Friday, May 29, 2015

Let Freedom Ring Fatbook Tile with Rebecca Baer®


Good Morning! Today I've created a fatbook page using Rebecca Baer™ Stencils. Fatbook pages are similar to ATCs in that they are little works of art that are traded among friends--they are 4×4" in size and sometimes they are bound into a book.

For this project I used the small Stars & Stripes stencil and the Seafarer Painted Digital Paper from her Rebecca's digital line. To begin I printed the darkest papers along with another print that I thought I would *play* with in the size that I was going to need 4×4" I did this by "formatting" my image to that size in my Publisher program. I could print out 4 squares easily on my standard  card stock. I used a color laser printer for my project so the ink does not become a muddy mess with the mixed media play, if you do not have a personal color laser printer, you can have your documents printed at an office supply store for a small fee.

Stars & Stripes Stencil - Product ImagePainted Digital Papers | Seafarer - Product Image


I trimmed out my papers to 4×4" and began with my stencil. Using the mini masking tapes I help my stencil into place while I added a thick pigment ink to the stencil to hold my copper embossing powder. While I used a brown ink, the color really will not matter as the embossing powder covered opaquely and none of the color showed through. I heat set the embossing powder.

RB Mini Masking Tape for Artists and Quilters - Product Image

Next I began layering on red paint around the edges. Using a wide brush in the RB Classique(TM) Angles set, I pulled my brush in towards the center of the fatbook tile. I used a wet wipe to remove some of the paint, especially on the embossed edges to give it a "antiqued" look. 
RB Classique(TM) Angles - Product Image

Next I took out my black detail pens and pastel pencils and went around the stars and curves of the stencil with white and black. I doodled around the edge of the tile and added white paint pen dots to the curves. 


I then replaced the stencil over the top of the tile and using my white paint pen went over the "strips" where the melted emboss powder was. I wiped away paint with my wet wipe again, leaving some of the lines and smearing the rest.  

To adhere the torn denim to the side I placed down a strip of double stick tape on the tile and then also on the back of my strip of denim. I was able to pleat the denim and have it hold in place. I added a little burlap bow and some bling to the tile to complete the embellishments.


I completed my tile by handwriting lyrics from patriotic songs and phrases of freedom and liberty that hold meaning with me along the stripes. 


I hope you enjoyed my little piece of art today! All supplies mentioned are available In Rebecca Baer's® store at the link below! Thank you for stopping by! Be sure to check out posts from my teammates each Tuesday and Thursday!


Twitter at @leslierahye | Facebook at leslierahye.| YouTube at leslierahye | Pinterest at leslierahye | Instagram at leslierahye
Thursday, May 28, 2015

Delightful Thursday | Spotlight Card

It's Delightful Thursday and the Digital Delights design team is sharing inspiration on the Digital Delights Blog today! 

Today I'm created a Spotlight Card with the precious Ferris Wheel Fun digital stamp from Digital Delights by Louby Lou! This stamp has SO many possibilities for dimension...One of my favorite tricks is to do a spotlight card...you highlight a spot on the card with color and leave the remaining card blank--this looks striking in Kraft as well but I'm trying not to over Kraft you! You can do your pop of color any shape you want...I like to use a square or a circle. Today I chose a 1" square from the image--the piggy is my favorite--and colored him. I matted him on a small piece of Payne's grey card stock and then popped him in the Ferris wheel where he belonged with a piece of foam tape!  Thank you for stopping by! I hope you enjoyed my card.


Ferris Wheel Fun
Ferris Wheel Fun
markers : Prismacolor  Pencils
Paper: Bazzill, Authentique
Accessories: Black PITT Pen, Baker's Twine, Foam Tape

Be sure to check out the rest of the team !

MAY SPECIALS
Twitter at @leslierahye | Facebook at leslierahye.| YouTube at leslierahye | Pinterest at leslierahye

Thursday, May 21, 2015

May Monthly Smeared Ink Blog Hop | Anything Goes


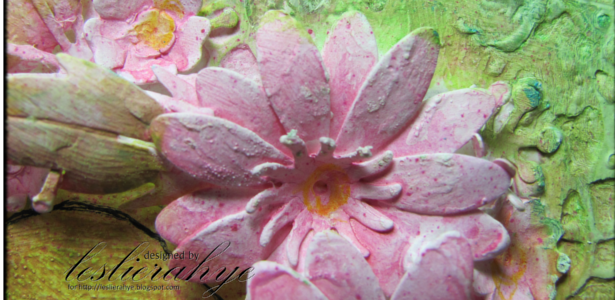
Good Morning Smeared and Smudged Family! Today I'm participating with the Smeared & Smudged members in ANYTHING GOES blog hop! In the states we are coming up on Memorial Day weekend. Several of our family members have served and we always think of them on this day of remembrance. This time of the year much of our landscape is abloom including the pathways along the railroad tracks...I like to think that the poppies I see blooming each year were among those sewn by returning soldiers passing along those tracks on their way back home. So today I share with you this Poppy ATC as mentally I prepare to remember those who've served so that we may live a life with freedoms.

Thank you for stopping by! I hope you enjoyed my project!
Be sure to hop to the rest of the Blog Hop Smeared Ink Family!

May Member Blog Hop
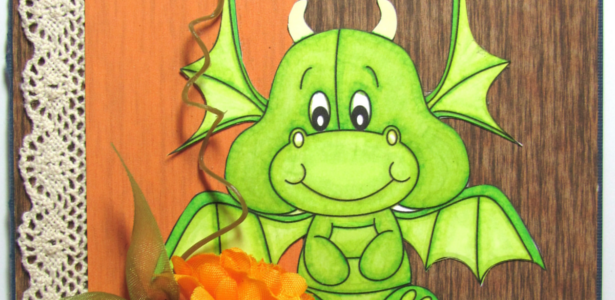
Black Dragon Nan | Teresa |  Leslie Rahye
Twitter at @leslierahye | Facebook at leslierahye.| YouTube at leslierahye | Pinterest at leslierahye

Delightful Thursday | CAS card

It's Delightful Thursday and the Digital Delights design team is sharing inspiration on the Digital Delights Blog today! 

Today I'm created a CAS card--Clean And Simple. I love this little Carousel Horse image and colored  her with Prismacolor pencils on Kraft! Today I tried a little different look by outlining my image with white...it gives it a little pop that I think I might like for some looks. I matted my card with Authentique papers and left it simple.It will make a great all-occasions or note card for that someone special in my life! Thank you for stopping by! I hope you enjoyed my card.


Horse Carousel
Horse Carousel
markers : Prismacolor  Pencils
Paper: Bazzill, Authentique
Accessories: Black PITT Pen

Be sure to check out the rest of the team !

MAY SPECIALS
Twitter at @leslierahye | Facebook at leslierahye.| YouTube at leslierahye | Pinterest at leslierahye

Thursday, May 14, 2015

Stencilled Fiber Art Necklace Pendants with Rebecca Baer™


Good Morning! Today I've created little fiber art necklaces and pin using Rebecca Baer­® stencils! I love handmade jewelry and am fascinated by the textures and mixed media feel of these little denim pendants. This is super easy and with one 6" square of fabric you could make a dozen or so pendants for sharing with your friends and family! I hope you enjoy my tutorial below!

Begin with a piece of fabric. I am using upcycled denim. I chose this beautiful Secret Garden stencil in the small for the above pendant. I also chose the lovely Enchanted Vine Stencil in small for a second project that I'm sharing below using the same technique.
Secret Garden Stencil - Product Image Enchanted Vine Stencil - Product Image

I applied Embossing Powder Adhesive to my fabric through the stencil so that it looks like it was stenciled with a darker shade of blue. Then I applied Embossing Powder and heat set it to melt the powder onto the jeans. 


I have not tested this for something that would need to be washed so I don't know if it would stand up to the wear and tear of that process. The results of the embossing powder on the denim is awesome though!


Above you see the result of a turquoise colored emboss powder on the denim...striking. However I wanted something with a bit more depth for the pendent today. For today's pendant, I decided to add one more element--I misted an opaque color mist first onto the denim.


Next I turned my stencil and proceeded with the embossing powder adhesive and the emboss powder...you can see the effect in the details of the pendant below.


I finished my pendant by fashioning a little hanger with some black annealed wire. I cut a strip of my stenciled fabric and attached it to the hanger with sewing. I then added a selection of charms to the front. Then I raveled the bottom of the pendant by cutting strips and removing the shorter fibers that remained. 


This little friendship pendant was completed in a similar manner...I cut little strips and attached it to the safety pin. I then attached a little bitty pin with beads to the front. 

All supplies mentioned are available at the link below! Thank you for stopping by! Be sure to check out posts from my teammates each Tuesday and Thursday!


Twitter at @leslierahye | Facebook at leslierahye.| YouTube at leslierahye | Pinterest at leslierahye | Instagram at leslierahye


Spring Refashions 2015 | Day 4


 This weekend my Fancy Fashionista and I spent the weekend looking through garage sale and goodwill finds to create a weeks worth of fashions for school to make it to the end of the school year. *Someone* hit a growth spurt and needed clothes NOW! I love that she likes to be creative and wanted to try making them. After this winter's 4-H Refashion Workshop she had declared that next year she would be making ALL of her school clothes. This short-term need gave us an opportunity to give it a try.
 

Today's fashion was started out as two shirts and a denim vest/dress. The best part is all three pieces were bought at an AWESOME garage sale for 50¢ each--so total materials $1.50! Fancy Pants likes a little color so of course this needed refashioning with COLOR. She chose the plaid shirt for the accents on the denim piece. The denim piece needed to be fitted to her body, The arm openings were tucked under and sewn to fit her shoulders better. Under the arms a generous dart was sewn to take it in to fit better around her arms and waist. The ties [from the plaid shirt] were attached to pull the back in for further fitting. Fancy loves that cotton rips and so the ruffle was constructed of ripped strips of the plaid fabric sewn together and then ruffled and attached to the bottom of the dress. They were left ragged on purpose! Originally the idea was to remove the collars from both and attached the plaid collar to the denim piece. The plaid collar was too little however so it was split and attached over the top of the denim collar. While Fancy slept I attached hot-fix rhinestones to the faux pockets and collar as a surprise, I think she loves it.
The little jacket was another shirt. It was sheer and had a gathered elastic bottom. We removed it and trimmed it to where it would come up to her waist. The front was split to make it a jacket and it was simply hemmed around the edge. While I did a bit more work on this one than she did, it was totally Fancy's idea and completely her style! We hope you enjoy!

Come back tomorrow for another refashioned spring outfit!


Twitter at @leslierahye | Facebook at leslierahye.| YouTube at leslierahye | Pinterest at leslierahye | Instagram at leslierahye

Wednesday, May 13, 2015

Delightful Thursday | Happy Graduation

It's Delightful Thursday and the Digital Delights design team is sharing inspiration on the Digital Delights Blog today! 

Today I'm created a graduation card with this delightful graduation owl from the Calendar Owls set. I love his big eyes! He was layered on matching cardstock and distressed on the edges. I added a bit of Frantage and a piece of string. Thank you for stopping by! I hope you enjoyed my card.


Calendar Owls
markers : Prismacolors
Paper: Bazzill, Authentique
Accessories: foam tap, emboss folders, trim
Be sure to check out the rest of the team !

MAY SPECIALS
Twitter at @leslierahye | Facebook at leslierahye.| YouTube at leslierahye | Pinterest at leslierahye

Spring Refashions 2015 | Day 3

**sorry for the delay on Day 3--technical difficulties with images made us late!**

This weekend my Fancy Fashionista and I spent the weekend looking through garage sale and goodwill finds to create a weeks worth of fashions for school to make it to the end of the school year. *Someone* hit a growth spurt and needed clothes NOW! I love that she likes to be creative and wanted to try making them. After this winter's 4-H Refashion Workshop she had declared that next year she would be making ALL of her school clothes. This short-term need gave us an opportunity to give it a try.


Today's fashion was super easy. It started as a VERY SHORT dress [the orange top] and a smocked elasticy sundress. For the top I removed about 8" and hemmed it. For the skirt, she wanted it long so we simply cut it down to this really cool trim [not seen in photo] and made an elastic casing to complete the skirt. 

Come back tomorrow for another refashioned spring outfit!


Twitter at @leslierahye | Facebook at leslierahye.| YouTube at leslierahye | Pinterest at leslierahye | Instagram at leslierahye
Tuesday, May 12, 2015

Spring Refashions 2015 | Day 2


This weekend my Fancy Fashionista and I spent the weekend looking through garage sale and goodwill finds to create a weeks worth of fashions for school to make it to the end of the school year. *Someone* hit a growth spurt and needed clothes NOW! I love that she likes to be creative and wanted to try making them. After this winter's 4-H Refashion Workshop she had declared that next year she would be making ALL of her school clothes. This short-term need gave us an opportunity to give it a try.


Today's fashion was a sundress made with the smocked gathering at the top and this cha-cha tank sweater. Nothing was done to the tank. Fancy loved it as is an actually sorted through 2 33 gallon bags to find the perfect compliment to it. The dress had that elasticy smocking at the top that holds the dress to your body. She LOVED this and wanted it to be a skirt that was higher in the front than the back. We used that for the waist of the dress and then brought the front up considerably. The front lays flat and is up around her knees and the back drapes down and falls mid to lower calf. To make it we just pinned it in place, measuring to insure a straight line across the front. In the back we gathered material so that it had a bit of fullness. Using her new Janome sewing machine [a Christmas present from Grammie and Papa] I helped her make a zig-zag around the whole skirt so that it would still stretch with the elastic. She paired it with some lace bottom leggings in her own wardrobe. I kinda think she likes it! lol!

Come back tomorrow for another refashioned spring outfit!

Twitter at @leslierahye | Facebook at leslierahye.| YouTube at leslierahye | Pinterest at leslierahye | Instagram at leslierahye
Monday, May 11, 2015

Spring Refashions 2015 | Day 1


This weekend my Fancy Fashionista and I spent the weekend looking through garage sale and goodwill finds to create a weeks worth of fashions for school to make it to the end of the school year. *Someone* hit a growth spurt and needed clothes NOW! I love that she likes to be creative and wanted to try making them. After this winter's 4-H Refashion Workshop she had declared that next year she would be making ALL of her school clothes. This short-term need gave us an opportunity to give it a try.

Today's fashion is a long-sleeved striped shirt and gauze maxi dress refashioned into palazzo pants and a sleeveless top. We began by removing the sleeves of the top and shortening the shirt. The maxi dress was cut into pants and an elastic casing was made from the remnants of the shirt. 

Come back tomorrow for another refashioned spring outfit!

Twitter at @leslierahye | Facebook at leslierahye.| YouTube at leslierahye | Pinterest at leslierahye | Instagram at leslierahye
Thursday, May 7, 2015

Delightful Thursday and New Release!

It's Delightful Thursday and the Digital Delights design team is sharing inspiration on the Digital Delights Blog today! 

Today I'm created this quick and easy card with the Cowardly George digi from Digital Delights new May release. George is so cute!. I colored him with PrismaColor pencils on Kraft cardstock! I just love the look and the white pencil is so striking against the Kraft background. I love George's little hands...it is perfect to have him "hold" things on your card. Here he's captured a star but that could easily be a bouquet of flowers for mom or a gift for someone special or a piece of cake! Love him! Thank you for stopping by! I hope you enjoyed my card.


Cowardly George
pencils : Prisma Colors
Paper: Bazzill
Accessories: foam tap, Cheery Lynn Designs Dies and woodies

Be sure to check out the rest of the team as they use this delightful New Release!

MAY SPECIALS
Twitter at @leslierahye | Facebook at leslierahye.| YouTube at leslierahye | Pinterest at leslierahye