Showing posts with label sewing. Show all posts

Thursday, May 14, 2015

Stencilled Fiber Art Necklace Pendants with Rebecca Baer™


Good Morning! Today I've created little fiber art necklaces and pin using Rebecca Baer­® stencils! I love handmade jewelry and am fascinated by the textures and mixed media feel of these little denim pendants. This is super easy and with one 6" square of fabric you could make a dozen or so pendants for sharing with your friends and family! I hope you enjoy my tutorial below!

Begin with a piece of fabric. I am using upcycled denim. I chose this beautiful Secret Garden stencil in the small for the above pendant. I also chose the lovely Enchanted Vine Stencil in small for a second project that I'm sharing below using the same technique.
Secret Garden Stencil - Product Image Enchanted Vine Stencil - Product Image

I applied Embossing Powder Adhesive to my fabric through the stencil so that it looks like it was stenciled with a darker shade of blue. Then I applied Embossing Powder and heat set it to melt the powder onto the jeans. 


I have not tested this for something that would need to be washed so I don't know if it would stand up to the wear and tear of that process. The results of the embossing powder on the denim is awesome though!


Above you see the result of a turquoise colored emboss powder on the denim...striking. However I wanted something with a bit more depth for the pendent today. For today's pendant, I decided to add one more element--I misted an opaque color mist first onto the denim.


Next I turned my stencil and proceeded with the embossing powder adhesive and the emboss powder...you can see the effect in the details of the pendant below.


I finished my pendant by fashioning a little hanger with some black annealed wire. I cut a strip of my stenciled fabric and attached it to the hanger with sewing. I then added a selection of charms to the front. Then I raveled the bottom of the pendant by cutting strips and removing the shorter fibers that remained. 


This little friendship pendant was completed in a similar manner...I cut little strips and attached it to the safety pin. I then attached a little bitty pin with beads to the front. 

All supplies mentioned are available at the link below! Thank you for stopping by! Be sure to check out posts from my teammates each Tuesday and Thursday!


Twitter at @leslierahye | Facebook at leslierahye.| YouTube at leslierahye | Pinterest at leslierahye | Instagram at leslierahye


Spring Refashions 2015 | Day 4


 This weekend my Fancy Fashionista and I spent the weekend looking through garage sale and goodwill finds to create a weeks worth of fashions for school to make it to the end of the school year. *Someone* hit a growth spurt and needed clothes NOW! I love that she likes to be creative and wanted to try making them. After this winter's 4-H Refashion Workshop she had declared that next year she would be making ALL of her school clothes. This short-term need gave us an opportunity to give it a try.
 

Today's fashion was started out as two shirts and a denim vest/dress. The best part is all three pieces were bought at an AWESOME garage sale for 50¢ each--so total materials $1.50! Fancy Pants likes a little color so of course this needed refashioning with COLOR. She chose the plaid shirt for the accents on the denim piece. The denim piece needed to be fitted to her body, The arm openings were tucked under and sewn to fit her shoulders better. Under the arms a generous dart was sewn to take it in to fit better around her arms and waist. The ties [from the plaid shirt] were attached to pull the back in for further fitting. Fancy loves that cotton rips and so the ruffle was constructed of ripped strips of the plaid fabric sewn together and then ruffled and attached to the bottom of the dress. They were left ragged on purpose! Originally the idea was to remove the collars from both and attached the plaid collar to the denim piece. The plaid collar was too little however so it was split and attached over the top of the denim collar. While Fancy slept I attached hot-fix rhinestones to the faux pockets and collar as a surprise, I think she loves it.
The little jacket was another shirt. It was sheer and had a gathered elastic bottom. We removed it and trimmed it to where it would come up to her waist. The front was split to make it a jacket and it was simply hemmed around the edge. While I did a bit more work on this one than she did, it was totally Fancy's idea and completely her style! We hope you enjoy!

Come back tomorrow for another refashioned spring outfit!


Twitter at @leslierahye | Facebook at leslierahye.| YouTube at leslierahye | Pinterest at leslierahye | Instagram at leslierahye

Wednesday, May 13, 2015

Spring Refashions 2015 | Day 3

**sorry for the delay on Day 3--technical difficulties with images made us late!**

This weekend my Fancy Fashionista and I spent the weekend looking through garage sale and goodwill finds to create a weeks worth of fashions for school to make it to the end of the school year. *Someone* hit a growth spurt and needed clothes NOW! I love that she likes to be creative and wanted to try making them. After this winter's 4-H Refashion Workshop she had declared that next year she would be making ALL of her school clothes. This short-term need gave us an opportunity to give it a try.


Today's fashion was super easy. It started as a VERY SHORT dress [the orange top] and a smocked elasticy sundress. For the top I removed about 8" and hemmed it. For the skirt, she wanted it long so we simply cut it down to this really cool trim [not seen in photo] and made an elastic casing to complete the skirt. 

Come back tomorrow for another refashioned spring outfit!


Twitter at @leslierahye | Facebook at leslierahye.| YouTube at leslierahye | Pinterest at leslierahye | Instagram at leslierahye

Tuesday, May 12, 2015

Spring Refashions 2015 | Day 2


This weekend my Fancy Fashionista and I spent the weekend looking through garage sale and goodwill finds to create a weeks worth of fashions for school to make it to the end of the school year. *Someone* hit a growth spurt and needed clothes NOW! I love that she likes to be creative and wanted to try making them. After this winter's 4-H Refashion Workshop she had declared that next year she would be making ALL of her school clothes. This short-term need gave us an opportunity to give it a try.


Today's fashion was a sundress made with the smocked gathering at the top and this cha-cha tank sweater. Nothing was done to the tank. Fancy loved it as is an actually sorted through 2 33 gallon bags to find the perfect compliment to it. The dress had that elasticy smocking at the top that holds the dress to your body. She LOVED this and wanted it to be a skirt that was higher in the front than the back. We used that for the waist of the dress and then brought the front up considerably. The front lays flat and is up around her knees and the back drapes down and falls mid to lower calf. To make it we just pinned it in place, measuring to insure a straight line across the front. In the back we gathered material so that it had a bit of fullness. Using her new Janome sewing machine [a Christmas present from Grammie and Papa] I helped her make a zig-zag around the whole skirt so that it would still stretch with the elastic. She paired it with some lace bottom leggings in her own wardrobe. I kinda think she likes it! lol!

Come back tomorrow for another refashioned spring outfit!

Twitter at @leslierahye | Facebook at leslierahye.| YouTube at leslierahye | Pinterest at leslierahye | Instagram at leslierahye

Monday, May 11, 2015

Spring Refashions 2015 | Day 1


This weekend my Fancy Fashionista and I spent the weekend looking through garage sale and goodwill finds to create a weeks worth of fashions for school to make it to the end of the school year. *Someone* hit a growth spurt and needed clothes NOW! I love that she likes to be creative and wanted to try making them. After this winter's 4-H Refashion Workshop she had declared that next year she would be making ALL of her school clothes. This short-term need gave us an opportunity to give it a try.

Today's fashion is a long-sleeved striped shirt and gauze maxi dress refashioned into palazzo pants and a sleeveless top. We began by removing the sleeves of the top and shortening the shirt. The maxi dress was cut into pants and an elastic casing was made from the remnants of the shirt. 

Come back tomorrow for another refashioned spring outfit!

Twitter at @leslierahye | Facebook at leslierahye.| YouTube at leslierahye | Pinterest at leslierahye | Instagram at leslierahye

Tuesday, April 22, 2014

leslierahye's 3rd Annual Earth Day Blog Hop

Welcome to my 3rd Annual Earth Day Blog Hop! This is one of my passions...upcycling! On a daily basis I am looking for ways to renew-reuse-recycle the materials I come into contact with. I am constantly rescuing toilet paper rolls from their landfill destiny, rinsing out bottles and jars, folding up packing materials for my box of supplies and reclaiming envelopes for mini altered journals.

Upcycled Denim Baskets
These fun baskets were created simply by removing the bottom of blue jeans, sewing up the bottom,and adding trim to the folded cuff. I will add a small can on the inside of each to allow me to place pens, brushes, pencils in them--the can will keep the tools from leaking on the denim and keep them looking pretty longer!


**********


Winter Libations Altered Bottle
featured in the Winter 2014 Altered Arts Magazine


A Selection of My Upcycled Faves
so far this year!


Please take a moment to stop at the rest of the hops of this short hop today. Next time, before you discard something ask yourself, can this be renewed? can I reuse it? can it be unpcycled? because....


Twitter at @leslierahye | Facebook at leslierahye.| YouTube at leslierahye | Pinterest at leslierahye

Wednesday, January 16, 2013

Weekly Challenge | Tag You're It!

 It's time for a new challenge with Digital Delights by Louby Loo! This week at Delightful Challenges our challenge is to Make or Add a tag to your project. This week I worked with a critter that Wendy says started this whole business--Ridley. He is hiding among the flowers on my tag. I colored him with the Distress Markers and added a background wash of blue with my Derwent Pencils. A bit of sewing, some ribbon, some glitter and Robin's Nest Dew Drops finished off the look. I hope you enjoy my project! Thank you for looking!


For this cards
Digital Stamps : Peek a Boo Valentine Ridley
Markers : Ranger Distress Markers & Derwent Inktense Pencils
Accessories Manila Tag, prisma glitter, red thread, ribbon and ink

In honor of this super cute release, this weeks challenge we would love to see 
Make/Add a Tag
You are not required to use a Digital Delights Image to join in on the fun
but if you do you can enter TWICE. 

To enter twice when using a Digital Delight image your 
1st entry use your card link
 2nd entry use your blog address and add 2nd entry after your name
**Please be sure to follow the challenge theme or it will be removed

We have a wonderful Sponsor this week

Tuesday, May 8, 2012

Sew Many Ways to say they're special


When looking for stamps for my next project to share with you from Viva Las Vegastamps! I spotted these fantastic vintage photo-image stamps. They are stunning. I could not stop at just one or two, I needed the entire plate! They are the perfect size for Artist Trading Cards [ATCs], and the sentiments on the plate lend themselves not only to artjournaling and cardmaking, but also to memory keeping. With Mother's Day just around the corner, I thought I would share a quick technique and a few cards that could be used for sending to Mom or a special woman in your life. Hop on over to the Viva Las Vegastamps! blog and check out my techniques!


Thank you for looking at my fun projects with these beautiful vintage photo-stamps.

Thursday, April 26, 2012

Challenge #18 | Pink, Orange & Yellow

if you are looking for my weekly challenge post for Delightful Challenges, click here.

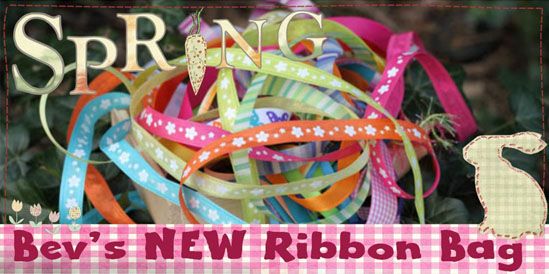
This term's challenge at Crafty Ribbons Challenge Blog is a color challenge--Pink, Orange & Yellow. I took this opportunity to use some of the yummy new ribbons that Ali and Tony sent us and do a little ribbon weaving to create a "fabric" to make into a amulet bag. The beaded fringe is also created with Crafty Ribbons beads! I love how it turned out! Great for tucking away little treasures and meditations...perfect for a mini album to journal secrets in--or just to keep up with your list of things to do! Thank you for looking!

For this bag you need:
Crafty Ribbons in a variety of colors/widths
Crafty Ribbons beads
Light Fusible interfacing
double stick tape to hold ribbons in place while weaving
sewing machine or needle and thread
glue to hold the beads into place

The prize this week:
spring bevs bag


Pink, Orange & Yellow
This challenge will run from 8.30am 26th Apr until 6pm 9th May ......

Wednesday, May 4, 2011

A Cinco de Mayo Ruffle

A letter came home today with Sam's backpack saying that she needed to wear a skirt to perform a dance for Cinco De Mayo. Sam really wanted a traditional Spanish Folk Dance outfit but her teacher and I convinced her that a shorter skirt with a ruffle perhaps would be perfect as she needed to be able to shuffle her feet for the dance.
I went to my stash of fabric from my mother-in-law's quilting days and found this beautiful colorful striped piece. We decided to add it to Sam's denim skort and make a new Cinco de Mayo ruffle skirt!
fabric and skirt before.


I cut strips of fabric about 4 inches wide and then attached them end to end to each other so I would have  a long enough strip to ruffle. Next I did 2 running stitches on about 10 stitches per inch to have strings to pull up to make a ruffle.

adding straight stitching to make a ruffle
 Once pulled, I placed the ruffle on the skirt, insured I had enough to have a full ruffle all the way around the edge and stitched it in place.

fabric gathered and ruffled
 After successfully stitching all the way around the skirt to add the ruffle, I folded over the bottom hem and stitched,
ruffle added to skirt and now being hemmed
I really love the look of the completed ruffle on the skirt! 
finished ruffle
My little amiga does too! She and I wish you a very happy Cinco de Mayo!
One happy amiga ready to dance with her amigos!
Gracias amigos!