Showing posts with label flowers. Show all posts

Thursday, April 9, 2015

The Season of Kindness Field Book


Lace Tile - Product Image
Omni Board Lace Tile
Good morning! Today I'm sharing my first official post with Rebecca Baer­® Inc. I have created a field book with the Omni Board Lace Tile. I love making little books and saw this tile and knew it would be covers of a book! A field book is something that you can take with you--you know, out in the field. I filled this one with blank pages and pocket pages using my Bind-it-all so that I could take notes, or doodle, or collect leaves and flowers. This is one of my favorite parts of the year and this will fit nicely in my backpack! The Omni Board comes in several shapes and sizes and is an awesome surface. It's lightweight, paintable, sandable, excellent for Mixed Media!

Painted Digital Papers | Cafe - Product Image
Painted Digital Papers | Cafe
I prepared my tile for covering with Rebecca Baer­® Painted Digital Papers by applying 2 thin layers of Gilded Stenciling Adhesive. I let them dry to clear both times and then layed the paper over the tile and secured with my brayer. I next cut around the tile with a craft knife and traced inside the lace pieces to get the paper out of the curvy pieces. This process can be tedious. I use little pieces of sand paper and dental tools to help remove excess glue and paper from the lace holes. I sand all edges of the tile and lightly sand over the "lacy" part. Next all edges are inked with brown distress ink.

Rebecca's Painted Digital Papers are gorgeous. I love this Cafe pack. The lighter papers are great to apply stenciling and stamping on top of and the darker colors are so rich and warm...just beautiful. I printed my papers to use for covering the Omni Board on regular weight bright white paper using an HP color laser printer. For the inside pocket pages I used a lightweight bright white card stock.
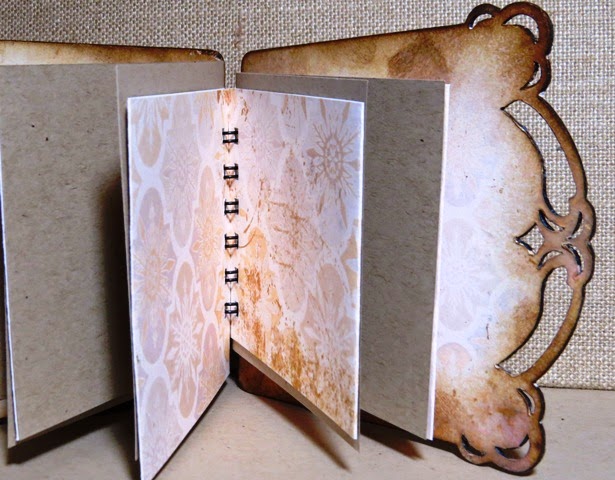

The Omni Board Lace tile comes with 2 pieces and some spacers. There is a square that can be popped up with the spacers on the front of the tile. I prepared the front with sanding and adhered light paper on top as above. 

This time I used the beautiful two-part daisy stencils. The two-part stencil provides you with a silhouette of your image and a detail line of your image. This is great for the doodler in me. I could use just the silhouette and create my own doodles or use the detail stencil for the perfect line or highlights to the flowers. Before stenciling the silhouettes, I position my flowers and the stamp I want to use to see how they will fit on the front tile. When I'm happy with the arrangement I secure my 1st stencil with the RB Mini Masking Tape--I LOVE this little adhesive! It's small, thin and not too sticky. You don't have to worry about it pulling up your paper when you remove it. YAY! 
Blooming Daisy Stencil | 
ST-502
Wild Daisy Stencil | ST-503

RB Mini Masking Tape
RB Artiste™ Stenciler 


With the RB Artiste™ Stenciler I applied acrylic paint to the silhouette. This is a beautiful brush.
Our brushes produce exceptionally crisp lines down to the finest detail. This is possible due to our unique feather-touch tips that are pure natural bristle. Our RB Artiste™ Stenciler has a short, contoured wood handle with a satin finish that offers a velvety feel.
I've used this brush with several applications now and find that its "feather-touch" is awesome with both ink and paint. I've used it for removing the delicate gilded bits when doing gilding with the adhesive. I need more of these in my life! It works perfectly with Rebecca Baer's detailed stencils. 


To complete my little book I added the sentiment stamp :Kindness is always in Season! I love these stamps. They are red rubber on foam cling and have beautiful crisp lines. You can use them with your acrylic blocks, or like I did on the video below use an acrylic ruler. I stamped the sentiment in brown which complimented my beautiful papers and stenciling perfectly.
Kindness In Season Stamp
The video below shows the preparation and assembly of the book and will be available as soon as it all uploads into the view! [I apologize--severe spring weather sometimes interferes with best laid plans]. I hope you enjoy my project! All supplies mentioned are available at the link below! Thank you for stopping by! Be sure to check out posts from my teammates each Tuesday and Thursday!

 shopping

Twitter at @leslierahye | Facebook at leslierahye.| YouTube at leslierahye | Pinterest at leslierahye

Tuesday, February 4, 2014

Love the Tiny Flowers!


 Happy Tuesday everyone! On the Cheery Lynn Blog today I am playing along with this week's challenge Add a Flourish! I have been creating a lot of projects lately with the Tiny Flower Kit and the Tiny Fanciful Flourishes! I love them! To create this filled letter look on any card is very easy.  I began by selecting a chunky font on my computer and printing out the letters for "love." With chalk I colored over the back of the letters to make it easy to transfer to my card stock. Next I positioned each letter and traced around them with a pencil, transferring the chalk from the back of my letters onto my card stock. I used a black marking pen to retrace my chalk lines and highlight the shape of the letters.
Next I glued down a flourish and stacked flowers starting with the largest and working my way to the itty bitty flowers in the Baby's Breath Flower Kit to fill in the tips. I added mini butterflies when I finished with the flowers!

Cheery Lynn Dies used

 Thank you for stopping by!!

*****
Remember there is still time to join the new challenge!!! Challenge #118 is Add a FlourishThere is a chance to win a $20 shopping spree at Cheery Lynn Designs. Thank you for stopping by today! 

Twitter at @leslierahye | Facebook at leslierahye.| YouTube at leslierahye | Pinterest at leslierahye

Tuesday, August 6, 2013

Bloom Obsession!!


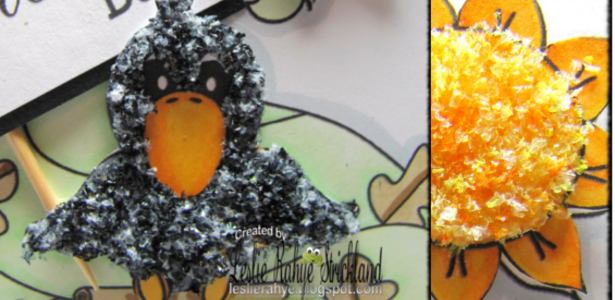
Friday night on my Crafty Gig  I shared with you these awesome dies that I've added to my tools from Cheery Lynn Designs.They have a whole set of Build a Flower dies that when used together create fantastic handmade flowers. While creating these flowers, I experimented with a process for making a flower fluff product for use with my flowers that I had seen on Pinterest. I have since added a micrograter to my tools and perfected the process for creating the flower fluff. I hope you enjoy the replay of my Friday night show--embedded below--along with the quick and easy tutorial on the Digital Delights Tutorial Blog where I show you how to make your own fluff!


Cheery Lynn Dies used


***Tuesday Tutorial with Digital Delights by Louby Loo***

Happy Tuesday Tutorial! Leslie-Rahye here to share a super easy method for creating a flower fluff product for use with your cards and paper crafting. I think it's perfect for use with Wendy's digital stamps for adding a textured dimension.

Check out the how-to video on our Tutorial Blog or here

I hope you enjoy my tutorial! Thank you for looking~

Sunday, July 28, 2013

Hot Time in the Summer Challenge at Cheery Lynn Blog

Happy Sunday everyone! I've had a crazy busy summer and am just now getting around to some fun tools that I've recently added to my collection that I found at the Scrapbook Convention this June. For months I've been watching several of my scrappy friends using these incredible super-thin dies from a company called Cheery Lynn Designs. I knew the convention would probably have them and I was THRILLED to find them!! The selection of dies is amazing, the price point perfect and the detail and design is awesome! 
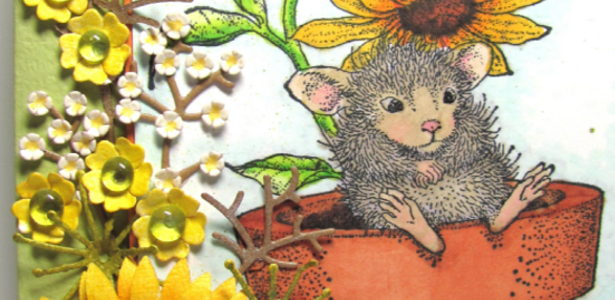
I am a big fan of flowers as you already know and Cheery Lynn has a how line of "Build a Flower" dies that make creating your own flowers super easy.  I used the Sunflower die and the Embellishments 3 die to create all the flower on my card below. I die cut all the flowers out as above in a cream and dark tan color of card stock. I then colored with markers and misted with sprays to achieve the colors on the flowers. I used my McGill stylus set to create dimension on the petals. Little Amanda, "The Thinker" seems to be getting some shade from the sunflower in the pot for the "Hot Time in the Summer" and Sunflowers definitely say "Hot Time" to us here in Texas!
I hope you enjoy my card!  Below is a link and rules in case you want to play along!

Supplies Used
Memento Tuxedo Black
House Mouse Amanda as "The Thinker"
Spectrum Noir [PP2, OR1, GB3, TN3, TN5, EB2, GB4, CG4, CG3, BT1, GG1, CG2, EB1, EB8, BG2]
Maya Road Mist Pearl
Clearsnap Smooch Spritz Sun Kissed & Limolicious
Bazzill Basics
Neena Card Stock
Artist Glitter Glue
Sakura Crystal Lacquer
Scrapbook Adhesives Mystix runner
Foam Tape
Robin's Nest Dew Drops 


Shop Cheery Lynn Designs
This week the challenge at Cheery Lynn Designs is
Hot Time In The Summer
Here are the rules:
  • You MUST follow the theme and use at least one Cheery Lynn Designs die, of course, we would love to see more than one. 
  • You MUST add a link to your blog post in the InLinkz at the end of this post; no back posting, only new projects are allowed
  • You MUST link to this challenge in your blog post or on your gallery post
  • You may only enter the challenge ONCE per week.
The winner will be chosen based on merit by Cheery Lynn Designs. They will receive $20 towards shopping at the Cheery Lynn website. The challenge will end on Saturday night at 18:00 Eastern time.

Wednesday, June 19, 2013

A farewell to Viva Las VegaStamps!

Hello everyone! Today is my last post with Viva Las VegaStamps! I've been with the team for two terms and wanted to take this opportunity to allow new blood to join the team and to explore some new projects for myself--there are only so many hours in the day! I love Viva Las VegaStamps! and will continue to enjoy their unique and varied brand of rubber! For my final project I wanted to create for you an ATC that not only followed my "one little word" personal journey this year, but also focused on one of my most favorite "blooms."
Dandelions have always been in my top 5 favorite flowers and this year I have found some MAMMOTH ones nearby. I took the opportunity to photograph them last month and got this fabulous shot of the seed head close up! That becomes one of the layers of my trading card.


For this project you will need
 Blowing Dandelion and Extra Seed by Susan M. Brown 2 x 3 1/2 and 3/4 x 3/4.
Make A Wish 3/4 x 2 1/4
Memento Ink
Brilliance Ink
rope trim/bakers twine
Specimen Bottle
Foam Tape
bling
photograph
fresh wishes

begin by procuring some fresh wishes.
Tie rope twin to neck of bottle.
trim out photograph for focal piece.
Stamp with dandelion stamp & Make a Wish
Edge the photograph
Add focal piece to an ATC sized cardboard
that has been stenciled. Attach with foam tape.
Poke holes through ATC to attach specimen
bottle full of wishes to ATC with Baker's Twine.
Dot your "i" with a piece of bling!
 Thank you Viva Las VegaStamps for this amazing journey!


Tuesday, March 5, 2013

leslierahye's crafty gig | fatbooks

Friday night we took on Fat Books where I created this fun fat book tile for my "one little word." I hope you enjoy the replay!


Friday, February 1, 2013

Bloom ATC with Altered Pages


I created my fun "Bloom ATC" using the Collage Backgrounds Oriental AP-1724, Gold German Scrap and original one-of-a-Kind Chinese paper scrap from AlteredPages.com. I printed my background collage on both tissue paper and cardstock to create faux washi tape layers on top of edged oriental backgrounds. The papers were edged with Black Paris Trunk Ink and layered on top of  a corrugated and painted ATC base. $1 store silk flowers were pulled apart and reassembled in to petite buds and upholstery remnants were rolled into beads for added embellishment. The year was punched from mini playing cards and a piece of tissue was attach with Crystal Lacquer to make it transparent. 
I hope you enjoy celebrating the upcoming Chinese New Year with my Bloom ATC!

Wednesday, January 30, 2013

Weekly Challenge | Red & White

It's time for a new challenge with Digital Delights by Louby Loo! This week at Delightful Challenges our challenge is a Red & White project. This week I created a gate fold Valentine card with Barnaby and Beatrice Bee from the January Release. They are so cute! I just love these sweet bees! I hope you enjoy my project! Thank you for looking!

For this card

Digital Stamps : Beatrice, Barnaby, Love me Accessories & Love is in the Air Sentiments
Digital Papers Love me Digital Paper Set
Markers : BIC Mark Its
Accessories Ribbon, silk flowers, buttons, glitter, Sakura Crystal Lacquer

In honor of this super cute release, this weeks challenge we would love to see 
Red & White
You are not required to use a Digital Delights Image to join in on the fun
but if you do you can enter TWICE. 

To enter twice when using a Digital Delight image your 
1st entry use your card link
 2nd entry use your blog address and add 2nd entry after your name
**Please be sure to follow the challenge theme or it will be removed

We have a wonderful Sponsor this week

This week's prize

Monday, September 24, 2012

VLVS! All Hallow's Eve Party | Day 2


Happy Monday and welcome to Day two of the Viva Las Vegastamps! week long celebration of Halloween. Viva Las Vegastamps has tons of Halloween related stamps including some amazing new plates of stamps--which I'm working with here. During this week there will be fun games to play, some voting to do and some prizes to be won. Hop on over to the Viva Las Vegastamps Blog to learn about all the details. There is a link up below to keep you on track of all the great designers in the hop! Be sure to check daily!
Today I am sharing with you an art canvas that I started a few weeks ago after being inspired by my crafty friend Cheryl Boglioli. I created the base in a manner similar to how Cheryl did. I completed my canvas by stamping a scene with my Viva Las Vegastamps! I embellished with flowers that I created with Bitty Blossoms dies and stamped with my favorite Grunge 1787 stamp! I LOVE the look of my handmade flowers on my art canvas! I can't wait to start another one!! 

 For this project:
assorted distress inks
black ink [ranger archival]
Bitty Blossoms & assorted Sizzix swirl dies
canvas, paint, fibers & mists
German Scrap & Beacon Adhesives

Thank You for stopping by~

Saturday, June 16, 2012

Chunky Coaster Mini

Tuesday, May 22, 2012

A Dog of a Different Color with Viva Las Vegastamps!


Recently I've had need for some cards for my friends with pets. Viva Las Vegastamps! has over 2500 animal stamps--many breeds of dogs and cats are represented--including some amazing sayings to go with them. I bring these two fun whimsical cards to you--I hope they bring you a smile!
Hop on over to the Viva Las Vegastamps! blog and check out my techniques!
Thanks for looking!

Sunday, April 8, 2012

Easy Cone Basket with Tissue Paper Flowers!!

Today on the Sakura Hobby Crafts Blog I share several techniques using Terri Sproul's Mixers to make this fun Spring cone basket with tissue paper flowers! Hop on over and check out a fun and easy way to use these grear mica powders! Thank you for stopping by!

Wednesday, March 7, 2012

Weekly Challenge | St. Patrick's Day Projects

It's time for a new challenge with Digital Delights by Louby Loo! This week at Delightful Challenges we are making St. Patrick's Day Projects --one of my favorite crafty holidays!! For this challenge I chose to combine two images using GIMP. I printed my completed image out on watercolor paper and painted the image with Sakura 3D Crystal Lacquer and Terri Sproul's Mixers (more on that in another post). I chose some of the yummy new Spring has Sprung Paper Pack for my background papers which match awesomely with last Spring's release of St. Patrick's Day Paper Pack. I hope you enjoy my card!
Happy St. Patrick's Day with Larry!

for this card you will need:
Card Stock: Bazzill Basics
Ink: SU River Rock
Accessories: Ribbon, silk flowers & premade butterfly, Watercolor Paper, Sakura Hobby Crafts 3D Crystal Lacquer and Terri Sproul's Mixers (Gold Shimmer, Gold Dust, Citrine Pearl, Tanzanite Pearl, Shimmer Red, Bronze) and Enhancer. 
Closeup: The Images were combined in GIMP and then
colored completely with  Mixers and Lacquer...Some mixers
were combined to make certain colors. Come back to my blog
next week for a tutorial on color theory with the Mixers!
Color swatch for my project notebook--whenever I experiment
with mixing colors of things, I always make a few notes so that
I can at a future date replicate a color or texture or such...
 This weeks challenge we would love to see you

St. Patrick's Day Projects

You are not required to use a Digital Delights Image to join in on the fun
but if you do you can enter TWICE. To enter twice you when using a Digital Delight image your  1st entry use your card link.  2nd entry use your blog address and add 2nd entry after your name

We have a wonderful NEW Sponsor this week


Scrapyland is offering a $20 Store Certificate
Thank you for stopping by!


Wednesday, October 26, 2011

Crafty Ribbons Challenge #5 | B I N G O


It's time again for the Crafty Ribbons Challenge!!  This week the Challenge Blog is having a challenge with a twist--it's new to me but I see that several companies are doing this. It's called BINGO. Go to the challenge blog and select the categories you are going to use to create your card! I chose 3 down--handmade embellies, ribbon and gems [aka BLING]. I also chose to use flowers, one other square on our bingo card--since we're teaming up with Mulberry Flowers as a sponsor! I hope you like my card!

The challenge this week is:
BINGO


For my handmade embellies, I made deco squares with bling and rub-ons and I made Ribbon Corners using yummy grosgrain Crafty Ribbons ribbon! I love these non-traditional colors of winter. 

Thank you for stopping by! I hope you like my project! All the details for joining the challenge are on the Crafty Ribbons Challenge blog. To see other awesome projects from the Crafty Ribbons Challenge Team hop over to the blogs below.

Saturday, October 15, 2011

Amazing Mold Putty DT | Breast Cancer Awareness Resin Pin

Hi! My name is Leslie-Rahye and I'm a new member on the Amazing Mold Putty Design Team! I am so honored to be among such talented artists and to be working with such a fun and exciting product! There are literally endless possibilities with this product line and I can wait to share more ideas with you soon!
The inception of this project came a few weeks ago while talking with my Best Friend Holly over what I could cast with the putty...we had named off a number of items and were just becoming silly. Finally the thought popped into the conversation to cast a dolls torso and make a pin. Since October is breast cancer awareness month, it only seemed reasonable to make the pin's theme be that. So I present to you...the Breast Cancer Awareness Resin Pin.

For this project you will need:
Fashion Doll Torso
acrylic paint
ribbon and pearls
chipboard
flowers
Take out equal amounts of the yellow and white putty. [note: Initially when taking photos I was going to do a full torso cast...however I soon realized that a full torso resin pin would be TOO heavy!] You mix the two colors of putty until you have an even color--no streaks of white showing. Gently roll the putty over the torso to insure the details are captured in the putty.
The putty will set up quickly providing you with a sturdy flexible mold for casting. I chose to cast my pin in resin because it sets up very quickly and it takes acrylic paint beautifully.

I poured the resin components together into a paper cup and quickly stirred with a craft stick until it is a clear liquid. I then poured into the mold. It's fun to watch this next process because all of a sudden the resin starts bursting into white! In about 3-10 minutes your resin is ready to un-mold.


As my project is for Breast Cancer Awareness, I chose to paint my torso in shades of pink...I painted my chipboard base and chipboard vines pink as well, accenting with dots! To assemble my pin, I used red tape and Beacon 3-in-1 glue. I dry-brushed hot-pink on the tips of the paper flowers, added a velvet pink ribbon and hot-pink pearls for accent. A pin-back was added to make the piece able to be worn. Thank you for looking! I hope you enjoyed my project!