Wednesday, November 30, 2011

Weekly Challenge | New Release & Let it Snow!!

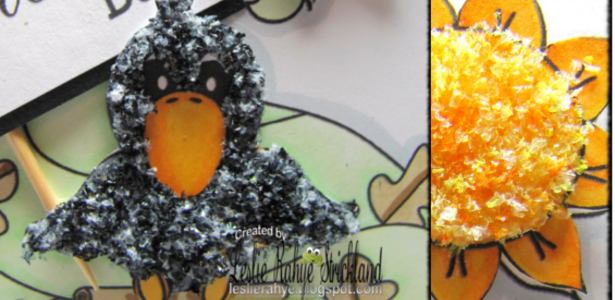
This week Wendy has released some totally cute wintery digital stamps at Digital Delights by LoubyLoo which are perfect for the Let it Snow Challenge at Delightful Challenges! I hope you enjoy my door plaque!


 Ingredients:
Digital Stamps : Flurry the Snowman Winter background & Snow Sentiments
Paper: Bazzill Basics & Snowflakes Digital Paper Set
Markers: BIC MarkIts
Accessories: Crafty Ribbons Ribbon, Sakura 3D Crystal Lacquer, Stampin Up Ink Pacific Blue


Thank you for looking!
You are not required to use a Digital Delights Image to join in on the fun, but if you do you can enter TWICE. To enter twice you when using a Digital Delights image you:
1st entry use your card link, 2nd entry use your blog address and add 2nd entry after your nameWe have a wonderful Sponsor this week

Simon Says Stamp is offering a $20 certificate to there store

Tuesday, November 29, 2011

Coming SOON!!!

COMING DECEMBER 1st 
Join my teammates as they celebrate the 12 days of Christmas with Viva Las VegaStamps! You can win an amazing plate of stamps!!

Monday, November 28, 2011

Stained Glass ATCs with Sakura Hobby Crafts

Hop on over to the Sakura Hobby Crafts Blog and check out how I made these awesome stained glass ATCs!! They're super easy with the Starkraft Enterprises foil outline stickers!!


Thank you for looking!!

Thursday, November 24, 2011

Festive Friday #22 | The Last Card


Welcome to Festive Friday #22!!! The last one! Wow this has flown by! On this the day after Thanksgiving, I want to say I'm thankful for meeting Terri Sproul and becoming involved with her enterprises! Through this blog hop I have many creative opportunities and have gained many new cyber friends in the papercraft world! For that I am truly appreciative!
The Festive Friday Blog Hop is hosted by Terri Sproul. This bi-monthly blog hop features Holiday cards from many talented card crafters as we get our Christmas cards ready early this year.
If you reached this stop from Becky's blog BC Designs , then you are in the right spot! If you would like to start from the beginning, you can return to Terri's blog


For this card I made 3-dimensional ornaments with my filigree flower punch. I zentangled the sentiment Joy and added bling to the ornaments for that extra sparkle! :)

Thank you so much for stopping by!! I hope you enjoyed my card! Now back to our regularly scheduled hop! The next stop on the hop is Laura Fisher's blog. If you get lost on the way, the entire list is below!

Crafty Ribbons Challenge #7 | Tags!


It's time again for a Crafty Ribbons Challenge. For this challenge we are doing TAGS! At Crafty Ribbons they have this amazing printed grosgrain that is a generous 2½" wide! It's printed with trees and presents and makes a perfect gift tag to be added to any present!

To create my tag, I attached the ribbon to a Kraft tag and tangled borders on the top and bottom of the front. I then created a To/From tangle and made a border with dots and a matching grosgrain ribbon that measures 5/8". I completed my tag by adding a 1/8" green grosgrain to attach my tag to the present!


 Thank you for looking! I hope you enjoyed my projects! If you would like to join our challenge, hop on over to the Crafty Ribbons Challenge Blog. This weeks challenge is:

TAGS


This challenge will run from 8.30am 24th Nov until 6pm 7th Dec 2011
  

Wednesday, November 23, 2011

Weekly Challenge | Red & Green

Delightful Challenges is having a color challenge this week!
 G R E E N &R E D
 For this card I chose to use the Candy Cane Lane Paper set which is AWESOME! The Candy Stripes Paper is perfect for this challenge with its green and red stripes! I hope you enjoy my card!


ingredients:
Digital Stamps : Standing Santa, Baby It's Cold Outside Sentiment, Window Background set
Paper: Bazzill Basics & Candy Cane Lane Digital Paper Set
Accessories: Crafty Ribbons Ribbon, Sakura 3D Crystal Lacquer, Sakura Glitter Pen, foam squares


Thank you for looking!
You are not required to use a Digital Delights Image to join in on the fun, but if you do you can enter TWICE. To enter twice you when using a Digital Delight image you:
1st entry use your card link, 2nd entry use your blog address and add 2nd entry after your name
This week we have a wonderful Sponsor this week

Friday, November 18, 2011

Gill's My Favorite Things Blog Hop


Welcome to Gill's My Favourite Things Blog Hop! You should have hopped here from Lisa G's Blog. If you just happened upon our blog hop you can start from the top of the hop with our hostess Gill at her blog Creations by Gill. When Gill mentioned doing this blog hop, SO MANY ideas came to mind...something with ribbon, something with bling, perhaps some ornaments--my favorite things! 
As I am in full holiday prep mode at this point of the year, my favorite things revolved around the holidays...making things to decorate my home. So for your viewing pleasure I'd like to share with you a couple of my favorite things for the upcoming Holiday season crafted using my favorite crafty thing--recycled materials and GLITTER!! I hope you enjoy!

Zentangled Owl Ornament from an upcycled toilet paper roll 

This little owl ornament is super easy to make out of toilet paper roll tubes. I also enjoy the art of zentangling very much and thought it added a nice touch to this little guy! Below is one of the most versatile products I've seen to date. Not only can magazines and travel brochures be recycled into beads and tubes and baskets and place mats, but they can be folded into some amazing holiday decor. This holiday I have an image stuck in my head of little trees all over my house. I really like how these turned out with the folded pages left natural and the edges dusted with green glitter!!
Upcycled Magazine Trees


Thank you for stopping by! I hope you enjoyed my projects! Your next stop on the hop is Debs Blog.


Wednesday, November 16, 2011

Weekly Challenge | BINGO!

Delightful Challenges is trying a new challenge this week with the B-I-N-G-O card. It's a very easy challenge, you just pick 3 elements to make your project--across, up and down, or diagonal. For my card I chose to use the Christmas Bongo 3D Decoupage page which is pre-colored and sectioned for easy trimming and piecing. You simply cut around the elements and stack them in the order they are numbered adding foam adhesive between each layer. I hope you enjoy my card!
ingredients:
Paper: Basic Grey
Accessories: Crafty Ribbons Ribbon, Alumilite Pearlescent Powder,
Sakura 3D Crystal Lacquer, Quickie Glue Pen, foam squares

Thank you for looking!
You are not required to use a Digital Delights Image to join in on the fun, but if you do you can enter TWICE. To enter twice you when using a Digital Delight image you:
1st entry use your card link, 2nd entry use your blog address and add 2nd entry after your name
This week we have a wonderful Sponsor this week

Tuesday, November 15, 2011

Resin Rings from Wooden Things!


I am so excited to share my project with you today!!! I love making my own jewelry and have recently been inspired to try some ideas with the Amazing Mold Putty and Amazing Casting Resin!! When my boss, who recently returned from a trip to Dublin Ireland brought me some wooden stamps inspired from the Chester Beatty Library's collection of Illuminated Manuscripts, I knew exactly where I wanted to take these nifty souveniers!!!
For this project you will need:
a DEEPLY cut stamp/item that will allow you to make a flat mold at least 1/8" deeop
Allumilite Pearlescent Powder
base to curve ring on
Alcohol Inks, Acrylics other colorants
wire and beads

Apply Allumilite Powder to wooden stamp to
encourage it to release from Mold Putty.
Mix part A with equal part B to create Mold Putty.
Press stamp(s) into Mold Putty and let set for 3 minutes.

Released stamps will have a shimmer from the glitter. You can either wipe that out
for the normal finish, or leave it in for a Pearlescent finish. 


 Mix equal parts Amazing Casting Resin per instructions on the package.
Pour into molds.

 And wait...the clear liquid will start to cloud and all of a sudden it will
take on the opaque hardened consistency seen below.

Once the resin is set to where it will "click" when tapped and will somewhat
easily allow itself to be removed from the mold but still warm, unmold and
begin to shape the resin piece to curve. I used the side of my mold putty
canister to begin the shaping.


It is easier to punch a hole in the resin before it is completely hardened.
I used a Japanese screw punch to make a hole for wire.


 I completed the shaping of the resin on my own finger since I was making these rings for myself.

Curved rings from wooden stamps! What fun!!!

It's simple to color the resin with Alcohol Inks--here I've used Bottle.

Copper Mixatives adds a beautiful contrast to the copper.

The flower was painted with both acrylic and alcohol inks.
To fashion the cast resin into a ring, I strung sterling wire
the holes and wrapped the wire to make a ring to fit my
finger. For the flower ring, which only had 1 set of  holes,
I added beads to the wire to make the ring part more
substantial and comfortable.

Thank you for looking! I hope you enjoyed my projects!

Sunday, November 13, 2011

Wintery Charms @ the Sakura Blog!

Go check out how I made the charms for this fun wintery fiber necklace on the Sakura Hobby Crafts blog! I used a fabulous background stamp from VivaLasVegaStamps! I hope you enjoy my project! Thank you for stopping by! Be sure to check out all the wonderful talent at the Sakura Blog!!!


Thursday, November 10, 2011

Festive Friday #21 | Speckled Snow with AJs Digi Shoppe Digis

Welcome to Festive Friday #21!!! ONLY 1 MORE after today! The Festive Friday Blog Hop is hosted by Terri Sproul. This bi-monthly blog hop features Holiday cards from many talented card crafters as we get our Christmas cards ready early this year.
If you reached this stop from Becky's blog BC Designs , then you are in the right spot! If you would like to start from the beginning, you can return to Terri's blog


This card is made with a FREE Digi Stamp available through AJs Digi Shoppe--Amanda, the owner, is also a Festive Friday hopper! I cropped the free digi so I could make individual "stamps" to randomly place in a publisher file. Once I was happy with my placement, I printed out my snowflake paper on vellum. I then took a variety of wintry colored BIC Mark-Its and began stippling around the snowflakes on the back side of the vellum until I like the feel of it. I then flipped my snowflakes back over to gloss the front with Sakura Hobby Crafts 3D Crystal Lacquer. I love how the vellum came out. To finish off my card I attached the vellum to a piece of Kraft Card stock with white eyelets and added a fun printed grosgrain.

Thank you so much for stopping by!! I hope you enjoyed my card! Now back to our regularly scheduled hop! The next stop on the hop is Laura Fisher's blog. If you get lost on the way, the entire list is below!

Crafty Ribbons #6 | Anything but a card


It's time again for a Crafty Ribbons Challenge. For this challenge we are doing ANYTHING BUT A CARD and I thought it would be the PERFECT time to play with the Crafty Ribbons buttons boxes. At Crafty Ribbons the yummy buttons come with a flat white matchbox-style sliding box. This box however is so much more fun. It measures 4"×2"×1½". 

Besides being a great box for my buttons, I thought it would also make a fun "gift" box. I stacked 3 of these boxes together and covered with my favorite Bazzill Kraft Card Stock. I chose the fun Advent colors for my ribbons with the beautiful purple embossed velvet and the fun pink imprinted grosgrain. I also love the sheer silver wired ribbon and thought it would provide for a shiny accent to my big puffy bow. I decorated the "gift box" to look like a wrapped package, extending the Kraft card stock to the "drawers" of my box and to the lining of the "drawers." For a final touch I added a punched tag with a piece of 1/8" grosgrain. This would be perfect for a series of presents that go together--jewelry perhaps, beautiful hair accessories, doll items...The sky is the limit!


With the box that my buttons came with, I decided to cover the box with a piece of denim, edge the edges of the box with some gingham ribbon so that the denim wouldn't fray and then add ribbon accents to the "pull" and sides of the box. I added Crafty Ribbons buttons to further embellish my little button box! I love the primary colors in this set of buttons and wanted the box to reflect what would be contained inside!

 Thank you for looking! I hope you enjoyed my projects! If you would like to join our challenge, hop on over to the Crafty Ribbons Challenge Blog. This weeks challenge is:

ANYTHING BUT A CARD

This challenge will run from 8.30am 10th Nov until 6pm 23th Nov 2011