
Showing posts with label Beads. Show all posts
Showing posts with label Beads. Show all posts
Thursday, September 17, 2015
Wednesday, June 24, 2015
International Fairy Day Blog Hop!
Happy International Fairy Day Everyone! Welcome to my annual Blog Hop celebrating this fantastic occasion! This blog hop is dedicated to all things Fairy! I am often asked where did International Fairy Day began? This quote from FaeNation sums it up:
"The most important day in the calendar, June 24th – this day is the second ever International Fairy Day. Founded by artist Jessica Galbreth, Fairy Day is a holiday for believers, collectors and the young at heart to celebrate all that is Fae and reconnect with their imagination and child-like wonder. It is the perfect day to glamour bomb, make a fairy altar, take a walk in unspoilt countryside or even just reread your favourite fairy books. See the Fairy Day website for more ideas."
I have collected some of my favorite bloggers and crafters to join me in this fun celebration! I hope you enjoy the projects we've done. Below you will find a list of bloggers..be sure to hop from project to project--keep my screen open as there may be one or two without the list on their blog.

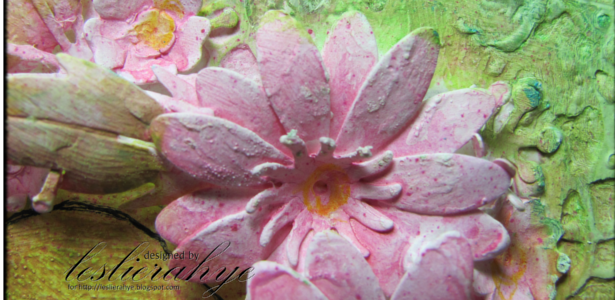
Today I'm creating with some of my new and favorite toys and sharing a quote from the fairytale man himself Hans Christian Anderson : "Just living isn't enough," said the butterfly fairy, "one must have sunshine, freedom and a little flower." After the month of rain and floods and storms that we've had this just seemed appropriate! We all need a little sunshine, freedom as we approach our celebration of independence here in the states and a "little flower!" While my word of the year is sparkle, I will forever be marked by the word bloom and all that it means. I hope you enjoy my project. I created a little plaque for my work area. I started with a spritz of water and some Ken Oliver Crafts Color Burst in Pthalo Green on Mixed Media paper! This is an AMAZING little product and I can't wait to get the new colors in July! That one little bottle has all of those colors in its little bottle...just a touch of powder, a little more misting and a little patting and voila! an amazing background! I stamped a little field of daisies in the corner. I printed the Hans Christian Anderson quote and stamped a light music background over it. The pages were trimmed and mounted on some black and shiny sequins and beads were added for a bit of sparkle! Love it! I hope you do too!

Now hop along and see what my amazing crafty friends have shared!

Twitter at @leslierahye | Facebook at leslierahye.| YouTube at leslierahye | Pinterest at leslierahye | Instagram at leslierahye
Thursday, May 14, 2015
Stencilled Fiber Art Necklace Pendants with Rebecca Baer™
.jpg)
Good Morning! Today I've created little fiber art necklaces and pin using Rebecca Baer® stencils! I love handmade jewelry and am fascinated by the textures and mixed media feel of these little denim pendants. This is super easy and with one 6" square of fabric you could make a dozen or so pendants for sharing with your friends and family! I hope you enjoy my tutorial below!

Begin with a piece of fabric. I am using upcycled denim. I chose this beautiful Secret Garden stencil in the small for the above pendant. I also chose the lovely Enchanted Vine Stencil in small for a second project that I'm sharing below using the same technique.


I applied Embossing Powder Adhesive to my fabric through the stencil so that it looks like it was stenciled with a darker shade of blue. Then I applied Embossing Powder and heat set it to melt the powder onto the jeans.

I have not tested this for something that would need to be washed so I don't know if it would stand up to the wear and tear of that process. The results of the embossing powder on the denim is awesome though!

Above you see the result of a turquoise colored emboss powder on the denim...striking. However I wanted something with a bit more depth for the pendent today. For today's pendant, I decided to add one more element--I misted an opaque color mist first onto the denim.


Next I turned my stencil and proceeded with the embossing powder adhesive and the emboss powder...you can see the effect in the details of the pendant below.

I finished my pendant by fashioning a little hanger with some black annealed wire. I cut a strip of my stenciled fabric and attached it to the hanger with sewing. I then added a selection of charms to the front. Then I raveled the bottom of the pendant by cutting strips and removing the shorter fibers that remained.

This little friendship pendant was completed in a similar manner...I cut little strips and attached it to the safety pin. I then attached a little bitty pin with beads to the front.

Twitter at @leslierahye | Facebook at leslierahye.| YouTube at leslierahye | Pinterest at leslierahye | Instagram at leslierahye
Tuesday, February 10, 2015
love tag

Happy Tuesday everyone! Today on the Cheery Lynn Blog I am sharing a Valentine tag using the new borders die along with the Lords and Commons doily and the Lattice Heart and Vines. The base is created by die cutting the edge of the die with the Scandinavian border die and adding a bit of the Lords and Commons Doily as a topper to the tag. The lattice dies was cut and hand painted gold on the heart and green on the vines. Daisies were die cut from a book print paper and inked and painted with pink and gold. a bead was added to the center to complete the flower.

The key, lock and "love" were die cut with a neutral card stock and then hand-colored gold with creams. The "love" was added to the bottom of the tag and the key and lock tucked into the flowers.

Thank you for stopping by! I hope you enjoyed my project!
Twitter at @leslierahye | Facebook at leslierahye.| YouTube at leslierahye | Pinterest at leslierahye
Tuesday, December 2, 2014
Winter Greetings

Happy Tuesday everyone! On the Cheery Lynn Blog today I share a seasonal holiday card using some of my favorite elements! Even though I live in a VERY WARM state, snowflakes are one of my favorite design elements for winter. For this card I used the Snowflake Wonder Doily along with Snowflowers sets and the Snowflakes plate. The elegant Fancy Deer paired with some shiny florals and bling. Below is a brief tutorial with all the tips.

Begin by cutting the Snowflake Wonder Doily without the center die out of Kraft and mist with an opaque white mist. I masked the center of the doily with a square.

Once I was happy with the look of the outer of the doily, I misted lightly from high so that it looked like a light misting of snow.

I then returned my mask to the doily to mist with a blue-hued mica mist. I heat set this mist to hold the colors in place.

I placed a red square behind the doily to coordinate with the red flowers that will be placed on the card and to help the doily to pop off the card. I then layered on snowflakes and a Fancy Deer with antlers--to add extra sparkle the white pieces were misted with a Pearl white mist. This focal square was place on the top two-thirds of the card.

I then began layering my florals on top of the mini flourish band. I built the flowers and added beads to the centers with a clear lacquer. The petals of the leaves and flowers were also painted with the lacquer to add shine [see last photo for the full effect]

Bling was added to several snowflake centers to add more sparkle.

Cheery Lynn Dies used
Snowflake Wonder Doily (Set of 2)
Holly Leaves - B183
Snowflowers Set One - DL225
Snowflowers Set Two - DL226
Snowflakes - C146
Wreath Strip - B216
Pine Branches - B146
Fancy Deer - B485
Mini Flourish Band - B176
Poinsettia Strip - B324
Thank you for stopping by! I hope you enjoyed my project!
Holly Leaves - B183
Snowflowers Set One - DL225
Snowflowers Set Two - DL226
Snowflakes - C146
Wreath Strip - B216
Pine Branches - B146
Fancy Deer - B485
Mini Flourish Band - B176
Poinsettia Strip - B324

[note the shiny flowers and leaves]
*****

Twitter at @leslierahye | Facebook at leslierahye.| YouTube at leslierahye | Pinterest at leslierahye
Thursday, October 23, 2014
Weekly Challenge | 3's NOT a Crowd
If you are looking for my 31 Days of Halloween Post it is here .
It's time for a new challenge with Digital Delights by Louby Loo! This week at Delightful Challenges our challenge is 3's NOT a Crowd--use 3 embellishments. My card us riddled with 3s...can you find them all?? 3 pieces of paper, 3 2ndary colors [besides black,white,brown, and gold], 3 colors of beads, 3 types of embellishments [bling, ribbon, beads]. Love this image and sharing her with you for 3's NOT a crowd! I hope you enjoy my card! Thank you for stopping by!


Card stock : Neenah
Pattern Paper : Core'dinations, Echo Park
Colors : Prismacolor Pencils
Accessories : art glitter glue, bling and beads, ribbon
*****
*****
Our Theme for this week is:
3's NOT a Crowd
(use 3 embellishments--brads, flowers, pearls, gems)
Be sure to read the challenge rules below
We were being sponsored by our own


Now it's Your Turn!
You are not required to use a Digital Delights
Image to join in the fun
but if you do, you can enter THAT project TWICE.
To enter twice when using a Digital Delight image,
for your 1st entry use your card link.
For your 2nd entry use your blog address
and add "2nd entry" after your name
Otherwise, only ONE entry person
**Please be sure to follow the challenge theme and rules or it will be removed.
Twitter at @leslierahye | Facebook at leslierahye.| YouTube at leslierahye | Pinterest at leslierahye
Monday, July 14, 2014
Beaded Wedding Pendant

Happy Monday everyone! Today on the Globecraft and Piccolo Blog I share another jewelry project today! I printed a vintage wedding image to fit the 1½×2½" Bezel and trimmed it out. I glued the image on to the bezel, trimming closely to the edges and sanding with a file. Once dry I added black ink around the edges of the bezel. Next I adhered a vintage bead mix to the edges, randomly picking the various sizes and styles of beads For an additional accent I placed three along side the couple. Once this is completely dry, I layered on Ultra Thick Clear emboss enamel [UTEE] adhering with Enamel Powder Adhesive. I added multiple layers until the clear molten liquid was up to the level of the shortest beads. I finished the piece by hanging it from a silver ball chain.

Twitter at @leslierahye | Facebook at leslierahye.| YouTube at leslierahye | Pinterest at leslierahye
Wednesday, June 11, 2014
Weekly Challenge | Tickled Pink
It's time for a new challenge with Digital Delights by Louby Loo! This week at Delightful Challenges our challenge is Tickled Pink. I pinked up my Bouquet Daisy and added punched flowers and beads to enhance the drawn flower on the digi!~I hope you enjoy my card! Thank you for stopping by!


Accessories : Foam Tape, Spectrum Noir, string, punches, beads
*****
This week's theme :
Tickled Pink
Challenge Rules below

Now it's Your Turn!
You are not required to use a Digital Delights
Image to join in the fun
but if you do, you can enter THAT project TWICE.
To enter twice when using a Digital Delight image,
for your 1st entry use your card link.
For your 2nd entry use your blog address
and add "2nd entry" after your name
Otherwise, only ONE entry person
**Please be sure to follow the challenge theme and rules or it will be removed
Twitter at @leslierahye | Facebook at leslierahye.| YouTube at leslierahye | Pinterest at leslierahye
Sunday, November 24, 2013
The Key to My Heart


For the chipboard hearts, I layered three coats of powder on each side and then added a glaze of glastique to the top to add shine and smoothness. For the keys I applied 2 coats of powder on both sides...the smoothness of the copper did not require an additional coat of glaze. I created 1" and ½" paper beads and then coated them all with the copper emboss enamel. On the ½" beads I sprinkled a coat of cranberry wine on for the last layer and heated the bead one more time. Layered on top of the copper, the cranberry powder gave a smoother finish!

Products Used

The necklace was put together with a variety of chains and jump rings. A bit of sari silk was threaded through the eyes above the beads for added comfort in wear. I hope you enjoyed my project featuring chipboard and emboss enamel and glastique glaze from Globecraft and Piccolo! Thank you for stopping by!!
Twitter at @leslierahye | Facebook at leslierahye.| YouTube at leslierahye | Pinterest at leslierahye
Friday, October 4, 2013
31 Days of Halloween | Day 4

 .
.
Seriba is colored with Spectrum Noir Alcohol Markers and glittered with prisma glitter on her wings and Wink of Stella on her cobweb stocking and bodice. Robin's Nest Dew Drops accent the focus image. Maya Road Mist over a Cheery Lynn Designs doily provide a glimmery stenciled background. A final accent of Halloween beads and ribbons finish of the card! Perfect for a spooky note to a pal!
Thank you for stopping by! Please check out the other stops!
Terra | Black Dragon | Kapree | Shell | Kristy | Susan | Helen | Loren | Alison | Kelli
De Stempelwinkel | Monique | Karen | Airless Chambers | Jane | Jennifer | Emily | Lisa | Lyneen
Wendy | Altered Pages Art Sociates | leslierahye | Delicious Doodles | Roni | Shoni | Jenn |
DominoART | Jessica | Sandy | Carolyn | Carla | Julia | Steph | Trisha | Brigitte | Lisa | Anna
Twitter at @leslierahye | Facebook at leslierahye.| YouTube at leslierahye | Pinterest at leslierahye
Friday, June 21, 2013
Wrapped Up with Altered Pages

A few weeks ago I asked Jean about these amazing Sari Silk ribbons that she got for the store. I had been inspired by some beautiful creations that an online friend does with ribbons, fibers, beads and such. I wanted to create a wrapped bracelet my style! with some beautiful remnants [I LOVE upcycling], some altering with my favorite alcohol ink markers, and of course beads and charms. I hope you enjoy!

Along with the gorgeous Sari Silk Ribbons, Jean sent these fabulous charms and beads. they are a great silvery-pewter color which makes them PERFECT for coloring with my Spectrum Noir pens. They make it easy to make your accessories match your ribbons.

Figure out the length of your wrap up by wrapping an length of beads [loosely strung], or your ribbon around your wrist 4-5 times. You then can thread your beads onto one or both of the Sari ribbons...knots can help beads from slipping. wrap your beads loosely around the ribbons and attach each end with wrapping smaller thread tightly around the grouping.

You can incorporate findings into the ends to help "close" your wrap up or your can tie it in a loose knot [so that it can be removed later]. I love how my AlteredPages.com goodies look with some of my favorite beads. I hope this inspires you to try to make your own!
Subscribe to:
Posts (Atom)





