Showing posts with label laser printer. Show all posts

Monday, October 20, 2014

The Midway!

if you are looking for my 31 Days of Halloween post it is here.


Happy Monday everyone! On the Globecraft&Piccolo Blog today I share a layout using the midway rides chipboard. My husband and daughter recently attended the State Fair of Texas and took some fabulous photos at the midway that I knew would be perfect with the midway chipboard. I created an 8×8" layout and layered the "rides" along the bottom. Deep Blue and Ruby Red Slippers EP were the perfect powders to coordinate with the red and blue neon of the midway! I hope you enjoy my layout!


Twitter at @leslierahye | Facebook at leslierahye.| YouTube at leslierahye | Pinterest at leslierahye
Thursday, September 25, 2014

Weekly Challenge | Cute & Cuddly

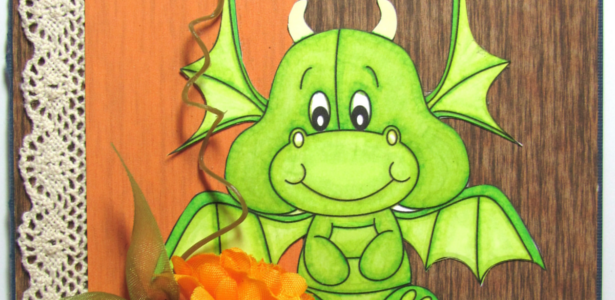
It's time for a new challenge with Digital Delights by Louby Loo! This week at Delightful Challenges our challenge is Cute & Cuddly! You all know how much I love Little Bird. I've paired her with the Hanging Birdhouse image and made her dimensional by adding foam tape to the back of a second image and layering it on top. I added some bling and a bow to accent the images. LOVE this easy peasy card! ~I hope you enjoy my card! Thank you for stopping by!

Hanging birdhouseHanging birdhouse (colored)
Hanging birdhouse
Little birdLittle bird (colored)
Little bird

Cardstock: Neenah, Bazzill
Accessories: Foamtape, ribbon, bling


*****
Our Theme for this week is:
Cute & Cuddly
Be sure to read the challenge rules below

We are being sponsored by the fabulous

Prize
$10 store certificate!!
Now it's Your Turn!
You are not required to use a Digital Delights 
Image to join in the fun 
but if you do, you can enter THAT project TWICE.
To enter twice when using a Digital Delight image,
for your 1st entry use your card link.
For your 2nd entry use your blog address
 and add "2nd entry" after your name

Otherwise, only ONE entry person
**Please be sure to follow the challenge theme and rules or it will be removed.
Twitter at @leslierahye | Facebook at leslierahye.| YouTube at leslierahye | Pinterest at leslierahye
Wednesday, July 16, 2014

Weekly Challenge | Button Button

It's time for a new challenge with Digital Delights by Louby Loo! This week at Delightful Challenges our challenge is Button Button (use brads or buttons). I used precolored Flippity Frankie and jazzed up my card front with some yummy embossing powder droplets and tied buttons. Perfect for a thinking of you card ~I hope you enjoy my card! Thank you for stopping by!

Leslie Rahye - Delightful Challenges Design Team Coordinator
Flippity FrankieFlippity Frankie (colored)
Flippity Frankie


Card stock : Neenah, Bazzill
Accessories : foam tape, white glue, trims from stash, Piccolo Emboss Powders, Buttons

*****
This week's theme :
Button Button
(use brads or buttons)

Be sure to read the challenge rules below

We are being sponsored by the fabulous

Now it's Your Turn!
You are not required to use a Digital Delights 
Image to join in the fun 
but if you do, you can enter THAT project TWICE.
To enter twice when using a Digital Delight image,
for your 1st entry use your card link.
For your 2nd entry use your blog address
 and add "2nd entry" after your name

Otherwise, only ONE entry person
**Please be sure to follow the challenge theme and rules or it will be removed.
Twitter at @leslierahye | Facebook at leslierahye.| YouTube at leslierahye | Pinterest at leslierahye

Monday, July 14, 2014

Beaded Wedding Pendant


  Happy Monday everyone! Today on the Globecraft and Piccolo Blog I share another jewelry project today! I printed a vintage wedding image to fit the 1½×2½" Bezel and trimmed it out. I glued the image on to the bezel, trimming closely to the edges and sanding with a file. Once dry I added black ink around the edges of the bezel. Next I adhered a vintage bead mix to the edges, randomly picking the various sizes and styles of beads For an additional accent I placed three along side the couple. Once this is completely dry, I layered on Ultra Thick Clear emboss enamel [UTEE] adhering with Enamel Powder Adhesive. I added multiple layers until the clear molten liquid was up to the level of the shortest beads. I finished the piece by hanging it from a silver ball chain.

  I hope you enjoyed my project! Thank you for stopping by today!

Twitter at @leslierahye | Facebook at leslierahye.| YouTube at leslierahye | Pinterest at leslierahye