Showing posts with label mixedmedia. Show all posts

Friday, July 3, 2015

Wednesday, June 24, 2015

International Fairy Day Blog Hop!

Happy International Fairy Day Everyone! Welcome to my annual Blog Hop celebrating this fantastic occasion! This blog hop is dedicated to all things Fairy! I am often asked where did International Fairy Day began? This quote from FaeNation sums it up: 
"The most important day in the calendar, June 24th – this day is the second ever International Fairy Day. Founded by artist Jessica Galbreth, Fairy Day is a holiday for believers, collectors and the young at heart to celebrate all that is Fae and reconnect with their imagination and child-like wonder. It is the perfect day to glamour bomb, make a fairy altar, take a walk in unspoilt countryside or even just reread your favourite fairy books. See the Fairy Day website for more ideas."
I have collected some of my favorite bloggers and crafters to join me in this fun celebration! I hope you enjoy the projects we've done. Below you will find a list of bloggers..be sure to hop from project to project--keep my screen open as there may be one or two without the list on their blog. 

Today I'm creating with some of my new and favorite toys and sharing a quote from the fairytale man himself Hans Christian Anderson : "Just living isn't enough," said the butterfly fairy, "one must have sunshine, freedom and a little flower." After the month of rain and floods and storms that we've had this just seemed appropriate! We all need a little sunshine, freedom as we approach our celebration of independence here in the states and a "little flower!" While my word of the year is sparkle, I will forever be marked by the word bloom and all that it means. I hope you enjoy my project. I created a little plaque for my work area. I started with a spritz of water and some Ken Oliver Crafts Color Burst in Pthalo Green on Mixed Media paper! This is an AMAZING little product and I can't wait to get the new colors in July! That one little bottle has all of those colors in its little bottle...just a touch of powder, a little more misting and a little patting and voila! an amazing background! I stamped a little field of daisies in the corner. I printed the Hans Christian Anderson quote and stamped a light music background over it. The pages were trimmed and mounted on some black and shiny sequins and beads were added for a bit of sparkle! Love it! I hope you do too!

Now hop along and see what my amazing crafty friends have shared!


http://leslierahye.blogspot.com/2015/06/international-fairy-day-blog-hop.html


Twitter at @leslierahye | Facebook at leslierahye.| YouTube at leslierahye | Pinterest at leslierahye | Instagram at leslierahye

Friday, May 29, 2015

Let Freedom Ring Fatbook Tile with Rebecca Baer®


Good Morning! Today I've created a fatbook page using Rebecca Baer™ Stencils. Fatbook pages are similar to ATCs in that they are little works of art that are traded among friends--they are 4×4" in size and sometimes they are bound into a book.

For this project I used the small Stars & Stripes stencil and the Seafarer Painted Digital Paper from her Rebecca's digital line. To begin I printed the darkest papers along with another print that I thought I would *play* with in the size that I was going to need 4×4" I did this by "formatting" my image to that size in my Publisher program. I could print out 4 squares easily on my standard  card stock. I used a color laser printer for my project so the ink does not become a muddy mess with the mixed media play, if you do not have a personal color laser printer, you can have your documents printed at an office supply store for a small fee.

Stars & Stripes Stencil - Product ImagePainted Digital Papers | Seafarer - Product Image


I trimmed out my papers to 4×4" and began with my stencil. Using the mini masking tapes I help my stencil into place while I added a thick pigment ink to the stencil to hold my copper embossing powder. While I used a brown ink, the color really will not matter as the embossing powder covered opaquely and none of the color showed through. I heat set the embossing powder.

RB Mini Masking Tape for Artists and Quilters - Product Image

Next I began layering on red paint around the edges. Using a wide brush in the RB Classique(TM) Angles set, I pulled my brush in towards the center of the fatbook tile. I used a wet wipe to remove some of the paint, especially on the embossed edges to give it a "antiqued" look. 
RB Classique(TM) Angles - Product Image

Next I took out my black detail pens and pastel pencils and went around the stars and curves of the stencil with white and black. I doodled around the edge of the tile and added white paint pen dots to the curves. 


I then replaced the stencil over the top of the tile and using my white paint pen went over the "strips" where the melted emboss powder was. I wiped away paint with my wet wipe again, leaving some of the lines and smearing the rest.  

To adhere the torn denim to the side I placed down a strip of double stick tape on the tile and then also on the back of my strip of denim. I was able to pleat the denim and have it hold in place. I added a little burlap bow and some bling to the tile to complete the embellishments.


I completed my tile by handwriting lyrics from patriotic songs and phrases of freedom and liberty that hold meaning with me along the stripes. 


I hope you enjoyed my little piece of art today! All supplies mentioned are available In Rebecca Baer's® store at the link below! Thank you for stopping by! Be sure to check out posts from my teammates each Tuesday and Thursday!


Twitter at @leslierahye | Facebook at leslierahye.| YouTube at leslierahye | Pinterest at leslierahye | Instagram at leslierahye

Thursday, May 14, 2015

Stencilled Fiber Art Necklace Pendants with Rebecca Baer™


Good Morning! Today I've created little fiber art necklaces and pin using Rebecca Baer­® stencils! I love handmade jewelry and am fascinated by the textures and mixed media feel of these little denim pendants. This is super easy and with one 6" square of fabric you could make a dozen or so pendants for sharing with your friends and family! I hope you enjoy my tutorial below!

Begin with a piece of fabric. I am using upcycled denim. I chose this beautiful Secret Garden stencil in the small for the above pendant. I also chose the lovely Enchanted Vine Stencil in small for a second project that I'm sharing below using the same technique.
Secret Garden Stencil - Product Image Enchanted Vine Stencil - Product Image

I applied Embossing Powder Adhesive to my fabric through the stencil so that it looks like it was stenciled with a darker shade of blue. Then I applied Embossing Powder and heat set it to melt the powder onto the jeans. 


I have not tested this for something that would need to be washed so I don't know if it would stand up to the wear and tear of that process. The results of the embossing powder on the denim is awesome though!


Above you see the result of a turquoise colored emboss powder on the denim...striking. However I wanted something with a bit more depth for the pendent today. For today's pendant, I decided to add one more element--I misted an opaque color mist first onto the denim.


Next I turned my stencil and proceeded with the embossing powder adhesive and the emboss powder...you can see the effect in the details of the pendant below.


I finished my pendant by fashioning a little hanger with some black annealed wire. I cut a strip of my stenciled fabric and attached it to the hanger with sewing. I then added a selection of charms to the front. Then I raveled the bottom of the pendant by cutting strips and removing the shorter fibers that remained. 


This little friendship pendant was completed in a similar manner...I cut little strips and attached it to the safety pin. I then attached a little bitty pin with beads to the front. 

All supplies mentioned are available at the link below! Thank you for stopping by! Be sure to check out posts from my teammates each Tuesday and Thursday!


Twitter at @leslierahye | Facebook at leslierahye.| YouTube at leslierahye | Pinterest at leslierahye | Instagram at leslierahye


Thursday, February 13, 2014

leslierahye's very steampunk Valentine Blog Hop | a love canvas


Welcome to the final post of my very steampunk Valentine Blog Hop! I've created a "backwards" canvas! I've been seeing these on the mixed media blogs and wanted to try my hand at it....I used yummy Globecraft & Piccolo chipboard and emboss enamels along with Dylusions mists and vintage music paper and embossed metals. I LOVE how my Valentine canvas turned out!


I hope you take the time to hop through each stop and enjoy my talented friends! Thank you for joining us in our Valentine Celebration!


Twitter at @leslierahye | Facebook at leslierahye.| YouTube at leslierahye | Pinterest at leslierahye

Saturday, December 14, 2013

Holiday Cheer with Altered Arts Magazine!

This article can be read HERE.

Thursday, October 3, 2013

31 Days of Halloween | Day 3

If you're looking for my Delightful Challenges post, it is here.
During the month of October I am participating in a month-long blog hop with some amazing artists. Everyday you will find a new Halloween project on all of the blogs listed below. Each project must have stamping on it, be it digi or ink. There are prizes to win, be sure to check out all the rules HERE and information on the daily scavenger hunt is posted there! You must go HERE to find the item/s you are looking for the scavenger hunt.

Today I am sharing a stamped "reassembled" piece. I create a background--this time with mists onto cardboard that has had a matte finish decoupage glaze laid down to keep the sprays from soaking--allowing them to do their drippy runny fun. I then stamped my image--in this case pumpkins--onto a piece of book paper I colored it in with Spectrum Noir pens and fussy cut around the main image.
Next I stamped the image on my background and adhered the cut pieces onto the stamped image. Next I cut apart my image and inked the edges. Finally I glued it back together and added some fiber and hardware for a final "arty" touch. At this point this art piece can be made into a magnet, or a pin, or any kind of fun embellishment for your arty needs. 


I hope you enjoy my project! Be sure to check out the others!
 photo wickedbloggerbutton_zps81ef6f33.jpg
31 Days of Halloween 2013 Wicked Blog Roll
Terra | Black Dragon | Kapree | Shell | Kristy | Susan | Helen | Loren | Alison | Kelli 
De Stempelwinkel | Monique | Karen | Airless Chambers | Jane | Jennifer | Emily | Lisa | Lyneen 
Wendy | Altered Pages Art Sociates | leslierahye Delicious Doodles | Roni Shoni | Jenn | 
DominoART | Jessica | Sandy | Carolyn | Carla | Julia | Steph | Trisha | Brigitte | Lisa | Anna
Twitter at @leslierahye | Facebook at leslierahye.| YouTube at leslierahye | Pinterest at leslierahye

Friday, September 13, 2013

Mixed Media Altered Journal

Happy Friday everyone! I have been doing a lot of cards for my other crafty obligations lately and just needed to get painty and misty! There is a group of crafters making altered journals for soldiers and while THIS journal is not for that, I did want to practice doing some journals in this style in preparation for a future soldier journal. THIS journal is for a friend of mine. They are super fun to do--collect your trinkets and trims, collage glue and dimensional glue, gesso, and mists.

I began by crumpling up some packing paper that came with my most recent AlteredPages.com order and gluing it to a composition journal with some Beacon Fast Finish Decoupage. I then added some doilies [both paper and fabric] to the cover with a dimensional glue to hold the heavier objects. I continued adding my flatter embellishments to the cover of the journal--chipboard, metal, bling. I coated this first layer with Gesso.

Next I added more!! I clustered dollar store flowers and felt coasters along with some butterflies using a dimensional glue to hold. 

....and then i coated the WHOLE THING with Gesso again. You can see here that the gold from the doilies is still trying to show through and that the flowers and butterflies still have a hint of color bleeding through...do not worry...the layers of mists will take care of that! 

Next I grabbed my favorite Dylusions Inks and my heat tool and began misting...There is no rhyme or reason to why I misted here or didn't mist there...I just followed the art until I liked the effect of the dripping and mixing of the colors--I used the white ink along with a variety of blues and greens. Once I was happy with the base colors, I grabbed my mica mists in Maya Road Gunmetal, Iridescent and Copper Metal to add that shimmer and shine. Again drying with heat tool as I worked.

For a final touch I added gold mica powder to areas of the cover that were still a little damp to touch and set with the heat tool. Now my altered journal is ready for my friend to write her wishes hopes and dreams. 


Twitter at @leslierahye | Facebook at leslierahye.| YouTube at leslierahye | Pinterest at leslierahye

Monday, August 19, 2013

Tutorial | Mixed Media Initial Canvas with Design Memory Craft Faber-Castell

Good evening everyone! leslierahye here to share with you this fun canvas that I made for my Samantha [aka Fancy Pants] with the beautiful Cheery Lynn Designs Dies and the scrumptious Faber-Castell Gelatos and Aquarelle Watercolor Pencils. We have been redoing the kids' room and the wall just screamed for some initial art! I hope you enjoy my project!
To create your own initial canvas
Assorted Cheery Lynn Doily and Flower Dies
8×10 canvas
empty mister bottles
Water Brushes
gesso
Beacon Fast Finish Decoupage
Beacon 3-in-1 

I gathered my supplies and my white hand-crafted flowers and doilies.

Before I got started gluing, I created a pink mist with the Watermelon Gelato. I sliced off some of the creamy Gelato into thin slivers and placed it into a mister bottle. I then added water and used a small stick to stir the mixture--helping to breakdown the Gelato further by mashing the stick against the side of the mister. When I thought it was dissolved enough, I gave the mister a good shake to disperse the color throughout.

Next I printed an outline of the letter "S" using my Publisher program. I choose the free font Big Top for my design. I sized the letter to about 650 points to fill the canvas. Once printed I tested out the flowers to see if they would fit nicely in the space I had. 
Next I trimmed out my initial to make it easy to trace and laid out the entire canvas with the doilies, the "S" and the flowers. Once I liked the positioning, I traced the letter onto the canvas with a pencil.
With Beacon Fast Finish Decoupage I glued my doilies firmly to the canvas and let them dry.
Next I attached my flowers using Beacon 3-in-1. I started with the big flowers first and then added leaves and smaller flowers until I was happy with the placement.  I set the canvas aside to dry for a little bit.
 
It is now time to coat the ENTIRE canvas with gesso! This coating gives the WHOLE canvas the same finish so the different mediums will act similar over the entire surface. This also provides the opportunity to create some "bubbles" with the heat tool and add an extra fun texture.  But more on that later!

Now the REAL FUN begins! Get out your Gelatos! I started with Margarita Mix and Snow Cone and colored direct to canvas around the "S" concentrating the Snow Cone color on my doilies.. Next I spritzed water onto the canvas to activate the Gelatos and painted the color until smooth all over the canvas leaving the flowers alone. As the colors around the doilies blended, I added back over the top more of the Snow Cone to make them bluer. 
Once I was happy with the background, I picked up the Gelato mister that I created above and sprayed the "S". I added color in layers, drying with my heat tool between layers. I allowed some over spray to stay on the canvas but if it got too thick I simply dabbed it with a dry cloth to pick up the extra.
While drying, I concentrated some heat around the doilies to bubble up the gesso that got stuck in the details of the die cut. I love these little bubbles that remained.
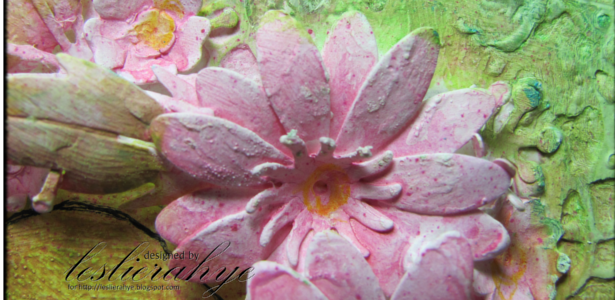
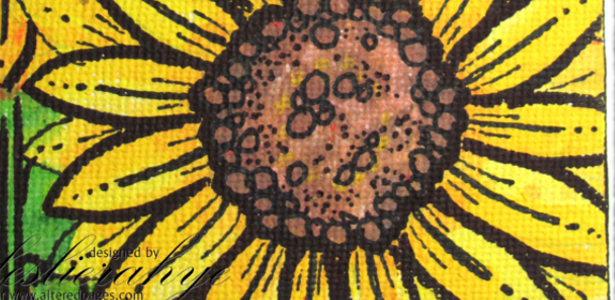
Once dry, I came back to the flowers with yellow and turquoise Faber-Castell Aquarelle pencils. I put yellow on some of the flower centers and yellow and turquoise on the leaves. I activated the watercolor with a water brush leaving the centers with a hint of yellow and the leaves with a hint of green. I finished with the coloring by adding a swipe of the Coconut white Gelato to the centers of the big flowers to bring in a small highlight! 
You know I'm not done until I've added a little doodle. As a final touch, I doodled with my Faber-Castell PITT Artist Pen in Black Small in a few areas around the "S". These pens are perfect as they are waterproof India Ink and come in several sizes for your doodling needs! 

I hope you enjoyed my project! Thank you for stopping by!