Showing posts with label stencils. Show all posts

Thursday, June 25, 2015

Steampunk Cards with Rebecca Baer™

This post can now be read here.

Thursday, June 11, 2015

Prejudice is a burden art journal page with Rebecca Baer®

Good Morning! Today I've created a journal page using Rebecca Baer™ Stencils and brushes. Rebecca's small stencils are perfect for art journaling and her brushes are a dream to work with.


For this project I began by laying down a thin coat of gesso on my mixed media paper so that my inks and colors rest on top of the surface rather than absorbing down into the paper. This way use less product to achieve the deep colors I love.  Using a wide brush in the RB Classique™ Angles set, I brushed thinly and quickly but completely to get a full coverage.
RB Classique(TM) Angles - Product Image

Next I applied watercolor crayons to the surface with no particular pattern in mind. You will see below that once water is applied and the colors are all blended it looks NOTHING like the pattern. I used the RB Classique™ Angles brush to get a smooth blend of the colors.


Next I grabbed my Mixed Elements Honey Comb Small Stencil [I just can't get enough of this stencil]  and began layering mists on the background I had created. For this technique I applied a LOT of mist in some areas and dried it with my heat tool to create those darker pools of ink.
Honeycomb Stencil - Product Image


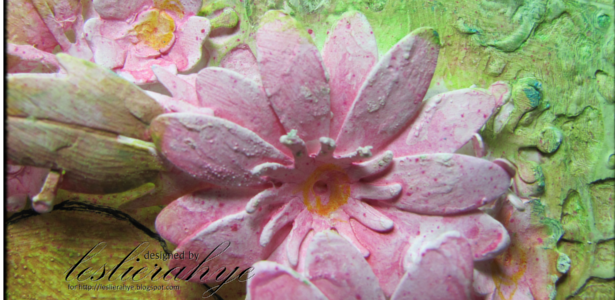
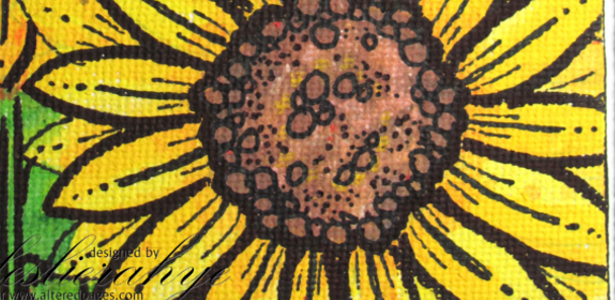
For this journal page I will share a quote and only need a single element to the side that enhanced my page. I love this Blooming Daisy Stencil| ST-502 in the medium size for this project. It's almost the full size of the page and it complements well with the whole natural feel of the Mixed Elements Honey Comb stencil that I've used. Using gesso I painted several layers through the solid part of the stencil to provide a lighter area to paint over the sunflower so that it will pop rather just blend in. There is so much ink on this page that the wet of the gesso mixes with and activates the mist below making the gesso appear blue green! 

Blooming Daisy Stencil | ST-502 - Product Image

Next I layer on acrylic paint to color the daisy to look like a sunflower using the small brushes in the RB Classique™ Angles set. 

Using the tip of the brush I added little "seeds" to my center.

Using the detail portion of the Blooming Daisy Stencil I misted a copper sparkly color, blotted it and then went back with a white mist...you can just see a hint of the details. I printed off my quote, misted it lightly with the colors I had used, cut it apart and adhered it to the page. 

Finally to add some pop to the colors I went around the words with a white paint pen and a Payne's grey brush pen. I added Payne's grey to the edges of the Daisy as well to help it pop! 

I hope you enjoyed my art journal page today! All supplies mentioned are available In Rebecca Baer's® store at the link below! Thank you for stopping by! Be sure to check out posts from my teammates each Tuesday and Thursday!

Twitter at @leslierahye | Facebook at leslierahye.| YouTube at leslierahye | Pinterest at leslierahye | Instagram at leslierahye


Friday, May 29, 2015

Let Freedom Ring Fatbook Tile with Rebecca Baer®


Good Morning! Today I've created a fatbook page using Rebecca Baer™ Stencils. Fatbook pages are similar to ATCs in that they are little works of art that are traded among friends--they are 4×4" in size and sometimes they are bound into a book.

For this project I used the small Stars & Stripes stencil and the Seafarer Painted Digital Paper from her Rebecca's digital line. To begin I printed the darkest papers along with another print that I thought I would *play* with in the size that I was going to need 4×4" I did this by "formatting" my image to that size in my Publisher program. I could print out 4 squares easily on my standard  card stock. I used a color laser printer for my project so the ink does not become a muddy mess with the mixed media play, if you do not have a personal color laser printer, you can have your documents printed at an office supply store for a small fee.

Stars & Stripes Stencil - Product ImagePainted Digital Papers | Seafarer - Product Image


I trimmed out my papers to 4×4" and began with my stencil. Using the mini masking tapes I help my stencil into place while I added a thick pigment ink to the stencil to hold my copper embossing powder. While I used a brown ink, the color really will not matter as the embossing powder covered opaquely and none of the color showed through. I heat set the embossing powder.

RB Mini Masking Tape for Artists and Quilters - Product Image

Next I began layering on red paint around the edges. Using a wide brush in the RB Classique(TM) Angles set, I pulled my brush in towards the center of the fatbook tile. I used a wet wipe to remove some of the paint, especially on the embossed edges to give it a "antiqued" look. 
RB Classique(TM) Angles - Product Image

Next I took out my black detail pens and pastel pencils and went around the stars and curves of the stencil with white and black. I doodled around the edge of the tile and added white paint pen dots to the curves. 


I then replaced the stencil over the top of the tile and using my white paint pen went over the "strips" where the melted emboss powder was. I wiped away paint with my wet wipe again, leaving some of the lines and smearing the rest.  

To adhere the torn denim to the side I placed down a strip of double stick tape on the tile and then also on the back of my strip of denim. I was able to pleat the denim and have it hold in place. I added a little burlap bow and some bling to the tile to complete the embellishments.


I completed my tile by handwriting lyrics from patriotic songs and phrases of freedom and liberty that hold meaning with me along the stripes. 


I hope you enjoyed my little piece of art today! All supplies mentioned are available In Rebecca Baer's® store at the link below! Thank you for stopping by! Be sure to check out posts from my teammates each Tuesday and Thursday!


Twitter at @leslierahye | Facebook at leslierahye.| YouTube at leslierahye | Pinterest at leslierahye | Instagram at leslierahye