Showing posts with label stamping. Show all posts

Thursday, April 23, 2015

Fairy Magic Tag with Rebecca Baer®

Fairy Magic

Good Morning! Today I've created this wonderfully textured mixed media tag with Rebecca Baer­® stencils, brushes and mediums! It reminds me of fairies with the swirls and glitz and glitter on the tag. I hope you enjoy my tutorial below!


Enchanted Vine Stencil - Product ImageFlexi-Spreader - Product ImageRB Stenciling Gel - Product Image

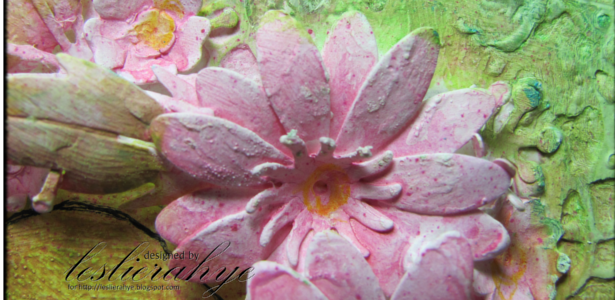
I began with a manila folder tag the Enchanted Vines Small Stencil and Rebecca Baer's Clearly Elegant Stencil Gel. While you could use the stencil straight on, I turned it various directions to get the design in specific places for my tag. I wanted lots of texture on the right side as the left side would have burlap and corrugated board. I smeared my gel with the Flexi-Spreader to get a thin coverage on my stencil.


I put my tag aside to dry and tested out some pieces to put on the left. I used a strip of burlap paper and an ATC-sized corrugated rectangle for the left. The easiest way to get the top layer off of a piece of corrugated card board is to mist the top with water, let it set for a minuted and then pull off the top--it will come off in one piece!


RB Classique(TM) Angles - Product ImageTriple-Well Brush Washer - Product ImageAmericana Acrylic Paint - Product Image
With a turquoise and apple green acrylic paint and the RB Classique™ Angles brushes, I painted over the stencil gel and the tag, adding the green to the edges only. The triple well brush washer is awesome for providing you with clean water and a place to wash a messy brush. It will be perfect for my class this weekend where I need a water container to wash brushes as it collapses down to a single well for travelling! 
Once the paint was dry, I rubbed on some brown distress ink to pop up some of the texture and define the edge of my tag. The "grommet" was also inked with the brown and glued into place. 


I also added paint to the burlap and the corrugated board to tie the tag together. These were glued into place.


Fleur De Lis Stamp  - Product Image

This fleur de lys stamp was first stamped with the same brown distress ink and then a second time with antique gold paint to get the final result below. 

Brads & Fasteners

Final details included adding this label to the corrugated board [the rectangle was cut out and removed to accommodate the glass vial of glitter]. Rebecca Baer's Custom Brad Kit which was the perfect color and perfect canvas texture. White and black charcoal doodles were added to the edges and inside to accent the elements of the stencil and stamp. A spritz or two of Radiant Rains was added to the tag to give it a little more glitz and complete the magical feel.

All supplies mentioned are available at the link below! Thank you for stopping by! Be sure to check out posts from my teammates each Tuesday and Thursday!


Twitter at @leslierahye | Facebook at leslierahye.| YouTube at leslierahye | Pinterest at leslierahye | Instagram at leslierahye

Thursday, April 16, 2015

April Monthly Smeared Ink Blog Hop | Decorate an Egg


Good Morning Smeared and Smudged Family! Today I'm participating with the Smeared & Smudged members in a fun egg-themed blog hop! We had to STAMP on an egg! SO FUN! You know I love decorating eggs...with tangles or decoupage or paint! I pierced the top and bottom of the egg and blew it out so my art would last--one time people got upset when I boiled the eggs first, decorated them, photographed them and then cracked and peeled them for egg salad! sometimes art is temporary!

I began by using Radiant Rains from ColourArte and misting my egg to get this lovely pink and green background. [it looks more pink than green in the photos!] I set this aside to dry. The radiant rains have a LOT of sparkle! Next I stamped my new little bird on some tissue with Archival ink and then painted my bird with the yummy Twinkling H2Os from ColorArte! When he was dry I trimmed him out and with Beacon Quick Finish Decoupage I glued him onto the egg. Once dry I added small flowers from Cheery Lynns Tiny Flower set and added yellow Prills for the centers. I misted with the pearl Radiant Rain to finish off the egg!

I wish you could see it in real life...it's so sparkly! 


Thank you for stopping by! I hope you enjoyed my project!
Be sure to hop to the rest of the Blog Hop Smeared Ink Family!

April Member Blog Hop

 Leigh | Nan  | Leslie Rahye Susan R. | Jane | Kristy | | Ike 

Twitter at @leslierahye | Facebook at leslierahye.| YouTube at leslierahye | Pinterest at leslierahye

Tuesday, February 17, 2015

Springtime Hugs


Happy Tuesday everyone! Today on the Cheery Lynn Blog I share a spring card complete with garden fence, flowers and a butterfly. I love the A2 stackers and how great they are for making layers on your card. This card uses 4 of the rectangles to create layers....the focal piece that I water-colored is a much larger stamp and I simply cut with an inner rectangle the portion I wanted to show on my card. The mini doily is inked around the edges to enhance the laceyness of the doily. A mini flourish, mini butterfly and tiny flowers complete the look of the card. I'm ready for spring! only four more weeks!


 Cheery Lynn Dies used
*****
Remember there is still time to join the new challenge!!! Challenge 172 is Shaped Card There is a chance to win a $20 shopping spree at Cheery Lynn Designs. Thank you for stopping by today!

Twitter at @leslierahye | Facebook at leslierahye.| YouTube at leslierahye | Pinterest at leslierahye

Wednesday, October 15, 2014

31 Days of Halloween | Day 15

During the month of October I am participating in a month-long blog hop with some amazing artists. Everyday you will find a new Halloween project on all of the blogs listed below. Each project must have stamping on it, be it digi or ink. There are prizes to win, be sure to check out all the rules HERE and information on the daily scavenger hunt is posted there! You must go HERE to find the item/s you are looking for the scavenger hunt.


Welcome to Day 15 of the 31 Days of Halloween hop with SmearedInk.com! It's Wednesday and that means ATCs!! I am using one of my favorite old rubber stamps along with my new happy halloween sentiment stamped on a fun background paper and then colored with prismacolor pencils. I love how they provide an almost opaque coverage. I completed the card with doodling of course...it's my happy go to place! I hope you enjoy my project! Please come back tomorrow for more!


 photo WickedBloggerbutton_zpsbcaacb28.jpg
Smeared Ink Wicked Bloggers 2014
Julia | Lisa | Teresa | Keren | Renee | Alison
Steph | Sandy | Sarah | Stefanie | Barbara

Twitter at @leslierahye | Facebook at leslierahye.| YouTube at leslierahye | Pinterest at leslierahye

Tuesday, October 14, 2014

31 Days of Halloween | Day 14

During the month of October I am participating in a month-long blog hop with some amazing artists. Everyday you will find a new Halloween project on all of the blogs listed below. Each project must have stamping on it, be it digi or ink. There are prizes to win, be sure to check out all the rules HERE and information on the daily scavenger hunt is posted there! You must go HERE to find the item/s you are looking for the scavenger hunt.

You are missing days 11-13 for me...they are being restored daily...we had a mishap with the storms while I was out of town for the weekend...check back soon.


 Welcome to Day 14 of the 31 Days of Halloween hop with SmearedInk.com! Today I'm sharing a small tile that I created with a piece of artist board and emboss enamels. I layered on enamels until I had a think molten tile and then I stamped the spiderweb rubber stamp into my molten EP. Once it cooled, I traced over the imprinted web with first white paint pen and then glitter pen to add some extra sparkle--thus making it virtually impossible to photograph directly! I finished the piece with black paint pen around the edges. I hope you enjoy my project! Please come back tomorrow for more!

 photo WickedBloggerbutton_zpsbcaacb28.jpg
Smeared Ink Wicked Bloggers 2014
Julia | Lisa | Teresa | Keren | Renee | Alison
Steph | Sandy | Sarah | Stefanie | Barbara


Twitter at @leslierahye | Facebook at leslierahye.| YouTube at leslierahye | Pinterest at leslierahye

Wednesday, June 18, 2014

A Jazzy Note for You!


  Happy Wednesday everyone! Today on the Globecraft and Piccolo Blog I share a "note" card to send to your friend to "jazz" up their day! I love the way emboss powders make simple card stock look like rich metal! I stamped my background notes using the Enamel Powder adhesive with Micro White powder on Kraft card stock. I then layered on colors of chalk to get the colored background. Next I tore the edges and curled them a bit and added more adhesive to dip the edges in my favorite Victorian Bronze!
I die cut 2 alto saxophones...I used one as a template for applying the shadow and highlight with chalk on the center of my card. I "double dipped" the embossing on the 2nd one. First I applied the adhesive, sprinkled Victorian Bronze and then heat set. Next I applied another layer of adhesive, sprinkled with Gilded Rose and heat set. Finally I embossed an ATC Bubble Background with Victorian Bronze and trimmed apart sections to float around my Saxophone.
I mounted this on a piece of black card stock to enhance my metal embossing...the inside of the note will have a slip of white paper to make writing with normal utensils easier! 

  I hope you enjoyed my project! Thank you for stopping by today!

Twitter at @leslierahye | Facebook at leslierahye.| YouTube at leslierahye | Pinterest at leslierahye

Tuesday, May 20, 2014

Friendships Journey Tag

Happy Tuesday everyone! Today on the Cheery Lynn Blog I share a Steampunk Friendship tag. This has one of my favorite quotes : "Friends are those people who know the words to the song in your heart and sing it back to you when you have forgotten the words."~Anonymous. I've used the Queen Anne's Lace border along with several steampunk dies and the gear emboss plate..


I began by embossing a tag with the Gears Embossing Plate. I rubbed brown chalk ink over the surface of the tag enhancing the gear pattern. Next die cuts of the Gear Mesh Border and the Queen Anne's Lace Border were layered on the background. French Flair was die cut around the stamped quote and the matching scallop was adhered to the back. The pocket watch and a corner were adhered to the back of the matted quote and then added to the tag with some foam tape for dimension. Finally gears and a clock hand were added to the tag. The word Journey was cut in red and added to the upper embossed part of the tag.

Cheery Lynn Dies used
*****
Remember there is still time to join the new challenge!!! Challenge #133 is Make It Manly There is a chance to win a $20 shopping spree at Cheery Lynn Designs. Thank you for stopping by today!

Twitter at @leslierahye | Facebook at leslierahye.| YouTube at leslierahye | Pinterest at leslierahye

Tuesday, December 3, 2013

Heat Up some Fun with Lutradur and Cheery Lynn Dies


I have something fun to show you! With the last release, Cheery Lynn Designs brought in a cool new "fabric" substance to play with for your mixed media needs. It's called Lutradur and it's this crazy product that originally came from the automotive industry. It's white and webby and can be colored with a variety of methods but today I left it in it's white form for my snowy card.

I began by die cutting the miniature rose and the daisy strip. To make it easier to cut place your mixed media sheets on the die--you can cut up to 3 of the thinner ones at one time easily when you place a piece of paper for them to cut into. Shimming your machine with the metal adapter plate can also enhance your cutting--you just need to test your machine to determine what work best for you.

After the materials are cut, I remove them from the sheet and stack them on the tip of my pointy die cut tool. With the heat tool I heat the flowers until they start to melt and change shape and curl. When I am happy with the look I remove the heat. For the miniature roses I stacked 4 at a time-the heat also fuses the centers together around the metal tool. For the big daisy I stacked 2 medium and 4 small daisy pieces and repeated the heat process. Where the "fabric" is thinner fun holes will appear. My son also found that if you heated the material enough to catch it to a piece of metal, you could then "pull" strings. He used a ¼" piece of material to pull the fine strings to the left of my floral cluster. There are so many fun applications to explore!

My second new favorite thing...die cutting metallic card stock and mirror card stock--it cuts like butter with a hot knife! Just wait until you see the New Year's Eve card I have planned for you towards the end of the month! It's just beautiful what you can do with the shiny mirrored card stock and Cheery Lynn Dies! Today I used silver for my little snowflakes.  I hope you enjoyed my card today and some Lutradur tips! Thank you for stopping by! 
 ***** 
Remember there is still time to join the new challenge!!! Challenge #109 is Tis the SeasonThere is a chance to win a $20 shopping spree at Cheery Lynn Designs. Thank you for stopping by today!

Twitter at @leslierahye | Facebook at leslierahye.| YouTube at leslierahye | Pinterest at leslierahye

Friday, November 22, 2013

You are my Best Friend!


Hi everyone! I'm sharing a fun fat book page on the AlteredPages.com Art-Sociates Blog today featuring some new items in the store! I hope you enjoy!

Materials :
G45 Steampunk Spells
Liquitex Modeling Paste
Ranger Distress Glitter Clear Rock Candy
Foam Tape
Burlap String
markers

Begin by adhering some pattern paper to a 4×4 cardboard square. With Modeling Paste stencil 2 sides of the square with a Dylusions stencil. I then poured microbeads from my Ephemera Treasureson the wet paste. The microbeads stay in place with the paste. Once dry edge the sides with Mix'd Media Inx Truffles.

Stamp a new Altered Pages rubber stamp with Mix's Media Inx Black onto cork paper. Color with Sharpie Metallic and Brown Markers. Add glue to "sand" of the hour glass and dust Distress Glitter. Sand the edges of the Glitz card stock stickers and ink. Layer on the fat book with foam tape.
Giant Rhinestone and bling as well as a burlap string wrapping finish the fat book!

Thank you for stopping by!

Twitter at @leslierahye | Facebook at leslierahye.| YouTube at leslierahye | Pinterest at leslierahye

Tuesday, November 5, 2013

I Survived the 31 Days of Halloween 2013

 photo 31DaysSurvivorButton2_zpsb6ba3963.jpg

SO something possessed me to take part in the Smeared and Smudged's Annual 31 Days of Halloween Hop 2013...Actually I L O V E D it and part of me IS sad to see Halloween projects going away for now as I can't seem to get anyone else to be on board with Cob Webs and Bats for all my cards! { I just LOVE those Cheery Lynn Designs Dies!!!}
I will not lie...I'm EXHAUSTED and spent the next week sputtering like Goldie Hawn in Overboard! But if given the chance, I'd probably do it again! I do love stamping and I do love Halloween! I'll start earlier this year! YAY!

So if you missed all of the Hallowed projects on my blog this past month--plus the design team ones I did--here is a recap! I hope you enjoy!


Twitter at @leslierahye | Facebook at leslierahye.| YouTube at leslierahye | Pinterest at leslierahye

Saturday, October 19, 2013

31 Days of Halloween | Day 19

During the month of October I am participating in a month-long blog hop with some amazing artists. Everyday you will find a new Halloween project on all of the blogs listed below. Each project must have stamping on it, be it digi or ink. There are prizes to win, be sure to check out all the rules HERE and information on the daily scavenger hunt is posted there! You must go HERE to find the item/s you are looking for the scavenger hunt.


Today I created this fun fat book with lots of yummy bubbly painty misty texture. This Trick or Treat Frankenstein is from the same set that the Count came from--I just love that set! I stamped and painted Franky and tinted the background with distressed ink. Of course my favorite creepy cloth is added to the background. A diecut frame and bat adds focus to the fat book page. The trick or treat message comes from Tim Holtz's Holiday papers.

I hope you enjoy my page!


Thank you for looking! Be sure to enjoy the other hoppers as well!

 photo wickedbloggerbutton_zps81ef6f33.jpg
31 Days of Halloween 2013 Wicked Blog Roll
Terra | Black Dragon | Kapree | Shell | Kristy | Susan | Helen | Loren | Alison | Kelli 
De Stempelwinkel | Monique | Karen | Airless Chambers | Jane | Jennifer | Emily | Lisa | Lyneen 
Wendy | Altered Pages Art Sociates | leslierahye Delicious Doodles | Roni Shoni | Jenn | 
DominoART | Jessica | Sandy |  Carla | Julia | Steph Anna

Twitter at @leslierahye | Facebook at leslierahye.| YouTube at leslierahye | Pinterest at leslierahye

Saturday, October 5, 2013

Operation Write Home's Blog Hop | World Card Making Day


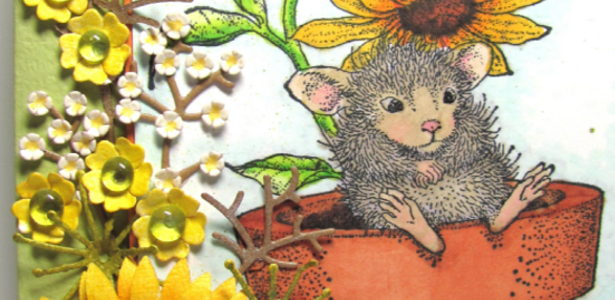
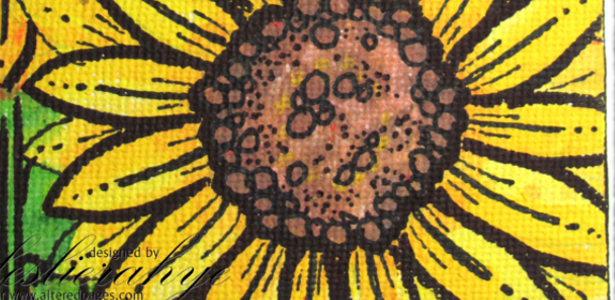
Happy World Card Making Day!! I am honored to be part of the Operation Write Home's World Card Making Day Blog Hop! Today I chose Sketch #141 since I have some fabulous new circle dies from Cheery Lynn Designs to play with!!! It made creating this card SUPER easy!! I chose papers from the SEI collection Field Notes and my favorite Spectrum Noir Markers [EB3, EN5. DG2, DG3, DG4. GB3, GB5, CR9. IG1] to color this beautiful Stampendous Sunflower Stamp.

Because of the several family members and friends that I have in the service, providing cards for soldiers to send back to their families is just one way I honor them! Thank you for stopping by!
Inline image 1
Sketch #141

WCDstart
Twitter at @leslierahye | Facebook at leslierahye.| YouTube at leslierahye | Pinterest at leslierahye

Thursday, October 3, 2013

31 Days of Halloween | Day 3

If you're looking for my Delightful Challenges post, it is here.
During the month of October I am participating in a month-long blog hop with some amazing artists. Everyday you will find a new Halloween project on all of the blogs listed below. Each project must have stamping on it, be it digi or ink. There are prizes to win, be sure to check out all the rules HERE and information on the daily scavenger hunt is posted there! You must go HERE to find the item/s you are looking for the scavenger hunt.

Today I am sharing a stamped "reassembled" piece. I create a background--this time with mists onto cardboard that has had a matte finish decoupage glaze laid down to keep the sprays from soaking--allowing them to do their drippy runny fun. I then stamped my image--in this case pumpkins--onto a piece of book paper I colored it in with Spectrum Noir pens and fussy cut around the main image.
Next I stamped the image on my background and adhered the cut pieces onto the stamped image. Next I cut apart my image and inked the edges. Finally I glued it back together and added some fiber and hardware for a final "arty" touch. At this point this art piece can be made into a magnet, or a pin, or any kind of fun embellishment for your arty needs. 


I hope you enjoy my project! Be sure to check out the others!
 photo wickedbloggerbutton_zps81ef6f33.jpg
31 Days of Halloween 2013 Wicked Blog Roll
Terra | Black Dragon | Kapree | Shell | Kristy | Susan | Helen | Loren | Alison | Kelli 
De Stempelwinkel | Monique | Karen | Airless Chambers | Jane | Jennifer | Emily | Lisa | Lyneen 
Wendy | Altered Pages Art Sociates | leslierahye Delicious Doodles | Roni Shoni | Jenn | 
DominoART | Jessica | Sandy | Carolyn | Carla | Julia | Steph | Trisha | Brigitte | Lisa | Anna
Twitter at @leslierahye | Facebook at leslierahye.| YouTube at leslierahye | Pinterest at leslierahye