Showing posts with label valentine's cards. Show all posts

Tuesday, February 4, 2014

Love the Tiny Flowers!


 Happy Tuesday everyone! On the Cheery Lynn Blog today I am playing along with this week's challenge Add a Flourish! I have been creating a lot of projects lately with the Tiny Flower Kit and the Tiny Fanciful Flourishes! I love them! To create this filled letter look on any card is very easy.  I began by selecting a chunky font on my computer and printing out the letters for "love." With chalk I colored over the back of the letters to make it easy to transfer to my card stock. Next I positioned each letter and traced around them with a pencil, transferring the chalk from the back of my letters onto my card stock. I used a black marking pen to retrace my chalk lines and highlight the shape of the letters.
Next I glued down a flourish and stacked flowers starting with the largest and working my way to the itty bitty flowers in the Baby's Breath Flower Kit to fill in the tips. I added mini butterflies when I finished with the flowers!

Cheery Lynn Dies used

 Thank you for stopping by!!

*****
Remember there is still time to join the new challenge!!! Challenge #118 is Add a FlourishThere is a chance to win a $20 shopping spree at Cheery Lynn Designs. Thank you for stopping by today! 

Twitter at @leslierahye | Facebook at leslierahye.| YouTube at leslierahye | Pinterest at leslierahye

Tuesday, January 28, 2014

Tickled Pink with Cheery Lynn!


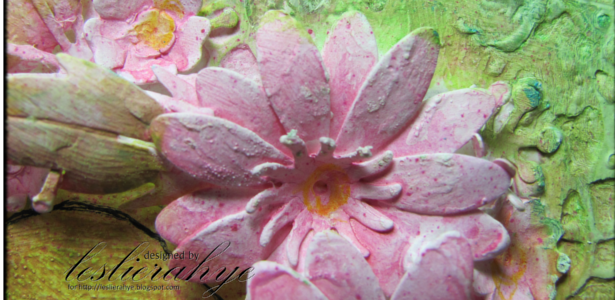
 Happy Tuesday everyone! Today on the Cheery Lynn Blog I am playing along with this week's challenge Tickled Pink! I created my card with shades of pink from a distressed paper pad. To add the green color to the vines and leaves, I used chalks. I bit of line work around the word "love"helps it to stand out against the background. I'm totally loving the paper bow among the flowers!

Cheery Lynn Dies used

 Thank you for stopping by!!

*****
Remember there is still time to join the new challenge!!! Challenge #117 is Tickled PinkThere is a chance to win a $20 shopping spree at Cheery Lynn Designs. Thank you for stopping by today!

Twitter at @leslierahye | Facebook at leslierahye.| YouTube at leslierahye | Pinterest at leslierahye

Tuesday, December 24, 2013

Be Mine Valentine!


 Today on the Cheery Lynn Blog I share this fun Steampunk Valentine For You! I adore these Streampunk--if you haven't already guessed and this Hearts and Gears set works perfectly with the individual Gears set and the larger Gear Mesh Border! I love using the Optimistic Set to make a Steampunk alphabet by adding in gears for the "o"s in words! The mesh was cut in Black and placed on the Peek-a-boo right and rubbed with a pink Inka Gold cream. Mirrored gold gears were matched up with gears on the hearts and glued above and below the gears. Both hearts were cut from a brushed red metallic cardstock but the smaller heart was inked with gold and rubbed on strategic gears with the pink Inka Gold cream. White pen stitching around the letters and the hearts complete the Valentine! I hope you enjoy my card! Thank you for stopping by!

Cheery Lynn Dies used
 Thank you for stopping by!!


*****
Remember there is still time to join the new challenge!!! Challenge #112 is Anything GoesThere is a chance to win a $20 shopping spree at Cheery Lynn Designs. Thank you for stopping by today!

Twitter at @leslierahye | Facebook at leslierahye.| YouTube at leslierahye | Pinterest at leslierahye

Monday, February 4, 2013

Quick & Easy Valentines with Melonheadz Bundles


Good morning everyone! I'd like to share a new digital design challenge team from one of my favorite digital stamp designers. Nikki of Melonheadz Illustrating has added a team to her sites for sharing her designs. What I enjoy about Nikki's designs is that she always includes hand drawn word art along with her fun and whimsical images. Additionally she bases a lot of her bundles on school subjects and literature. These are the reasons I fell in love with her work and I am honored to design projects for her.

Today's challenge is Valentine's Day!!
now until midnight on the 18th of February

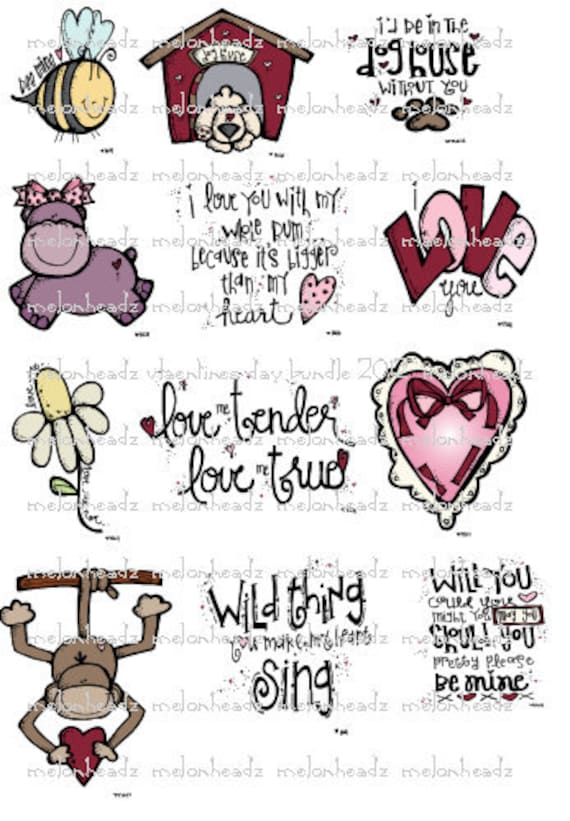
I chose this cute Valentine's Day bundle that had fun sentiments included to make whimsical cards for my kids to share. On an 8½ × 11" piece of paper it's easy to get two cards [printing front and back] that can be trimmed to 4¼×8½" and then folded in half. To highlight the cards, I used glitter and crystal lacquer and edged the cards with coordinating BIC Mark-Its! It's a fun, quick and easy set of cards for my kids to had out to their friends and family! These images are available in Black & White or Color. To make it even quicker, I used the precolored designs. 

Valentine's day digital stamp bundle


Sunday, September 23, 2012

VLVS! All Hallow's Eve Party | Day 1

Happy Sunday and welcome to Day one of the Viva Las Vegastamps! weeklong celebration of Halloween. Viva Las Vegastamps has tons of Halloween related stamps including some amazing new plates of stamps--which I'm working with here. During this week there will be fun games to play, some voting to do and some prizes to be won. Hop on over to the Viva Las Vegastamps Blog to learn about all the details. There is a link up below to keep you on track of all the great designers in the hop! Be sure to check daily! Today I am sharing with you a technique I love for making backgrounds and especially backgrounds for Artist Trading Cards. Watch the replay of my bi-monthly show leslierahye's crafty gig to see start to finish how I made these!


 For this project:
assorted distress inks
black ink [ranger archival]
Versamark Watermark

Thank You for stopping by~

Tuesday, January 17, 2012

AJ's Digi Shoppe Post | Owl Love

Go by the AJ's Digi Shoppe blog to learn what fun papers and stamps I used from Amanda's great collection of digital products!! I just love these owls and papers! I hope you enjoy my card! Thank you for stopping by!

Saturday, February 12, 2011

KinderStampO's My Vintage Valentine Blog Hop

Hi everyone and Welcome to KinderStampO's 34 My Vintage Valentine Blog Hop.
If your came here from Sigrid Martin's  blog, you are in the right place. If you would like to start from the beginning, hop on over to Kinder's Blog!
For this project I made a 6×6" Valentine card. All 2-dimensional products used in this card were from free digital downloads on the internet! It's amazing all the fun free digital stuff you can find. A list of resources for this project is below.
I hope you enjoy my card!

Supplies:
Ranger Distress Crackle Paint Rock Candy
Ranger Distress Ink Spun Sugar
Tsukineko Walnut Ink
Beads, white silk flowers, DMC Gold Thread, Red Tape ,Foam Tape, Zots 3D gluedots, homemade glimmer mist [perfect pearls & reinker] ; crochet lace
Digital Sources for images and paper:

Thank you for looking!

Your next stop is Sandra
Here is the complete list if you get lost along the way. Be sure to keep me company this weekend as I rest to get better. I will have my phone by my bedside to hear what you thought about the beautiful projects : )

Thursday, February 10, 2011

Delightful Digitals Challenges | Let's Get Punchy & Digi Day at SNR

Happy Thursday to you!!
It's time for another Delightful Challenge and this week is....
 
LETS GET PUNCHY
(Use your punches and Die Cuts)

Shaker Card with Happy Birthday Pippin and Ticket Sentiments Set by Digital Delights by Louby Loo


CS AND PAPERS: Bazzill and Diecuts with a View
MARKERS: BIC Mark-It
ACCES. AND EMBELLISHMENTS: Offray ribbon, Stampin Up Hardware, acrylic sheet (Bazzill), mini star confetti/glitter, foam tape, EK Success Punches (star and flower), Marvy Punch (Scalloped Circle)
SPECIAL TECHNIQUES: shaker box created by punching window out of top layer of cardstock and backing with an acrylic sheet of paper. Added 2 layers of foam tape to form a shadowbox. Added punchies and glitter for the “shakings” and placed the colored digi stamp over the back so that it could be seen through the window.
Now of coarse we have a Fabulous Sponsor for our Delightful Challenge as always and this week we are sponsored by
BABY BUD DESIGNS

One lucky player will win Two Stamps from Baby Bud Designs.
Aren't they just adorable!!!

We also have our Digital Delights Digi Day Challenge going on Today over at SNR Card Universe.

Our Challenge image is Peeking Heart Larry.
The Challenge: To come up with Original Sentiments to put in Larry's Banner.
You can find all the details HERE.

Valentine Card with Peeking Heart Larry by Digital Delights by Louby Loo
ALL DDSTAMPS USED: Heart Peeking Larry
CS AND PAPERS: Bazzill Basics and Bazzill Bling, paper scraps
ACCESS. AND EMBELLISHMENTS: Martha Stewart ultrafine glitter (yellow gold), Quickie Glue Pen, Foam Tape, Prismacolor Pencils, Gamsol, paper stumps.
COLORING MEDIUM (if any): Gamsol
SPECIAL TECHNIQUES (if any): color blending with Prismacolor Pencils, Gamsol and paper stumps. Glittering with Quickie Pen and ultrafine glitter. Three-Dimensional paper piecing using Foam Tape.

Our Digi Day Challengers will have a chance to win 3 Digi Images of their choice from Digital Delights by Louby Loo :0)

I hope you take the opportunity to participate in BOTH of our challenges at Digital Delights!
Thank you for looking! 

Thursday, January 27, 2011

You Had Me at M♥♥!


You Had Me at Moo with digitaldelightsbyloubyloo

This Friday Freebie Digital Delights by LoubyLoo digital stamp made me smile when I saw it. I knew I had to use it in a card! I printed off several of the same digital stamp on my HP Inkjet Printer. I trimmed out one to a 3×3" card and colored it in with my BIC Markers. I then colored a few elements that I wanted to add dimension to and cut them out [the ears, hair tuft, hooves and nose]. I made the parts dimensional with 3M foam tape.
I used the Stampin' Up Classic Ink Soft Suede to distress the edge of the cardstock base and the sign that Claudia Cow Topper holds. I wrote the sentiment with BIC markers and added Stampin' Up punched hearts for accent and for the Os in M♥♥. The Claudia base was matted on red Bazzill cardstock. Pen-stitching and dotting was added with a glitter pen, white pen and red BIC marker.
For the inside of the card, I cut a thin strip of white distressed with Soft Suede, matted to red Bazzill. I added another Stampin' Up heart punchie and added the sentiment "Happy Valentine's Day!" This element was added to the bottom part of the inside of the card leaving room for a sweet message for your Valentine!
Thank you for looking!