Showing posts with label tags. Show all posts

Thursday, September 17, 2015

September Monthly Smeared Ink Member Blog Hop | STEAMPUNK!

Good Morning Smeared and Smudged Family! This month I'm participating in the Steampunk Members Blog Hop! I LOVE steampunk and actually host 4 or 5 blog hops a year dedicated to celebrating holidays steampunk style! I needed this hop to rewind my mind and gear up for new creative adventures coming my way. 


For today's tag, I started with a piece of patterned paper that I stamped across to create "background clutter". I die cut some gear shapes and inside some of them you see stamping as well. I layered my gears, added some bling and some pearls. I created some shadowy depth with sepia pastel around gears. I added some doodle lines with my PITT pen and added some steampunk washi tape and more pearls to the topper to finish off the tag!

Thank you for stopping by! I hope you enjoyed my project!
Be sure to hop to the rest of the Blog Hop Smeared Ink Family!

Leigh | Rebecca   Lyneen | Fiona | Elenor


Twitter at @leslierahye | Facebook at leslierahye.| YouTube at leslierahye | Pinterest at leslierahye

Thursday, April 23, 2015

Fairy Magic Tag with Rebecca Baer®

Fairy Magic

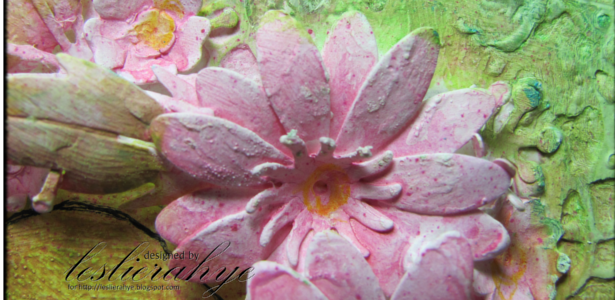
Good Morning! Today I've created this wonderfully textured mixed media tag with Rebecca Baer­® stencils, brushes and mediums! It reminds me of fairies with the swirls and glitz and glitter on the tag. I hope you enjoy my tutorial below!


Enchanted Vine Stencil - Product ImageFlexi-Spreader - Product ImageRB Stenciling Gel - Product Image

I began with a manila folder tag the Enchanted Vines Small Stencil and Rebecca Baer's Clearly Elegant Stencil Gel. While you could use the stencil straight on, I turned it various directions to get the design in specific places for my tag. I wanted lots of texture on the right side as the left side would have burlap and corrugated board. I smeared my gel with the Flexi-Spreader to get a thin coverage on my stencil.


I put my tag aside to dry and tested out some pieces to put on the left. I used a strip of burlap paper and an ATC-sized corrugated rectangle for the left. The easiest way to get the top layer off of a piece of corrugated card board is to mist the top with water, let it set for a minuted and then pull off the top--it will come off in one piece!


RB Classique(TM) Angles - Product ImageTriple-Well Brush Washer - Product ImageAmericana Acrylic Paint - Product Image
With a turquoise and apple green acrylic paint and the RB Classique™ Angles brushes, I painted over the stencil gel and the tag, adding the green to the edges only. The triple well brush washer is awesome for providing you with clean water and a place to wash a messy brush. It will be perfect for my class this weekend where I need a water container to wash brushes as it collapses down to a single well for travelling! 
Once the paint was dry, I rubbed on some brown distress ink to pop up some of the texture and define the edge of my tag. The "grommet" was also inked with the brown and glued into place. 


I also added paint to the burlap and the corrugated board to tie the tag together. These were glued into place.


Fleur De Lis Stamp  - Product Image

This fleur de lys stamp was first stamped with the same brown distress ink and then a second time with antique gold paint to get the final result below. 

Brads & Fasteners

Final details included adding this label to the corrugated board [the rectangle was cut out and removed to accommodate the glass vial of glitter]. Rebecca Baer's Custom Brad Kit which was the perfect color and perfect canvas texture. White and black charcoal doodles were added to the edges and inside to accent the elements of the stencil and stamp. A spritz or two of Radiant Rains was added to the tag to give it a little more glitz and complete the magical feel.

All supplies mentioned are available at the link below! Thank you for stopping by! Be sure to check out posts from my teammates each Tuesday and Thursday!

Twitter at @leslierahye | Facebook at leslierahye.| YouTube at leslierahye | Pinterest at leslierahye | Instagram at leslierahye

Tuesday, February 24, 2015

Springtime Dream Big Tag


Happy Tuesday everyone!Today on the Cheery Lynn Blog I am sharing a spring tag! I love the colors purple and green together and with watercolor it has a wonderful spring feel. I used the Dutch Daisy Borders, Boutique stackers and doilies to complete this tag! All pieces started out as file folder and were hand water colored with greens and purples. 

I began by cutting the border dies out of the bottom of the tag. I used the border edger and the negative space die from Border Set #2. The base was then watercolored with greens and spotted. The center of the Dutch Daisy Doily was used as a stencil to apply watercolor and ink in the corner. 

Next a ½" strip of folder was colored green and placed the ribbon-like strip from the Border Set #1 on top--it was also cut from file folder and painter purple.  The sentiment square was colored green and the negative shape of the Dutch Daisy Doily was stenciled on there as well. The doily and the sentiment square were layered on the tag. Crystal Bling was added above the cut daisies and a dot for the "i" in  the word "big". 


 Cheery Lynn Dies used


Thank you for stopping by! I hope you enjoyed my project!
*****
Remember there is still time to join the new challenge!!! Challenge 173 is anything goes There is a chance to win a $20 shopping spree at Cheery Lynn Designs. Thank you for stopping by today!

Twitter at @leslierahye | Facebook at leslierahye.| YouTube at leslierahye | Pinterest at leslierahye

Wednesday, November 19, 2014

Joyful Tag


 Happy Tuesday everyone! On the Cheery Lynn blog today I shared a tag to go along with this weeks challenge! I LOVE tags and the new Alpine Flourish Doily makes the perfect tag! I began by cutting a kraft tag to go behind my die cut. I then layered the Alpine Flourish Die onto the tag with 3 dimensional glue dots so that it would have a bit of dimension. 


Next I added my poinsettias that I had created using the strip die. Once cut from red card stock, I shape them with a stylus on a foam pad. I then stack them, little one on the top and the next smallest below it. I add little yellow prills for the center. Love the look here.  

I cut the Joy to the World Sentiment from the wreath set in both chocolate and red. I layer them and wipe a layer of lacquer over the top. 
To adhere to my tag I coat the entire solid are with lacquer and place my sentiment in the center. The twiggies are cut from the same brown and green using the wreath strip. They are layered under the poinsettias. The flowers are attached last and trims are run through a hole I punched in the tag.

Cheery Lynn Dies used
*****
Remember there is still time to join the new challenge!!! Challenge #159 is Tag You're It There is a chance to win a $20 shopping spree at Cheery Lynn Designs. Thank you for stopping by today!

Twitter at @leslierahye | Facebook at leslierahye.| YouTube at leslierahye | Pinterest at leslierahye

Friday, October 17, 2014

31 Days of Halloween | Day 17

During the month of October I am participating in a month-long blog hop with some amazing artists. Everyday you will find a new Halloween project on all of the blogs listed below. Each project must have stamping on it, be it digi or ink. There are prizes to win, be sure to check out all the rules HERE and information on the daily scavenger hunt is posted there! You must go HERE to find the item/s you are looking for the scavenger hunt.


Welcome to Day 17 of the 31 Days of Halloween hop with SmearedInk.com! I first want to thank you all for the outpouring of well wishes and kindness that you all offered. You're intentions were felt and appreciated! Thank you. My appointment went well and except for some soreness I came through fine on the other side. We will know more next week as to the results of the tests.

...AND now on to my tag! The sentiment with the moon and cemetery scene were created using 3 stamps from Viva Las VegaStamps. It was layered on a piece of burlap, a piece of embossed purple core card stock and a piece of orange Bazzill. All pieces were distressed and inked with my favorite Frayed Burlap! A bit of white chalk pencil doodling and pen stitching and a simple bow completed the tag! I hope you enjoy my project! Please come back tomorrow for more!


 photo WickedBloggerbutton_zpsbcaacb28.jpg
Smeared Ink Wicked Bloggers 2014
Julia | Lisa | Teresa | Keren | Renee | Alison
Steph | Sandy | Sarah | Stefanie | Barbara

Twitter at @leslierahye | Facebook at leslierahye.| YouTube at leslierahye | Pinterest at leslierahye

Friday, September 12, 2014

September Monthly Member Blog Hop | Make a Wish!


Hi everyone! Today I'm participating with the Smeared & Smudged members in a monthly blog hop. This month's theme is Make a Wish! I love Smeared Ink's Goth Fairies and Seriba is probably my fave! I chose her to use on my Make a Wish Birthday Tag! She is colored with Prismacolors, a hint of Perfect Pearl mist and some frantage-style heat emboss sprinkles with Piccolo Emboss Enamels. The paper is Authentique Seasons  Essentials! I hope you enjoy my tag! Be sure to check out the other Smeared and Smudged members projects along the hop!


September Monthly Member Blog Hop


Twitter at @leslierahye | Facebook at leslierahye.| YouTube at leslierahye | Pinterest at leslierahye

Monday, August 18, 2014

Be Inspired Tag


Happy Monday everyone!Today on the Globecraft and Piccolo Blog   I share an inspiration tag created with emboss enamels and a piece of mica along with some of the molded embellies that I created last week--it's addictive...I just kept melting and filling the molds!

I created the tag with layers of embossed backgrounds, air brushed and water stamped backgrounds. A final layer of Gilded Rose along the edges of the distressed tag and some Mermaid Tears applied Frantage Style finished the base of the tag.

Next I stamped with die ink the inspired stamp and sprinkled Micro Black on to the surface of the mica. I heat set the words and waited for my piece of mica to cool. I attached it to the tag with some copper brads. I finished the tag with some of my molded embellies and some fancy fiber string.

I hope you enjoyed my project! Thank you for stopping by today!

Twitter at @leslierahye | Facebook at leslierahye.| YouTube at leslierahye | Pinterest at leslierahye

Wednesday, May 21, 2014

Queen Bee Tag


  Happy Wednesday everyone! Today on the Globecraft and Piccolo Blog I share with you a steampunk tag that I created that could be added to a gift or scrapbook page or card! Piccolo powders come in a variety of "metals" which makes creating steampunk crafts super easy!


I stamped my tag with a chickenwire background stamp and embossed with MicroWhite. I then rubbed chalk ink over the cooled embossing and buffed with a dry cloth...the Micro White gives a resist appearance on the tag. Next I added a torn piece of patterned paper and added more distress inking. I heat embossed elements from the Steampunk Airship Accents set with Victorian Bronze. One of the scroll elements was placed at the top of my tag. Another of the same element was trimmed and used below the wooden bee that I also embossed with Victorian Bronze--the Enamel Powder Adhesive works great on all surfaces, including wood! Smaller bits from the Steampunk Airship Accents were layered with a rhinestone from the Bling on a Roll added to form a "crown".
Pieces from the Vintage Gears--including a negative gear--were embossed with Vintage Black, Real Rust and Vintage Copper and then layered on the tag and a strip of Bling on a Roll was added to the bottom of the card!
Globecraft & Piccolo Products used
Enamel Powder MICRO WHITE
Enamel Powder REAL RUST
  I hope you enjoyed my project! Thank you for stopping by today!

Twitter at @leslierahye | Facebook at leslierahye.| YouTube at leslierahye | Pinterest at leslierahye

Tuesday, May 20, 2014

Friendships Journey Tag

Happy Tuesday everyone! Today on the Cheery Lynn Blog I share a Steampunk Friendship tag. This has one of my favorite quotes : "Friends are those people who know the words to the song in your heart and sing it back to you when you have forgotten the words."~Anonymous. I've used the Queen Anne's Lace border along with several steampunk dies and the gear emboss plate..


I began by embossing a tag with the Gears Embossing Plate. I rubbed brown chalk ink over the surface of the tag enhancing the gear pattern. Next die cuts of the Gear Mesh Border and the Queen Anne's Lace Border were layered on the background. French Flair was die cut around the stamped quote and the matching scallop was adhered to the back. The pocket watch and a corner were adhered to the back of the matted quote and then added to the tag with some foam tape for dimension. Finally gears and a clock hand were added to the tag. The word Journey was cut in red and added to the upper embossed part of the tag.

Cheery Lynn Dies used
*****
Remember there is still time to join the new challenge!!! Challenge #133 is Make It Manly There is a chance to win a $20 shopping spree at Cheery Lynn Designs. Thank you for stopping by today!

Twitter at @leslierahye | Facebook at leslierahye.| YouTube at leslierahye | Pinterest at leslierahye

Tuesday, April 22, 2014

Steampunk Survivor Tag


Happy Tuesday everyone! Today on the Cheery Lynn Blog I share a Survivor tag Steampunk Style. I used the fabulous new steampunk corners along with the Survivor Bra set. The swirled overlays chalked with copper pan pastel looked steampunk-y to me! For this tag I die cut all elements in black card stock [some textured, some smooth] and dusted with metallic shades of pan pastel. I love the subtle metal tones this technique gives. White penwork highlights the die cuts and finishes off my tag!


Cheery Lynn Dies used
*****
Remember there is still time to join the new challenge!!! Challenge #129 is Mother's Day There is a chance to win a $20 shopping spree at Cheery Lynn Designs. Thank you for stopping by today!

Twitter at @leslierahye | Facebook at leslierahye.| YouTube at leslierahye | Pinterest at leslierahye

Tuesday, January 21, 2014

Steampunk Tag Remake


 Happy Tuesday everyone! Today I am going to re-create a steampunk tag. Back in December I was gathering my Cheery Lynn projects together to send over to BJ in preparation for the Craft and Hobby Association Winter Show. I came across the tag below. I love that tag! I created it as part of my application for this design team! Since then Cheery Lynn Designs has released more steampunk inspired dies...and of course I have added them to my collection! So, using the tag below as my inspiration, I have crafted for you a fresh interpretation of this tag.


Cheery Lynn Dies used


I love my new tag with all the extra Cheery Lynn goodness!  Thank you for stopping by!!

*****
Remember there is still time to join the new challenge!!! Challenge #115 is SweetheartsThere is a chance to win a $20 shopping spree at Cheery Lynn Designs. Thank you for stopping by today!

Twitter at @leslierahye | Facebook at leslierahye.| YouTube at leslierahye | Pinterest at leslierahye

Tuesday, January 7, 2014

Be Kind!


 Happy Tuesday everyone! Today on the Cheery Lynn Blog I am sharing a fun tag reminding us to "be kind" I built my tag on a misted office supply tag that I had distressed the edges of. I die cut the honeycomb background and cut out bits to adhere to my tag! A hand-made sunflower and cute little bees perked up the sentiment "be kind."

Cheery Lynn Dies used
Build a Flower #2 - B187

 Thank you for stopping by!!

*****
Remember there is still time to join the new challenge!!! Challenge #114 is Winter WhitesThere is a chance to win a $20 shopping spree at Cheery Lynn Designs. Thank you for stopping by today!


Twitter at @leslierahye | Facebook at leslierahye.| YouTube at leslierahye | Pinterest at leslierahye

Tuesday, November 19, 2013

Weekly Challenge | Tag You're It at Cheery Lynn


Happy Tuesday everyone! On the Cheery Lynn Blog today I am sharing with you a watercolored fall tag! I cut out all the elements of this tag on watercolor paper. I used both crayons and mica infused cake watercolors to create these fall leaves and back ground. Distress Ink rubbed onto the edges helped complete the leaves once they were formed with an emboss tool. The Thank and You were also painted with the mica cake watercolors and rubbed gently with the Distress Ink.  I really love how the Dimensional Leaves look with the embossed veins--so real looking!
 ***** 
Remember there is still time to join the new challenge!!! Challenge #107 is Tag You're It!There is a chance to win a $20 shopping spree at Cheery Lynn Designs. Thank you for stopping by today!

Twitter at @leslierahye | Facebook at leslierahye.| YouTube at leslierahye | Pinterest at leslierahye

Monday, October 7, 2013

31 Days of Halloween | Day 7

During the month of October I am participating in a month-long blog hop with some amazing artists. Everyday you will find a new Halloween project on all of the blogs listed below. Each project must have stamping on it, be it digi or ink. There are prizes to win, be sure to check out all the rules HERE and information on the daily scavenger hunt is posted there! You must go HERE to find the item/s you are looking for the scavenger hunt.


Happy Monday! Today I'm sharing with you a tag that just simply makes me smile...it combines several of my favorites!  A digital stamp from Digital Delights by Louby Loo, Cheery Lynn Designs die cuts, Basic Grey Halloween Paper and GLITTER!! I colored my Spellifying witch with yummy prismacolor pencils and sprakled up my lace edges with Distress Glitter!

I hope you enjoy my tag! Be sure to check out the other hoppers!! 
 photo wickedbloggerbutton_zps81ef6f33.jpg
31 Days of Halloween 2013 Wicked Blog Roll
Terra | Black Dragon | Kapree | Shell | Kristy | Susan | Helen | Loren | Alison | Kelli 
De Stempelwinkel | Monique | Karen | Airless Chambers | Jane | Jennifer | Emily | Lisa | Lyneen 
Wendy | Altered Pages Art Sociates | leslierahye Delicious Doodles | Roni Shoni | Jenn | 
DominoART | Jessica | Sandy | Carolyn | Carla | Julia | Steph | Trisha | Brigitte | Lisa | Anna

*****
I am adding this card to the Unruly PaperArts RAQ #2 Challenge

Twitter at @leslierahye | Facebook at leslierahye.| YouTube at leslierahye | Pinterest at leslierahye