
Showing posts with label die cutting. Show all posts
Showing posts with label die cutting. Show all posts
Thursday, September 17, 2015
September Monthly Smeared Ink Member Blog Hop | STEAMPUNK!

Good Morning Smeared and Smudged Family! This month I'm participating in the Steampunk Members Blog Hop! I LOVE steampunk and actually host 4 or 5 blog hops a year dedicated to celebrating holidays steampunk style! I needed this hop to rewind my mind and gear up for new creative adventures coming my way.

For today's tag, I started with a piece of patterned paper that I stamped across to create "background clutter". I die cut some gear shapes and inside some of them you see stamping as well. I layered my gears, added some bling and some pearls. I created some shadowy depth with sepia pastel around gears. I added some doodle lines with my PITT pen and added some steampunk washi tape and more pearls to the topper to finish off the tag!
Thank you for stopping by! I hope you enjoyed my project!
Be sure to hop to the rest of the Blog Hop Smeared Ink Family!

Twitter at @leslierahye | Facebook at leslierahye.| YouTube at leslierahye | Pinterest at leslierahye
Friday, July 3, 2015
Thursday, June 25, 2015
Thursday, June 4, 2015
Delightful Thursday& New Release
Today we have a delightful new release at Digital Delights and I'm working with the precious Katy Kangaroo! She's perfect for a fun little thinking of you card! Be sure to check out the rest of the new release and creations on the blog! Thank you for stopping by! I hope you enjoyed my card.

Our Design Team has been busy bringing more delightful crafty goodness your way!

Twitter at @leslierahye | Facebook at leslierahye.| YouTube at leslierahye | Pinterest at leslierahye
Thursday, April 23, 2015
Fairy Magic Tag with Rebecca Baer®
 |
| Fairy Magic |
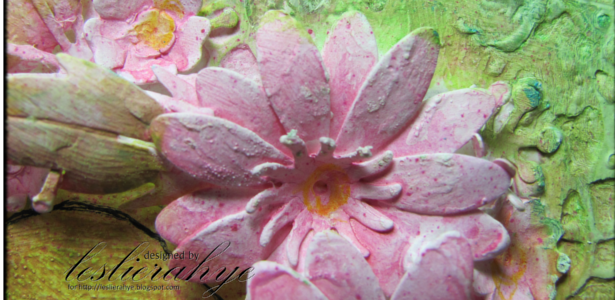
Good Morning! Today I've created this wonderfully textured mixed media tag with Rebecca Baer® stencils, brushes and mediums! It reminds me of fairies with the swirls and glitz and glitter on the tag. I hope you enjoy my tutorial below!


I began with a manila folder tag the Enchanted Vines Small Stencil and Rebecca Baer's Clearly Elegant Stencil Gel. While you could use the stencil straight on, I turned it various directions to get the design in specific places for my tag. I wanted lots of texture on the right side as the left side would have burlap and corrugated board. I smeared my gel with the Flexi-Spreader to get a thin coverage on my stencil.

I put my tag aside to dry and tested out some pieces to put on the left. I used a strip of burlap paper and an ATC-sized corrugated rectangle for the left. The easiest way to get the top layer off of a piece of corrugated card board is to mist the top with water, let it set for a minuted and then pull off the top--it will come off in one piece!


With a turquoise and apple green acrylic paint and the RB Classique™ Angles brushes, I painted over the stencil gel and the tag, adding the green to the edges only. The triple well brush washer is awesome for providing you with clean water and a place to wash a messy brush. It will be perfect for my class this weekend where I need a water container to wash brushes as it collapses down to a single well for travelling!
Once the paint was dry, I rubbed on some brown distress ink to pop up some of the texture and define the edge of my tag. The "grommet" was also inked with the brown and glued into place.

I also added paint to the burlap and the corrugated board to tie the tag together. These were glued into place.


This fleur de lys stamp was first stamped with the same brown distress ink and then a second time with antique gold paint to get the final result below.


Final details included adding this label to the corrugated board [the rectangle was cut out and removed to accommodate the glass vial of glitter]. Rebecca Baer's Custom Brad Kit which was the perfect color and perfect canvas texture. White and black charcoal doodles were added to the edges and inside to accent the elements of the stencil and stamp. A spritz or two of Radiant Rains was added to the tag to give it a little more glitz and complete the magical feel.
All supplies mentioned are available at the link below! Thank you for stopping by! Be sure to check out posts from my teammates each Tuesday and Thursday!

Twitter at @leslierahye | Facebook at leslierahye.| YouTube at leslierahye | Pinterest at leslierahye | Instagram at leslierahye
Subscribe to:
Posts (Atom)





