Last night I joined Cynthia Gagen on a special
Creative EdVentures Webcast to share a project that is near and dear to our hearts. Marion Smith of A Piece of Craft shared her passion for this charity and challenged everyone she knows to participate in a artistic endeavor to create collages from 4×4" art tiles that will then be auctioned off to raise funds for this deserving charity. Reece's Rainbow helps orphaned special needs children get adopted into loving families. It is our hope that we will raise enough money to help get several children adopted! Details on the inspiration for the
Creative EdVentures Challenge can be found
here.
In addition to sharing the
Peace Hope and Love Tile, I shared how the metal flower and colored plastic letter beads were made. Additionally I created on camera the
Happy Heart Tile, sharing a few more fun tips.
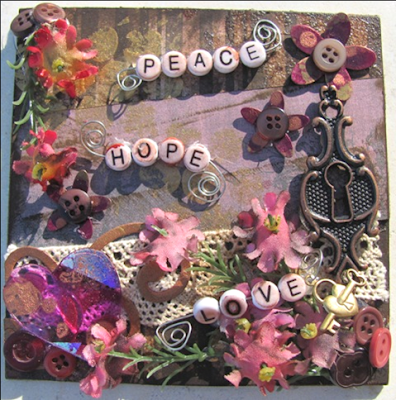 |
| Peace Hope Love Art Tile for Reece's Rainbow Charity Drive |
All tiles are constructed on 4×4" chipboard.
Cutnpastememories.com is providing a great deal on precut chipboard squares that you can use for your art tile.
For my
Peace, Hope, Love Tile, I layered free digi papers with ink and lace and fun flowers that I rubbed in ink as well. My embellishments for this tile included diecut swirls, buttons from Buttons Galore and Maya Road metal flowers. I completed the embellishing with charms and wire from my stash.
 |
| detail of Peace, Hope, Love Tile showing altered bead letters |
To create the colored letter beads you can do one of two things. You can use Ranger Alcohol Inks and blot the color on, or you can use Sharpie Markers or BIC Mark-its and color right on them. Since alcohol-based inks stick to non-porous surfaces, they stick really nicely to the plastic beads and also to the metal flowers.
Embellishments were added to the tile using hotglue so that when these are hanging upright as part of a collage they will stay put!
I created the
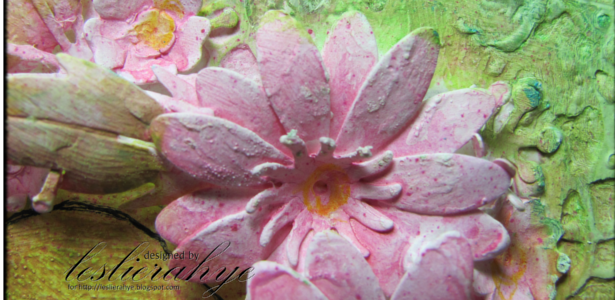
Happy Heart Tile using downloaded free digi papers and layering diecut cardboard and grungeboard to create dimension. The edges of this tile were inked with Distress Inks and embossed with clear emboss powder. The flowers were rubbed in distress inks and then spritzed with homemade glimmer mist--made by combining in a mister bottle water, a few drops of dye based ink refiller and Ranger's Perfect Pearls powder.
 |
| Happy Heart Art Tile created on 2-Hour Event for Reese's Rainbow Charity Drive |
The heart in the right hand corner is an upcycled dvd that had been split apart to reveal the mylar inside. It was inked up using Ranger Alcohol Inks. I then stamped into the ink with a stamp inked with Stazon and gently rubbed off the ink to lift the image back off the cd. Split CDs and DVDs are easily cut with Tim Holtz scissors or die cut with the Bigshot Machine into any shape you desire.
 |
| Detail of Happy Heart Tile showing altered CD heart and metal flowers. |
You can also see to the right of the heart in this detail my initials--all art-tiles need to be discretely signed in the bottom right-hand corner.
I completed the embellishing of my tile by adding a little grungeboard butterfly--as a hat tip to Cynthia Gagen,
Creative Edventures founding creator.
 |
| Detail of Happy Heart Tile showing Creative Memories Butterfly. |
Thank you for looking! I hope you participate with us in this wonderful endeavor!!
Details on participating in the charity drive can be found
here.
You may watch the play back
here.