Showing posts with label steampunk. Show all posts

Thursday, September 17, 2015

September Monthly Smeared Ink Member Blog Hop | STEAMPUNK!

Good Morning Smeared and Smudged Family! This month I'm participating in the Steampunk Members Blog Hop! I LOVE steampunk and actually host 4 or 5 blog hops a year dedicated to celebrating holidays steampunk style! I needed this hop to rewind my mind and gear up for new creative adventures coming my way. 


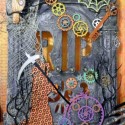
For today's tag, I started with a piece of patterned paper that I stamped across to create "background clutter". I die cut some gear shapes and inside some of them you see stamping as well. I layered my gears, added some bling and some pearls. I created some shadowy depth with sepia pastel around gears. I added some doodle lines with my PITT pen and added some steampunk washi tape and more pearls to the topper to finish off the tag!

Thank you for stopping by! I hope you enjoyed my project!
Be sure to hop to the rest of the Blog Hop Smeared Ink Family!

Leigh | Rebecca   Lyneen | Fiona | Elenor


Twitter at @leslierahye | Facebook at leslierahye.| YouTube at leslierahye | Pinterest at leslierahye

Thursday, June 25, 2015

Steampunk Cards with Rebecca Baer™

This post can now be read here.

Tuesday, February 10, 2015

love tag


Happy Tuesday everyone! Today on the Cheery Lynn Blog I am sharing a Valentine tag using the new borders die along with the Lords and Commons doily and the Lattice Heart and Vines. The base is created by die cutting the edge of the die with the Scandinavian border die and adding a bit of the Lords and Commons Doily as a topper to the tag. The lattice dies was cut and hand painted gold on the heart and green on the vines. Daisies were die cut from a book print paper and inked and painted with pink and gold. a bead was added to the center to complete the flower.

The key, lock and "love" were die cut with a neutral card stock and then hand-colored gold with creams. The "love" was added to the bottom of the tag and the key and lock tucked into the flowers. 


  Cheery Lynn Dies used
*****
Remember there is still time to join the new challenge!!! Challenge 171 is Tickled Pink There is a chance to win a $20 shopping spree at Cheery Lynn Designs. Thank you for stopping by today!


Twitter at @leslierahye | Facebook at leslierahye.| YouTube at leslierahye | Pinterest at leslierahye

Sunday, December 21, 2014

Merry Steampunk Holiday Blog Hop | Festive Fat Book


For the hop today I went to my happy place with Steampunk emboss folders, Frantage emboss powder, Cheery Lynn Dies for snowflakes and cogs and some pearl bling to finish it off! I hope you enjoy my project! Thank you for stopping by!


Be sure to stop at all the stops!! Happy Holidays to you and yours!


Twitter at @leslierahye | Facebook at leslierahye.| YouTube at leslierahye | Pinterest at leslierahye

A Very Merry Holiday Steampunk Blog Hop!

Welcome to my Annual Very Merry Holiday Steampunk Blog Hop! Happy Winter Solstice everyone! Today I am joined by several talented friends and artists as we celebrate the winter months Steampunk Style!
Sit back, relax and enjoy our festive projects!


Twitter at @leslierahye | Facebook at leslierahye.| YouTube at leslierahye | Pinterest at leslierahye

Saturday, October 25, 2014

31 Days of Halloween & a VERY Spooky Halloween Steampunk Blog Hop

During the month of October I am participating in a month-long blog hop with some amazing artists. Everyday you will find a new Halloween project on all of the blogs listed below. Each project must have stamping on it, be it digi or ink. There are prizes to win, be sure to check out all the rules HERE and information on the daily scavenger hunt is posted there! You must go HERE to find the item/s you are looking for the scavenger hunt.

Good Morning! I welcome you to my 4th Annual Very Spooky Halloween Steampunk Blog Hop. This is a special hop for me. This is where my friends joined me for the very first time to share a love of Halloween and Steampunk. My blog friends come from a variety of craft and art backgrounds and bring lots of exciting creativity to the hop! I hope you enjoy their projects today!!!

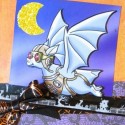
I want to start by bringing you a fantastic creation by my creative friend Vince! On the first Spooky Steampunk he created this fabulous steampunk ghost. He now has it available on his own blog...Be sure to go over there and check out all of Vince's FREE digital designs! He creates such awesome digis! I invited him to play along and he created another steampunk inspired Halloween digi and brings us this precious bat outfitted in his special steampunk flight gear!! Love him!!! Thank you VERY much Vince!!! To save, simply right click on each image and choose save image as an put into the folder of your choice.


Now take a moment to hop to each stop along the way and be sure to see my last post for my project and another give away!!! Thank you so much for joining us! Enjoy!!! Nothing says love like leaving a comment, following a blog, sharing a link! 


...and while you're hopping be sure to check out the amazing talent below!!! They're part of a crazy 31 day hop that I'm a part of this October--a month-long celebration of the Hallowed MONTH! Join us!
 photo WickedBloggerbutton_zpsbcaacb28.jpg
Smeared Ink Wicked Bloggers 2014
Julia | Lisa | Teresa | Keren | Renee | Alison


Steph | Sandy | Sarah | Stefanie | Barbara

Twitter at @leslierahye | Facebook at leslierahye.| YouTube at leslierahye | Pinterest at leslierahye

Saturday, October 4, 2014

31 Days of Halloween | Day 4

During the month of October I am participating in a month-long blog hop with some amazing artists. Everyday you will find a new Halloween project on all of the blogs listed below. Each project must have stamping on it, be it digi or ink. There are prizes to win, be sure to check out all the rules HERE and information on the daily scavenger hunt is posted there! You must go HERE to find the item/s you are looking for the scavenger hunt.
Welcome to Day 4 of the 31 Days of Halloween hop with SmearedInk.com! Today I am creating a square card with my crafty pal Vince's fantastic steampunk witch! Vince created this last year for my annual Steampunk Blog Hop for Halloween and I just LOVE her! She's precolored with or without moon back drop or black&white. This is the precolored with the moon backdrop. I created a frantage-inspired base and then layered my favorite steampunk Cheery Lynn Dies diecut in Black cardstock and heat embossed with Piccolo powders!I love the metal look of this card! I hope you enjoyed my project and will stop by again tomorrow for another project! Thank you!

 photo WickedBloggerbutton_zpsbcaacb28.jpg
Smeared Ink Wicked Bloggers 2014
Julia | Lisa | Teresa | Keren | Renee | Alison
Steph | Sandy | Sarah | Stefanie | Barbara


Twitter at @leslierahye | Facebook at leslierahye.| YouTube at leslierahye | Pinterest at leslierahye

Monday, September 22, 2014

leslierahye's Very Fall Steampunk Blog Hop

Fall greetings everyone!! leslierahye here with my Very Fall Steampunk Blog Hop! I am joined by several of my creative friends to celebrate the turning of the calendar seasons to Autumn, Steampunk-style! This is my favorite time of year and I love to pair it up with my favorite style! It's a smallish hop with talented designers, take a moment to sit back, relax and enjoy the projects! You won't be disappointed!
For my project I created a fall tag with bits of molded emboss powder steampunk gears and fantastic fall leaves created from crinkled core'dinations cardstock and die cut with Cheery Lynn Dies. These were layered on the tag and dusted with Pan Pastel. A final molded embellishnment of a clockworks reminds us of the passing of time into the Fall! 


I hope you enjoyed my tag! Be sure to hop by each stop and leave some love! We all appreciate comments!
Twitter at @leslierahye | Facebook at leslierahye.| YouTube at leslierahye | Pinterest at leslierahye

Monday, August 11, 2014

Emboss Powder Embellies

Happy Monday everyone! Today on the Globecraft and Piccolo Blog I share a steampunk fatbook page that I create using embellishments that I made with Piccolo Emboss Powders. I am a mold addict--there, I said it. I think molds are awesome...from molded food and resin projects to jewelry projects and more...molds are, simply put, FUN!


Today I used silicone molds which come a variety of ways. There are companies that make them special for embellishments and then there are food companies that make them for decorated cakes and there are also companies that sell the materials to make your own mold! I chose to use molds for crafting embellishments.I found that heating up the mold a bit before adding a sprinkling of emboss enamel helped the enamel to melt faster and stay in the mold rather than flying out! I added enamel in metal colors to the gear molds and built up my molten pile until it was near the edge of the mold. Once I was happy with the fill, I set my mold to the side to cool completely. Before popping out the embellishments, I zapped the edges of the mold one more time to melt the thin "flash". Once removed from the mold you can add more paint or colorants, sand or whatever. I like the shiny metal look of the gears but on some I zapped the top of the gear to give a textured metal look! I think these were perfect for my steampunk fatbook page~!
I hope you enjoyed my project! Thank you for stopping by today!

Twitter at @leslierahye | Facebook at leslierahye.| YouTube at leslierahye | Pinterest at leslierahye

Monday, August 4, 2014

The Keys to my Steampunk Heart

Happy Monday everyone! Today on the Globecraft and Piccolo Blog I share a steampunk jewelry project today! I love the Piccolo keys and the steampunk charm sets--it seemed only natural to create a pendant to reflect my love for steampunk!
I melted several layers of Vintage Black and when I had it nice and molten I pressed a grid stamp into the enamel.

Likewise I embossed some of the gears with Vintage Copper and added the same texture with the grid stamp.

Finally I embossed some gears with gilded rose gold and a few with Copper Kettle.

I layered the gears on the bezel and attached the bezel and some black chain to the satin cord with jumprings. The keys were embossed with Gilded Rose Gold and Vintage Copper. They were attached to the chain with jumprings. A beaded dangle was added to the chain as well!


  I hope you enjoyed my project! Thank you for stopping by today!

Twitter at @leslierahye | Facebook at leslierahye.| YouTube at leslierahye | Pinterest at leslierahye

Wednesday, June 11, 2014

Blingy Steampunk Train Card

  Happy Wednesday everyone! Today on the Globecraft and Piccolo Blog I share blingy steampunk card. I layered a background that was stamped and embossed with detail copper. The edges were distressed and embossed. Vintage black was also sprinkled in the bottom corner and embossed. 
The gears were embossed with detail black, detail copper and vintage black...the open gears were stamped with a speckle stamp while still molten. The solid gear was stamped with a detailed steam train stamp. Bling was added to the open gears by cutting apart the Bling on a Roll and gluing it down individually along the curve of the gear.
The final focal element is created by melting a pile of ultra thick black emboss powder and mixing in detail copper on a craft sheet. I stamped the steam train image into the molten powder. If you attempt this and do not like how it looks remember you can remelt it and start again! After the stamped emboss powder dries, use the scraper tool to gently lift it off the craft sheet.


  I hope you enjoyed my project! Thank you for stopping by today!


Twitter at @leslierahye | Facebook at leslierahye.| YouTube at leslierahye | Pinterest at leslierahye

Tuesday, June 10, 2014

Dream Big Steampunk Dreams


 Happy Tuesday everyone! Today on the Cheery Lynn Blog I share a card of encouragement to Dream Big! I love the steampunk feel of this image and thought it would be great on the step-card base with some of my favorite steampunk dies and the Dream Big Sentiment!


Cheery Lynn Dies used


*****

Remember there is still time to join the new challenge!!! Challenge #136 is  Creative Corners There is a chance to win a $20 shopping spree at Cheery Lynn Designs. Thank you for stopping by today!

Twitter at @leslierahye | Facebook at leslierahye.| YouTube at leslierahye | Pinterest at leslierahye

Wednesday, May 21, 2014

Queen Bee Tag


  Happy Wednesday everyone! Today on the Globecraft and Piccolo Blog I share with you a steampunk tag that I created that could be added to a gift or scrapbook page or card! Piccolo powders come in a variety of "metals" which makes creating steampunk crafts super easy!


I stamped my tag with a chickenwire background stamp and embossed with MicroWhite. I then rubbed chalk ink over the cooled embossing and buffed with a dry cloth...the Micro White gives a resist appearance on the tag. Next I added a torn piece of patterned paper and added more distress inking. I heat embossed elements from the Steampunk Airship Accents set with Victorian Bronze. One of the scroll elements was placed at the top of my tag. Another of the same element was trimmed and used below the wooden bee that I also embossed with Victorian Bronze--the Enamel Powder Adhesive works great on all surfaces, including wood! Smaller bits from the Steampunk Airship Accents were layered with a rhinestone from the Bling on a Roll added to form a "crown".
Pieces from the Vintage Gears--including a negative gear--were embossed with Vintage Black, Real Rust and Vintage Copper and then layered on the tag and a strip of Bling on a Roll was added to the bottom of the card!
Globecraft & Piccolo Products used
Enamel Powder MICRO WHITE
Enamel Powder REAL RUST
  I hope you enjoyed my project! Thank you for stopping by today!

Twitter at @leslierahye | Facebook at leslierahye.| YouTube at leslierahye | Pinterest at leslierahye
Wednesday, April 23, 2014

Never Give Up!


  Happy Wednesday everyone! Today on the Globecraft and Piccolo Blog I share with you a card that would be great for a graduation or any other note for some accomplishments. I love the sentiment "The impossible is often the untried." This card is LAYERED with yummy emboss powders for a masculine steampunky grungy feel.


The front of the card is created using a gear stencil...I applied Enamel Powder Adhesive over the stencil and dusted with Real Rust powder. I heat set the powder and then edged the card stock with the adhesive making wider patches in places. Mermaid Tears was layered on top, leaving translucent patches on the stenciled background. I love the chunky glitter in Mermaid Tears and it's translucency--you can see the background through the emboss enamel.

The focal piece was created by stamping the sentiment and embossing it with Micro Black first and then masking the sentiment to stamp the rest of the images. That was also dusted with Micro Black and heat set. The card was colored with watercolor washes and mounted on a piece of card stock edged with Victorian Bronze. 

The inside of the card has a layered strip--edged with Victorian Bronze and a large panel stamped on the edge with brushes--and embossed with Victorian Bronze. This panel was also edged with the Mermaid Tears  to tie it into the front of the card. The focal panel was placed so that it extends over the edge of the shortened front and over the stamped side panel.

Globecraft & Piccolo Products used
  I hope you enjoyed my project! Thank you for stopping by today!

Twitter at @leslierahye | Facebook at leslierahye.| YouTube at leslierahye | Pinterest at leslierahye