Wednesday, August 28, 2013

Weekly Challenge | Make the Cut!

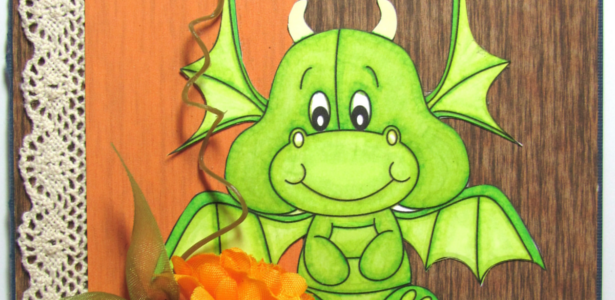
It's time for a new challenge with Digital Delights by Louby Loo! This week at Delightful Challenges our challenge is Make the Cut--use die cuts, decorative scissors and punches! I used my favorite Festive Flamingo along with some fabulous Cheery Lynn doilies and snowflakes to create this fun festive holiday card! I LOVE how it turned out and I hope it brings you happiness too! Thank you for looking!|

for this card 
Digital Delights Stamps : Festive Flamingo
Card stock : Bazzill and Neena
Markers : Spectrum Noir [IG2, BT1, LG3, OR1, PP5, IG8]
Accessories :  Art Glitter Designer Dries Clear adhesive,  Cheery Lynn Dies, 3D Zots
a ~St It Sc
rap It hThis weeks theme :
Make the Cut!
(use die cuts, punches, decorative scissors)

Challenge Rules below
Our Delightful Sponsor this week is our very own

Prize 
are It
Now it's Your Turn!
You are not required to use a Digital Delights 
Image to join in the fun 
but if you do, you can enter THAT project TWICE.
To enter twice when using a Digital Delight image,
for your 1st entry use your card link.
For your 2nd entry use your blog address
 and add "2nd entry" after your name

Otherwise, only ONE entry person
**Please be sure to follow the challenge theme and rules or it will be removed.

Monday, August 26, 2013

Altered Pages' Two for Tuesday with Bombshell Stamps! | Cowgirl's Misbehaving!

Welcome to my stop on the Hop! This is leslierahye and I'm a proud part of the fantastic AlteredPages.com design team. This is the first opportunity I've had to create with these cheeky digital stamps and so I chose the Bucking Bronco stamp to create this tag "Save a Horse...Ride a Cowboy!"  I hope you enjoy my tag!
Save a Horse Ride A Cowboy
Supplies Used :
Wanted Poster & Bucking Bronco from Bombshell Stamps
Collage Sheet Vintage Cowgirls from AlteredPages.com
supplies from AlteredPages.com:
Maya Road Mists : Gunmetal and Antique Copper
Tag Stock
Faber-Castell PITT Pen small
Additional supplies : 
Distress Glitter
Vintage Photo Distress Ink
Petaloo Flowers
Art Glitter Designer Dries Clear Adhesive
Zots 3D Glue Dots
Spectrum Noir Pens [ EB1, EB2, EB5, GB8, TN7, DR1]

Be sure to check out the rest of the designers from both teams!
So what are you waiting for let's get hopping!
Start at

and then hop onto our Design Teams Blogs
Gia Lau

and finish back here at
Altered Pages Blog

Altered Pages is giving away a prize...check out the details on the Altered Pages Blog!

Saturday, August 24, 2013

Dreaming of Snow

August and September have me thinking of school but also dreaming of SNOW! In Texas these ARE the Dog Days of Summer and it is often miserably hot and humid. Even though I'm a Texas girl, I LOVE LOVE LOVE snowflake imagery in art!Today I am using one of my favorite Cheery Lynn Dies---the 4×4 Snowflake die. It has several intricate and different flakes that are beautiful and can be easily stacked to make cool 3-D images. ALSO I'm using the Felicity Doilies which are perhaps my favorite doilies. I've created a little snowflake element for the tag using two of the Tiny Felicity doilies and some simple folding. I hope you enjoy my project!


supplies used
Mono Aqua Glue
Circle Punches
Bazzill Basics CardStock
Queen & Co. Trio Bling

Shop Cheery Lynn Designs
This week the challenge at Cheery Lynn Designs is
Doilies
Here are the rules:
  • You MUST follow the theme and use at least one Cheery Lynn Designs die, of course, we would love to see more than one. 
  • You MUST add a link to your blog post in the InLinkz at the end of this post; no back posting, only new projects are allowed
  • You MUST link to this challenge in your blog post or on your gallery post
  • You may only enter the challenge ONCE per week.
The winner will be chosen based on merit by Cheery Lynn Designs. They will receive $20 towards shopping at the Cheery Lynn website. The challenge will end on Saturday night at  6 p.m. EST

Tutorial with Digital Delights | Fancy Flap Card


Happy Saturday! On Tuesday I shared a tutorial on how to create this simple fancy fold that can be used to highlight a focal image!

I hope you enjoy my tutorial! Thank you for looking~

For this project
Jubbly hippo
Jubbly Hippo

Tuesday, August 20, 2013

Be the Change ATC

Happy Friday everyone! Altered Pages has a number of metal sheets that are perfect to use with your emboss folders and markers to create stunning effects and embellishment. With your alcohol markers you can customize all of your charms and embossed bits to match any project. Alcohol inks/markers are not just Copics and Ranger inks but also Spectrum Noir, BIC Mark-its and Sharpies! Use 91% Isopropyl Alcohol for your "blending solution" to get cool dropped effects and blends. 

I would recommend coloring your metal black before running it through and then add other colors back on. and flick on alcohol with a tooth brush or paint brush! Metal bits are easily adhered to any surface with your favorite heavy body glue. 


Monday, August 19, 2013

Tutorial | Mixed Media Initial Canvas with Design Memory Craft Faber-Castell

Good evening everyone! leslierahye here to share with you this fun canvas that I made for my Samantha [aka Fancy Pants] with the beautiful Cheery Lynn Designs Dies and the scrumptious Faber-Castell Gelatos and Aquarelle Watercolor Pencils. We have been redoing the kids' room and the wall just screamed for some initial art! I hope you enjoy my project!
To create your own initial canvas
Assorted Cheery Lynn Doily and Flower Dies
8×10 canvas
empty mister bottles
Water Brushes
gesso
Beacon Fast Finish Decoupage
Beacon 3-in-1 

I gathered my supplies and my white hand-crafted flowers and doilies.

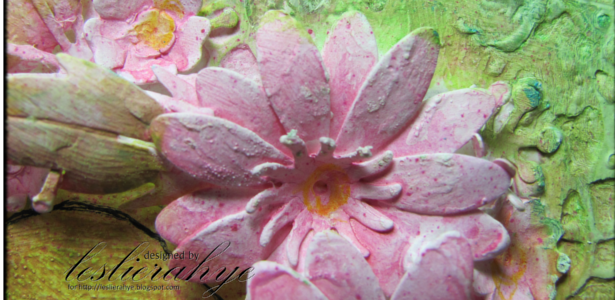
Before I got started gluing, I created a pink mist with the Watermelon Gelato. I sliced off some of the creamy Gelato into thin slivers and placed it into a mister bottle. I then added water and used a small stick to stir the mixture--helping to breakdown the Gelato further by mashing the stick against the side of the mister. When I thought it was dissolved enough, I gave the mister a good shake to disperse the color throughout.

Next I printed an outline of the letter "S" using my Publisher program. I choose the free font Big Top for my design. I sized the letter to about 650 points to fill the canvas. Once printed I tested out the flowers to see if they would fit nicely in the space I had. 
Next I trimmed out my initial to make it easy to trace and laid out the entire canvas with the doilies, the "S" and the flowers. Once I liked the positioning, I traced the letter onto the canvas with a pencil.
With Beacon Fast Finish Decoupage I glued my doilies firmly to the canvas and let them dry.
Next I attached my flowers using Beacon 3-in-1. I started with the big flowers first and then added leaves and smaller flowers until I was happy with the placement.  I set the canvas aside to dry for a little bit.
 
It is now time to coat the ENTIRE canvas with gesso! This coating gives the WHOLE canvas the same finish so the different mediums will act similar over the entire surface. This also provides the opportunity to create some "bubbles" with the heat tool and add an extra fun texture.  But more on that later!

Now the REAL FUN begins! Get out your Gelatos! I started with Margarita Mix and Snow Cone and colored direct to canvas around the "S" concentrating the Snow Cone color on my doilies.. Next I spritzed water onto the canvas to activate the Gelatos and painted the color until smooth all over the canvas leaving the flowers alone. As the colors around the doilies blended, I added back over the top more of the Snow Cone to make them bluer. 
Once I was happy with the background, I picked up the Gelato mister that I created above and sprayed the "S". I added color in layers, drying with my heat tool between layers. I allowed some over spray to stay on the canvas but if it got too thick I simply dabbed it with a dry cloth to pick up the extra.
While drying, I concentrated some heat around the doilies to bubble up the gesso that got stuck in the details of the die cut. I love these little bubbles that remained.
Once dry, I came back to the flowers with yellow and turquoise Faber-Castell Aquarelle pencils. I put yellow on some of the flower centers and yellow and turquoise on the leaves. I activated the watercolor with a water brush leaving the centers with a hint of yellow and the leaves with a hint of green. I finished with the coloring by adding a swipe of the Coconut white Gelato to the centers of the big flowers to bring in a small highlight! 
You know I'm not done until I've added a little doodle. As a final touch, I doodled with my Faber-Castell PITT Artist Pen in Black Small in a few areas around the "S". These pens are perfect as they are waterproof India Ink and come in several sizes for your doodling needs! 

I hope you enjoyed my project! Thank you for stopping by!

Saturday, August 17, 2013

Fun with Letters Challenge!

supplies used
8×10 canvas
gesso
Beacon Fast Finish Decoupage
Faber-Castell Gelatos : Coconut, Watermelon, Margarita Mix and Snow Cone
Faber-Castell Art Grip Aquarelle : 108, 156
Faber-Castell PITT Artist Pen Black S

Shop Cheery Lynn Designs
This week the challenge at Cheery Lynn Designs is
Fun with Letters
Here are the rules:
  • You MUST follow the theme and use at least one Cheery Lynn Designs die, of course, we would love to see more than one. 
  • You MUST add a link to your blog post in the InLinkz at the end of this post; no back posting, only new projects are allowed
  • You MUST link to this challenge in your blog post or on your gallery post
  • You may only enter the challenge ONCE per week.
The winner will be chosen based on merit by Cheery Lynn Designs. They will receive $20 towards shopping at the Cheery Lynn website. The challenge will end on Saturday night at  6 p.m.

Friday, August 16, 2013

Altered Domino Fun with Altered Pages Challenges

 I've been wanting to play with altering dominoes and trying my hand with soldering. For my challenge project I decided to combine the two with the Green Challenge going on over at the Challenge Blog at Altered Pages.

I began by marking the back of a domino where I wanted to drill holes. I began with my pointy file and drilled a shallow hole as a pilot for my hand drill. 

Next I hand-drilled the 4 holes that I had marked on my domino. Once I had a domino with holes, I wired the bale onto the top of the domino leaving room to solder my metal rose and wings onto it.
Next I added loops across the bottom of the domino to attached dangles of charms from my stash.
I colored the domino with my alcohol markers and added a sticker from one of the vintage sticker sheets from Altered Pages and applied Fast Finish Decoupage over the top. 
A sheer green ribbon finished the necklace. 


I hope you enjoyed my project. Be sure to enter the Challenge by August 30th to enter to win! Details are available on the blog.

Wednesday, August 14, 2013

Weekly Challenge | Anything But A Card

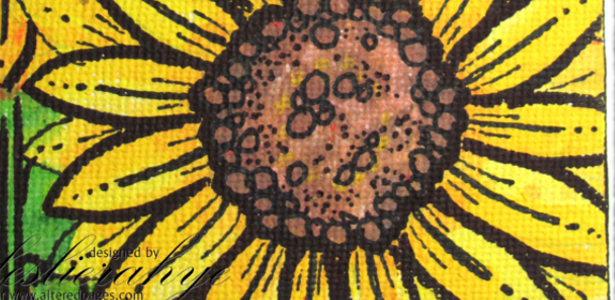
It's time for a new release and a new challenge with Digital Delights by Louby Loo! This week at Delightful Challenges our challenge is Anything But a Card! I chose to make a garden stake for my sunflowers with the precious Flower Power Sunflower! I hope you enjoy my project! Thank you for looking!


Digital Delights StampsFlower Power Sunflower
Card stock : Bazzill and Neena
Markers : Spectrum Noir, Faber Castell PITT
Accessories :  Tombow Aqua, diecuts foam tape
a ~St It Scrap It
This weeks theme :
Anything but a Card!

Challenge Rules below
Our Delightful Sponsor this week is


Prize 
$15 store gift card hare It


Now it's Your Turn!
You are not required to use a Digital Delights 
Image to join in the fun 
but if you do, you can enter THAT project TWICE.
To enter twice when using a Digital Delight image,
for your 1st entry use your card link.
For your 2nd entry use your blog address
 and add "2nd entry" after your name

Otherwise, only ONE entry person
**Please be sure to follow the challenge theme and rules or it will be removed.

Wednesday, August 7, 2013

Weekly Challenge | Make it Pop!

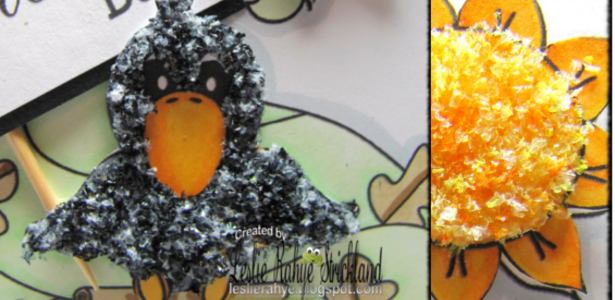
It's time for a new release and a new challenge with Digital Delights by Louby Loo! This week at Delightful Challenges our challenge is Make it Pop! You can add dimension with foam tape or some other substance or use layers. I have highlighted a few elements with my homemade flower fluff---if you've missed the tutorial it's linked in the list below the photo. I LOVE this months cupcake digi--Wendy has been making one for each month. They are precious. This one is all about fall and has sunflowers...well by now you KNOW about the thing I have for sunflowers! Have a FABULOUS Day!! I hope you enjoy my card! Thank you for looking!

Have a Fabulous Day by leslierahye
Digital Delights Stamps : August Cupcake Set
Card stock : Bazzill and Neena
Markers : Spectrum Noir [GB1, GB2, GB4, GB5, GB10, OR1, OR2, GG1, LG1, LG2, LG3, CG4, IG5, EB1, EB2, EB7, EB8, EB10
Accessories :  Tombow Aqua & Scrapbook Adheasives, Homemade Flower Fluff
a ~St It Scrap
This weeks theme :
Make it Pop!
add layers or use dimension

Challenge Rules below
Our Delightful Sponsor this week is
Prize:  to be determined
 It hare It
Now it's Your Turn!
You are not required to use a Digital Delights 
Image to join in the fun 
but if you do, you can enter THAT project TWICE.
To enter twice when using a Digital Delight image,
for your 1st entry use your card link.
For your 2nd entry use your blog address
 and add "2nd entry" after your name

Otherwise, only ONE entry person
**Please be sure to follow the challenge theme and rules or it will be removed.

Tuesday, August 6, 2013

Bloom Obsession!!


Friday night on my Crafty Gig  I shared with you these awesome dies that I've added to my tools from Cheery Lynn Designs.They have a whole set of Build a Flower dies that when used together create fantastic handmade flowers. While creating these flowers, I experimented with a process for making a flower fluff product for use with my flowers that I had seen on Pinterest. I have since added a micrograter to my tools and perfected the process for creating the flower fluff. I hope you enjoy the replay of my Friday night show--embedded below--along with the quick and easy tutorial on the Digital Delights Tutorial Blog where I show you how to make your own fluff!


Cheery Lynn Dies used


***Tuesday Tutorial with Digital Delights by Louby Loo***

Happy Tuesday Tutorial! Leslie-Rahye here to share a super easy method for creating a flower fluff product for use with your cards and paper crafting. I think it's perfect for use with Wendy's digital stamps for adding a textured dimension.

Check out the how-to video on our Tutorial Blog or here

I hope you enjoy my tutorial! Thank you for looking~

Thursday, August 1, 2013

Weekly Challenge & New Release | You're Super!

It's time for a new release and a new challenge with Digital Delights by Louby Loo! This week at Delightful Challenges our challenge is You're Super! The new release is just awesome--full of superheros of all kinds! I love it! They are also great for shaped cards. I love making shaped cards for kids. I did a tutorial a while back for the Tuesday Tutorial where I share how easy it is to make a mat for your shape with a small washer...I've added the tutorial below! I hope you enjoy my card! Thank you for looking!
Digital Delights Stamps : Bat Brian
Card stock : Bazzill and Neena
Markers : Spectrum Noir
Accessories :  Beacon 3in1


We have a great new release and a new challenge for you this week.
This weeks theme :
You're Super
(add a star or sparkle)
Challenge Rules below


Your Prize!!!
**coming soon**

About us - Crafty Ribbons is a ribbon emporium, we are passionate about ribbons and want to share our fantastic ribbons with others. Our range of Christmas ribbons is second to none.
Remember when we only used ribbons to add a bow to our hair, or tie up a birthday parcel? Ribbons are now a "must-have" for all types of craft. Whether your project requires satin, sheer, silk, grosgrain, gingham or polka dot ribbon we have them all! Lots and lots of different colours in a range of widths.
Need a little bit of ribbon inspiration - then have a look at our projects on our blog,or visit our Inspiration blog,or maybe join in with us at our Challenge blog. Go on, have a look... It's worth it !
Tony & Ali
Website: www.craftyribbons.com
Visit our blog http://blog.craftyribbons.com
Inspiration Blog http://craftyribbonsinspiration.blogspot.co.uk/
Challenge Blog http://craftyribbonschallenge.blogspot.co.uk/

Now it's Your Turn!
You are not required to use a Digital Delights 
Image to join in the fun 
but if you do, you can enter TWICE.
To enter twice when using a Digital Delight image,
for your 1st entry use your card link.
For your 2nd entry use your blog address
 and add "2nd entry" after your name
**Please be sure to follow the challenge theme and rules or it will be removed.