Saturday, April 30, 2011

Nicolette's Mom's Day Blog Hop | Day 1

Welcome to Nicolette's 2-day Mom's Day Blog Hop! I am thrilled to be a part of this wonderful blog hop with nearly 30 talented crafters!! If you arrived here from Martha's blog  you are in the right place! If you just happened to my blog in mid-hop and want to start from the top, Nicolette's blog is the starting point and can be found here.


For Mother's Day I wanted to make a special handmade gift for my Mommie who appreciates the handmade more than the store bought. I've had some little Dollar Tree boxes that I've had for years and I knew that I wanted to incorporate them into my Mother's Day gift. Magnetic closure wooden boxes, a little Ceramcoat Gleams, some remnant cheetah print plush fabric that my boss gave me and a lot of tangling went into this trinket box!

details of sides
I began by painting a single coat of the Ceramcoat Gleams in gold on the box with a spongbrush. I love this paint because it allows the grains of the wood to show through with giving the box a seal so that the BIC Mark-It's wouldn't bleed when applied to the wood. And the paint gives the wood a nice golden glow.
detail of flowers on top with ladybug
I lined the inside of the box with the plush cheetah fabric adheared with Beacon 3 in 1 Craft Glue--a favorite of mine for many applications including paper crafting or all sorts and wood and fabric crafts.
details of flowers on top with MOM.
I have been completely absorbed with tangling flowers this spring and this project was no different. My Mommie loves flowers and I enjoyed covering the top of the box with a variety of stylized flowers. Little ladybugs sneak into the design and of course the word MOM popped in there for added enhancement.

 The sides of the box include some of my favorite tangles and some new-to-me ones that I enjoyed trying out on this fun box.

I hope you stop by tomorrow to see what I plan to put into the box for my Mommie for Mother's Day!

Thank you for stopping by. I hope you enjoyed your stop! I have a $15 gift certificate that I am giving away in honor of Nicolette's Mom's Day Blog Hop! It is to my FAVORITE papercraft store that just happens to be owned by my Mommie!!! Cutnpastememories.com carries the glue I used in this project as well as the tools I used to cut the fabric. They carry all of your papercrafting supplies and if there is something you need that you don't see in the store, the awesome news is that they will special order things in for you too!!!

To be in the random drawing for the gift certificate, become a follower and add your comment to this post or to tomorrow's post and you will be in the drawing!!! It's that simple! I hope you decide to play!


The next stop on the hop is Kathryn's blog.
Thursday, April 28, 2011

Weekly Challenge | Distressed

You're My Knight in Shining Armor
CS AND PAPERS: Bazzill Basics, Miss Elizabeth paper
INK: Walnut Stain Distress Ink
MARKERS : BIC Mark Its
SPECIAL TECHNIQUES (if any): Distressing with sanding, crumpling, misting, inking edges

This week at Delightful Challenges, we would love to see some DISTRESSING somewhere on your project.
You do not have to use a Digital Delights image to play but if you do you will receive two entries. Just add your card twice to inlinkz to enter twice you need to when you use a Digital Delight image 1st entry use your card link, 2nd entry use your blog address and add 2nd entry after your name
We have a Wonderful Sponsor this week


THE BEARY SCRAP with a $20.00 Gift Voucher to their store.

Tuesday, April 26, 2011

I Hear You're Dragon | Get Well Soon

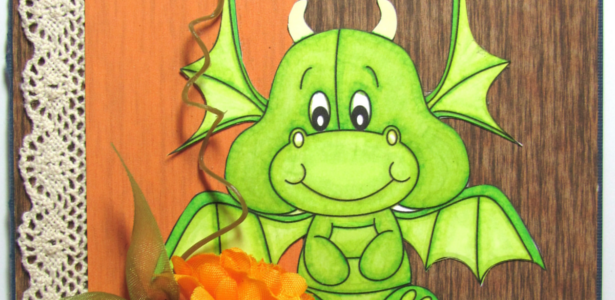
I learned this weekend that one of my Design Team sisters over at Digital Delights by Louby Loo is under the weather and I thought this cute dragon card with Augustus the Dragon might cheer her up!
I love all things dragon and love the pun "I Hear You're Dragon" as the sentiment, which was easy to make with the blank circular sentiments digi stamp.
I hope Lisa loves the card and that the sentiment helps her heal! Get well soon! Thank you for looking, I hope you enjoyed the card!

CS AND PAPERS: Bazzill Basics
INK:  Walnut Stain Distress Ink, SU Rich Razzleberry
MARKERS: BIC Mark-Its
ACCESS. AND EMBELLISHMENTS: Bias Tape, glitter glue, Circle Punch and Heart Punch, Glossy Accents

Sunday, April 24, 2011

Happy Easter!

I spent a relaxing day with my family. I had a wonderful morning with the kids and their baskets. The egg hunt gets FASTER every year. Delicious yumminess came from the kitchen. To wind down the evening after a relaxing day, I zentangled one of our boiled Easter eggs with BIC Mark-Its and Zig Millenium pens. I really like how it turned out! I hope you do too!
I hope your Easter was glorious! Have a great week!

Saturday, April 23, 2011

Tangled Eggs for a Pre-K Egg Hunt


Friday was my daughter's 1st school Easter Party and of course we all brought eggs to "hide" for the kids. Sam decided the eggs she brought needed to be pink and purple and that we needed to tangle on them. they say "Be the best BEE you can be!" [the slogan for the Yellow Jackets at the elementary schools.] Each have soo-flowers and various other tanglations. I used a BIC Mark-It to tangle on the plastic eggs.
pink tangled eggs
purple tangled eggs

Thursday, April 21, 2011

Festive Friday Blog Hop #8| House Mouse Double Joy

I am so excited to be part of the Festive Friday Blog Hop hosted by Terri Sproul. This bi-monthly blog hop features Holiday cards from 13 talented card crafters and I'm proud to be among them.
If your reached this stop from Fab's blog Fab's Big Christmas Card Challenge , then you are in the right spot! If you would like to start from the beginning, you can return to Terri's blog.
Shared Joy House Mouse Christmas Card

For this 6×6" card I used my favorite stamp subject : HOUSE MOUSE by Stampabilities.
I colored this image with Prismacolors using Gamsol Blending Solution.  The pine branches are highlighted with PKGlitz Egyptian Treasures. The ball is made to look like glass with the help of Diamond Glaze. I attached the image to its mat with matte-finished Bazzill brads. The tomato Bazzill Cardstock was edged with Ceramcoat Gleams in gold. The sentiment was colored with Green and Red markers, matted and attached with foam tape to the front on top of the green hemp twine.
Thank you for stopping by and I hope you enjoyed my card.

The next stop on the hop is Debbie Feist's blog. If you get lost on the way, the entire list is on the right hand side of the blog under Festive Friday Blog Hop!


Weekly Challenge | Paper PieRcing

This week's challenge at Digital Delights by Louby Loo is Paper Piecing OR Paper PieRcing. I love using the Tim Holtz ruler to pierce paper as it creates even holes with very little effort. and of course I had to bling out my Myrtle with the gelly roll glitter pen! I hope you enjoy USA Myrtle the Turtle! Thank you for stopping by!


USA Myrtle the Turtle

ALL DDSTAMPS USED: USA Myrtle, Stars and Stripes Forever Sentiment
CS AND PAPERS: Coredinations and Bazzill Basics
MARKERS (if any): BIC Mark-Its
ACCESS. AND EMBELLISHMENTS: bling, Bazzill Buttons, cotton embroidery thread, Gelly Roll Glitter Pen
SPECIAL TECHNIQUES (if any): Piercing using Tim Holtz Paper Piercing Tool and Ruler


You do not have to use a Digital Delights image to play but if you do you will receive two entries. Just add your card twice to inlinkz to enter twice you need to when you use a Digital Delight image 1st entry use your card link, 2nd entry use your blog address and add 2nd entry after your name We have a wonderful sponsor this week,


Digital Delights is offering a $10 certificate to thier store!!!

Wednesday, April 20, 2011

Eggstra Special Thanks!

Eggstra Special Thanks!
 I have had the great fortune of meeting some really sweet people over these last few months in the online community. Several of them have become good friends to me and they continually offer support for my crafty efforts. One good friend is often sending me the cutest cards and this week surprised me and my daughter with a care package filled with another super cute card and all kinds of handmade and papercrafty goodies! I was overwhelmed by her generosity and spirit--it really made my day super special! Thank you Sigrid!

To show my thanks, I have made her this darling bunny card using Digital Delights Digi Stamp from the Snuffles and Sookie Easter Set and my favorite Easter sentiment You're Eggstra Special. I colored Snuffles with BIC Mark-Its and accented the stamp with glossy accents, gelly roll glitter pen, wiggle eyes, and bling. I made hotpink "flocking" by trimming down a hotpink pompom and adding crystal lacquer to the nose and piling on the "flocking." I gently swept away the excess. The Bazzill Buttons are some of my favorite but these light tan buttons really did not match the tan of my bunny...so I colored them with the same marker I used on my bunny which easily stuck to the non-porous surface since BIC Mark-It's are alcohol based. Finally I added a little strip of layered cardstock wtih some bling to the interiour of the card to give it a little extra something.

I hope you enjoyed my card! I really hope Sigrid loves it! Thank you again! You are truly a special friend!

special details

Tuesday, April 19, 2011

Weekly Challenge #18 | Eggcellent!

This week's challenge at Laura Harms' blog I am the Diva CZT is all about EGGS! What a fun way to get ready for Easter. Inspired by Pysanky - the art of Ukrainian Easter Eggs--we are making our own tangled eggs...I know I plan to tangle some of our "huntin' eggs" but for now this paper one will have to do!
Eggcellent!
My papercraft friend Deanna also does Pysanky eggs and they are GORGEOUS!! Go visit her blog and look around at her beautiful eggs!!
Go on over to Laura's blog as she has an AWESOME link to Pysanky designs!

Monday, April 18, 2011

Come2Crop | National Scrapbook Day 05/07/11


Join me and the Creative Edventures Team for our first ever Virtual Crop! Lots of cropping, sharing, demos, laughter and fun!!! OH!! and there will be giveaways!!! See you there!

Sunday, April 17, 2011

Spring in Texas 2011

Images I've taken of a few of the local spring flowers.

First Daffodil blooming in the front yard

First rose on our rose bush.

Breathtaking wildflower on the side of the road.

Friday, April 15, 2011

Paper Cranes for Japan

Helping Japan one crane at a time

On March 11,2011, Sendai, Japan suffered a massive earthquake which resulted in a devastating tsunami along 180 miles of coast.  The devastation of this land is unbelievable. In reponse, Students Rebuild partnered with DoSomething.org to provide a way for students worldwide to help support their peers in Japan.
It's simple. Make paper cranes. The Bezos Family Foundation has pledged $2 for each crane recieved to the Architecture for Humanity's reconstruction effort in Japan. By reaching 100,000 cranes, the Bezos Family Foundation will donate $200,000 to the efforts in Japan and the cranes will be woven into an art installation as a "symbolic gift from students around the globe to Japanese youth."

I went this morning to fold cranes with the children at my son's school! We followed the directions on the Student's Rebuild website to complete the cranes which will be mailed next week! The kids LOVED the idea that their art would help bring much-needed relief to victims in Japan. What a great day!

I would like to offer a special thanks to Staples Stephenville for their help with this project! Thank you for looking! I hope you enjoyed your visit!

Thursday, April 14, 2011

Weekly Challenge | Easter

Barnaby Bunny Topper Card

ALL DDSTAMPS USED: Barnaby Bunny Topper, Happy Easter Sentiment                
CS AND PAPERS: Bazzill Basics, Easter Kids Digi Paper Pack
INK:  SU Classic Pirouette Pink
MARKERS (if any): BIC Mark-It's
ACCESS. AND EMBELLISHMENTS: Ribbon, Bling, pompom, Diamond Glaze, Foam Tape
SPECIAL TECHNIQUES (if any): GIMP software to add sentiment to topper, 3D layering with foam tape

Since Easter is just around the corner, Delightful Challenges just had to make this week's theme all about ....

EASTER

You do not have to use a Digital Delights image to play but if you do you will receive two entries.

Just add your card twice to inlinkz at the Delightful Challenges Blog

to enter twice you need to when you use a Digital Delight image

1st entry use your card link,

2nd entry use your blog address and add 2nd entry after your name

We have a wonderful sponsor this week,

Tuesday, April 12, 2011

Throwback Tuesday | Sam's Fairy Party Part I

For my daughter's birthday, she wanted a Fairy Birthday Party. She has always been fascinated by the fanciful and loves all things wings.  Her brother wanted to play a huge role in the making of the party items and invitation and I loved collaborating with him on this project. A lot of  detail went into the planning of this party to make it a spectacular fairy wonderland. In order to focus on all the details, I've divided this post into 3 parts--the first part today covers the invitation, general guest preparation and the cake. Part 2 will cover the decorations and fairy environment. Part 3 will include a tutorial on wing construction.

For her invitation, Will and I illustrated a Fairy Story  inviting folks to come to the secret location of the fairies.
title page of book
 We began by making individual illustrations of the various fanciful creatures that would be in fairy books. I did some of the watercolor drawings and Will did others. We merged them together to form the illustrations of the book.
opening of book featuring art from Will and myself
 Once the illustrations were merged, the book was designed in Publisher and written about Samantha and the party. The book was bound using the Bind-it-All with pink coils. the covers of the book were bookboard covered with pretty paper.
another page of book featuring Will primarily
additional characters featured on other pages in the book
Fairy wings were made for each party-goer out of acetate, alcohol inks, tissue paper, paint and glitter. A tutorial for the process of making the wings will be in the 3 part of this post.
The guests faces were painted when they arrived using Crayola watercolor paint and soft bristle brushes..

Sam and Will outfitted with their wings and faces painted
 The cake was a two layer round strawberry cake with buttercream icing, embellished with fresh flowers and green icing! YUM!

The backyard was transformed into a fairy paradise...below is a hint of what is to come in Part 2--Fairy Sam is relaxed eating mini marshmallows at a fairy feeding station...several of these were positioned around the yard to attract fairies to the area!
A great time was had by all...look for more on the fairy party on another Throwback Tuesday!


Thank you for visiting I hope you like what you see!

Monday, April 11, 2011

Weekly Challenge #17 | 15 Minutes of Fame

This week Laura Harms' weekly Zentangle challenge asks us to spend only 15 minutes on our tangle!

At first I was a bit timid, as I KNEW I would in no way be able to fill in the solid tile as I am known to do. Then, I was intrigued as I would be forced to stay within time constraints--something I have been striving for my offspring to do efficiently. HA! I thought, good practice to show it is attainable, completing a task--even a tangle--in an alotted time period!

So, I present to you my 15 Minute Tangle. I hope you enjoy it!
15 Minute Tangled Pod

Saturday, April 9, 2011

In Honor of my Dad Blog Hop | Day 1


Welcome to Jennifer Anderson's In Honor of my Dad Blog Hop! This celebration of dads runs from 9-10 April! There are over 20 crafters with lots of cards to look at! Some will be showing more than one project during the hop, including me, so be sure to check back for new inspiration!

If you came to this hop from Shannon's blog then you're in the right spot! If you wish to start from the beginning hop over to here.
One of the items I made for this hop was a handsome little treasure box for Dad to keep anything small in--change, medicine, or a key. This altered tin was made from a BB ammo box. I layered paper on the box with mod podge. I added painted texture with Gold Gleams paint and bubble wrap plastic. I gave the box a darker tone with Distressed inks in Walnut Stain. Buttons Galore buttons and a Jeni Bowlin chipboard button were layered on the lid and adhered with Diamond Glaze. I hope you in joy this little treasure box! Thank you for looking! 

Be sure to check below if you get lost on the hop. Alina's blog is next on the list! Hop on over there to see her wonderful birthday creations!

Please become a follower if you like what you see!

 Roll Call

Friday, April 8, 2011

Spring Sky

spring skies

Thursday, April 7, 2011

Weekly Challenge | Sun, Sea and Sand & New Release!!!

Thank you all for joining us. For this week's challenge we want to see SUN, SEA and SAND to help celebrate our new releases over at Digital Delights by Louby Loo!!I have created a gate-fold card using Presley the Pirate, Ahoy Matey Paper Pack and the new matching Accessories Set and Sentiment Set. I love these sweet pirates and I hope you do too! Thank you for looking I hope you enjoy my card!
Presley the Pirate You Had Me At Ahoy!

CS AND PAPERS: Bazzill Basics, Ahoy Matey Digital Paper Pack
MARKERS : BIC Mark-Its
ACCESS. AND EMBELLISHMENTS: Ribbon, Diamond Glaze, Pearl Gelly Roll, Foam Tape
SPECIAL TECHNIQUES: gate-fold card

Photobucket

You do not have to use a Digital Delights image to play but if you do you will receive two entries.

Just add your card twice to inlinkz
to enter twice you need to when you use a Digital Delight image
1st entry use your card link,
2nd entry use your blog address and add 2nd entry after your name
We have a wonderful sponsor this week,


Simon Says Stamp is offering a $20 Certificate to the lucky winner

Wednesday, April 6, 2011

Creative EdVentures Special Event | Reece's Rainbow Art Tiles

Last night I joined Cynthia Gagen on a special Creative EdVentures Webcast to share a project that is near and dear to our hearts. Marion Smith of A Piece of Craft shared her passion for this charity and challenged everyone she knows to participate in a artistic endeavor to create collages from 4×4" art tiles that will then be auctioned off to raise funds for this deserving charity. Reece's Rainbow helps orphaned special needs children get adopted into loving families. It is our hope that we will raise enough money to help get several children adopted! Details on the inspiration for the Creative EdVentures Challenge can be found here.

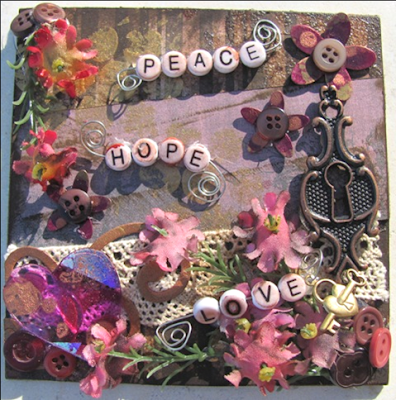
In addition to sharing the Peace Hope and Love Tile, I shared how the metal flower and colored plastic letter beads were made. Additionally I created on camera the Happy Heart Tile, sharing a few more fun tips.
Peace Hope Love Art Tile for Reece's Rainbow Charity Drive
 All tiles are constructed on 4×4" chipboard. Cutnpastememories.com is providing a great deal on precut chipboard squares that you can use for your art tile.

For my Peace, Hope, Love Tile, I layered free digi papers with ink and lace and fun flowers that I rubbed in ink as well. My embellishments for this tile included diecut swirls, buttons from Buttons Galore and Maya Road metal flowers. I completed the embellishing with charms and wire from my stash.
detail of Peace, Hope, Love Tile showing altered bead letters
To create the colored letter beads you can do one of two things. You can use Ranger Alcohol Inks  and blot the color on, or you can use Sharpie Markers or BIC Mark-its and color right on them. Since alcohol-based inks stick to non-porous surfaces, they stick really nicely to the plastic beads and also to the metal flowers.
Embellishments were added to the tile using hotglue so that when these are hanging upright as part of a collage they will stay put!

I created the Happy Heart Tile using downloaded  free digi papers and layering diecut cardboard and grungeboard to create dimension. The edges of this tile were inked with Distress Inks and embossed with clear emboss powder. The flowers were rubbed in distress inks and then spritzed with homemade glimmer mist--made by combining in a mister bottle water, a few drops of dye based ink refiller and Ranger's Perfect Pearls powder.
Happy Heart Art Tile created on 2-Hour Event for Reese's Rainbow Charity Drive
 The heart in the right hand corner is an upcycled dvd that had been split apart to reveal the mylar inside. It was inked up using Ranger Alcohol Inks. I then stamped into the ink with a stamp inked with Stazon and gently rubbed off the ink to lift the image back off the cd. Split CDs and DVDs are easily cut with Tim Holtz scissors or die cut with the Bigshot Machine into any shape you desire.
Detail of Happy Heart Tile showing altered CD heart and metal flowers.
You can also see to the right of the heart in this detail my initials--all art-tiles need to be discretely signed in the bottom right-hand corner.

I completed the embellishing of my tile by adding a little grungeboard butterfly--as a hat tip to Cynthia Gagen, Creative Edventures founding creator.
Detail of Happy Heart Tile showing Creative Memories Butterfly.
Thank you for looking! I hope you participate with us in this wonderful endeavor!!
Details on participating in the charity drive can be found here
You may watch the play back here.