Thursday, August 28, 2014

Weekly Challenge | Layer It!

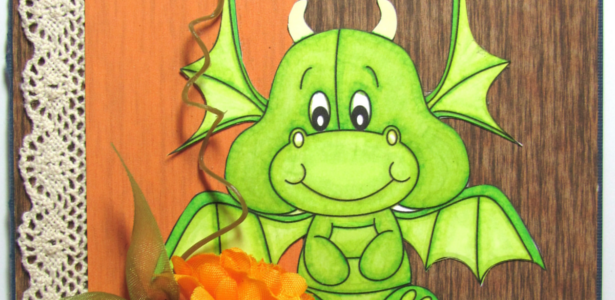
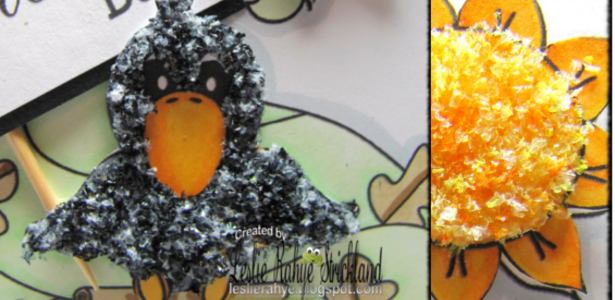
It's time for a new challenge with Digital Delights by Louby Loo! This week at Delightful Challenges our challenge is Layer It! What a fun challenge to build up layers on your card! Including the card front I have 6 layers on this card! I separated a few of them with foam dots which makes for a "deep" card. One of Digital Delights Box Envelopes would be perfect for sending your card to someone!  ~I hope you enjoy my card! Thank you for stopping by!

Flower power SkyFlower power Sky (colored)

Card stock : Neenah, Bazzill, Core'dinations
Accessories : Art Glitter Glue, CLD dies & Want2Scrap and Prima Bling
Colors: PrismaPencils

Our Theme for this week is:
Layer It! (use layers)

Be sure to read the challenge rules below

We are being sponsored by the fabulous

Prize


Let's see what our Delightful Designers have created!

Now it's Your Turn!
You are not required to use a Digital Delights 
Image to join in the fun 
but if you do, you can enter THAT project TWICE.
To enter twice when using a Digital Delight image,
for your 1st entry use your card link.
For your 2nd entry use your blog address
 and add "2nd entry" after your name

Otherwise, only ONE entry person
**Please be sure to follow the challenge theme and rules or it will be removed.
Twitter at @leslierahye | Facebook at leslierahye.| YouTube at leslierahye | Pinterest at leslierahye
Wednesday, August 27, 2014

Dream | A Mixed Media Canvas

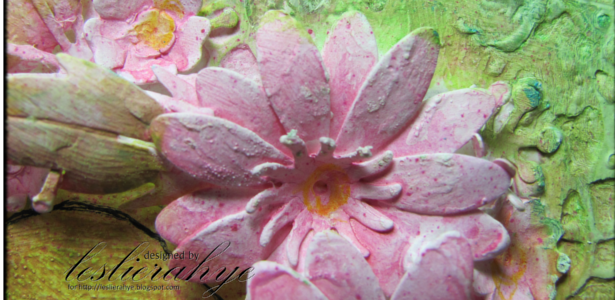
Today my canvas is featured at Unruly PaperArtsUnruly PaperArts is a collaborative blogozine featuring a panel of regular and guest columnists as well as reader-submitted articles. We hope you will join us and come back often as we feature articles on stamping, mixed media, collage, altered art, and scrapbooking.


Supplies

Begin by adhering strips of newsprint (leaving part of canvas uncovered) and die cut burlap to canvas using Beacon Fast Finish Decoupage and Art Glitter Glue Designer Dries Clear. 


Adhere die cut pieces of the gear mesh to parts of the canvas that were not covered with newsprint. Brush over the die cut parts first with grey and then with brown set aside to dry. Once dry mark over canvas with oil pastels, accentuating the edges of the canvas, rubbing over die cuts to make them POP! breaking up the print surface with some color.

Next add some walnut ink mist and droplets to canvas surface. With Enamel Powder Adhesive Fluid, rub over edges of canvas and sprinkle with Vintage Bronze Powder--heat set. Add die cut balloons, compass rose, bicycle and flourish and corner. Add metallic Pan Pastel to die cuts.


With Enamel Adhesive Fluid, apply enamel powders to chipboard dream and gears. Heat emboss. Adhere to canvas with Art Glitter Glue. 


Print out quote and cut to fit Horizon Square die. Distress edges of quote and add Brushed Corduroy Distress Ink to quote. Adhere to die cut square and apply to canvas. Mark around gears with charcoal pencils to highlight the gears some more.

Read my Artist's Spotlight at Unruly PaperArts here.
Unruly PaperArts
Twitter at @leslierahye | Facebook at leslierahye.| YouTube at leslierahye | Pinterest at leslierahye
Tuesday, August 26, 2014

Back to School Greetings


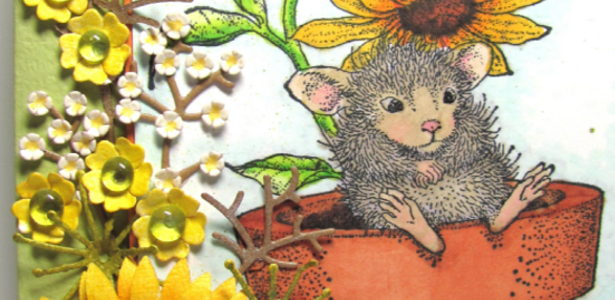
 Happy Tuesday everyone! Today on the Cheery Lynn Blog I have a back to school card! I love this time of year and creating a simple layered card like this with the scalloped square stackers and the Horizon Square die are so much fun! Using coordinating papers and precolored digital images make this type of card making super fast and easy! A few simple embellishments [paper flower and black on black flowers] add just the right touch!


*****
Remember there is still time to join the new challenge!!! Challenge #148 is Frame It! There is a chance to win a $20 shopping spree at Cheery Lynn Designs. Thank you for stopping by today!


Twitter at @leslierahye | Facebook at leslierahye.| YouTube at leslierahye | Pinterest at leslierahye

Monday, August 25, 2014

A Trio of Trading Cards


Happy Monday everyone! Today on the Globecraft and Piccolo blog I share a trio of Altered Trading Cards. I LOVE ATCs--they are little pieces of artwork on a 2½×3½" card! Piccolo Accents are perfect for these!
I began with some pre-designed collages on colored  collage sheets. I adhered the collages to my ATC chipboard base. Next I applied Enamel Powder Adhesive to the edges of each ATC and enamel powder to match the base collage. Enchanted Aubergine to the photographer, Temple Stone for the jewels Victorian chic, and Deep Blue for the Papillons. A bit of the powder or an accent powder like Mermaid Tears and Bahama Aqua was sprinkled and melted in a Frantage technique fashion. I love that spill of melted powder.
Accents were made with the piccolos and the melted enamel molds. A bit of glue to add them to the card completed the piece.
I hope you enjoyed my project! Thank you for stopping by today!

Twitter at @leslierahye | Facebook at leslierahye.| YouTube at leslierahye | Pinterest at leslierahye
Thursday, August 21, 2014

Weekly Challenge | School Daze

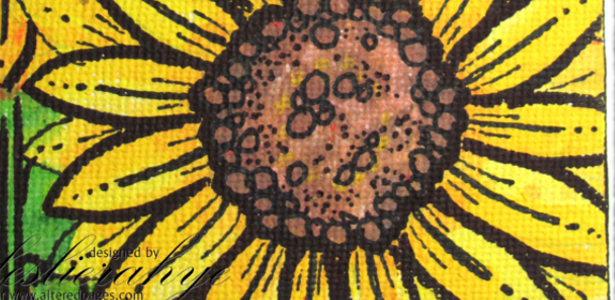
It's time for a new challenge with Digital Delights by Louby Loo! This week at Delightful Challenges our challenge is School Daze! This is probably one of my most favorite times of the year! I love buying school supplies and school clothes! I love the excitement the kids have over new teachers and reconnecting with friends. It's the best--even with the hustle and bustle of getting everyone where they need to go. This year Sam wanted to bring cards to her teachers on the first day of school...I chose to use the OH SO CUTE School Time Molly (colored). I used the pre-colored so that I could make a bunch of cards fast and easy. Pairing it with the School Digital Paper Pack brings the card together and then all you need are a few die cut embellishments and you're all set! ~I hope you enjoy my card! Thank you for stopping by!
School time Molly (colored)School time Molly
Card stock : Neenah, Bazzill, Core'dinations
Accessories : Art Glitter Glue, CLD dies & Want2Scrap


Our Theme for this week is:

School Daze

Be sure to read the challenge rules below

We are being sponsored by our own

Prize
Let's see what our Delightful Designers have created!

Now it's Your Turn!
You are not required to use a Digital Delights 
Image to join in the fun 
but if you do, you can enter THAT project TWICE.
To enter twice when using a Digital Delight image,
for your 1st entry use your card link.
For your 2nd entry use your blog address
 and add "2nd entry" after your name

Otherwise, only ONE entry person
**Please be sure to follow the challenge theme and rules or it will be removed.

Twitter at @leslierahye | Facebook at leslierahye.| YouTube at leslierahye | Pinterest at leslierahye
Wednesday, August 20, 2014

Core’dinations Design Team Call

This article can be read here.

Tuesday, August 19, 2014

Every Little Thing Wants to be Loved

Hi everyone! I recently joined an Altered Trading Card Swap. ATCs are meant to be traded among artists and that's why they are so fun to make. This little 2½×3½" work of art will be shared with other artists making ATCs along the same theme--this theme was Bees. They also will make a run of cards on this theme and our hostess will sort out the lot and send them to each of us. It's always fun to get back the cards and see everyone's artwork!
I chose to use this quote from The Secret Life of Bees for my ATC. This is part of the Bee Yard Etiquette and while assembling them I became inspired to do a series of Bee ATCs--I will share those with you at a later date!

“I hadn't been out to the hives before, so to start off she gave me a lesson in what she called 'bee yard etiquette'. She reminded me that the world was really one bee yard, and the same rules work fine in both places. Don't be afraid, as no life-loving bee wants to sting you. Still, don't be an idiot; wear long sleeves and pants. Don't swat. Don't even think about swatting. If you feel angry, whistle. Anger agitates while whistling melts a bee's temper. Act like you know what you're doing, even if you don't. Above all, send the bees love. Every little thing wants to be loved.” 
― Sue Monk KiddThe Secret Life of Bees


Thank you for stopping by!
 photo swapshopATCbutton_zpse0c40a93.jpg

Twitter at @leslierahye | Facebook at leslierahye.| YouTube at leslierahye | Pinterest at leslierahye
A Winter White Hello


 Happy Tuesday everyone! Today on the Cheery Lynn Blog I share a winter hello with a few more dies from the new release. I used the new Snowflake Doily again which goes along with this weeks challenge and I added the new Dancing Snowflake Flurries! This is such a fun die! It has little dots here and there on circles on the swirl that just beg for some bling and bigger circles in "flowers" that want bling too! I went with white on white-with-some-glitz. For all of my snowflakes I misted my paper with a pearly mist that added a nice shimmer. To complete my card I added a few flowers and a scattering of snowflakes and a simple Hello.

*****
Remember there is still time to join the new challenge!!! Challenge #147 is Doilies There is a chance to win a $20 shopping spree at Cheery Lynn Designs. Thank you for stopping by today!

Twitter at @leslierahye | Facebook at leslierahye.| YouTube at leslierahye | Pinterest at leslierahye

Monday, August 18, 2014

Be Inspired Tag


Happy Monday everyone!Today on the Globecraft and Piccolo Blog   I share an inspiration tag created with emboss enamels and a piece of mica along with some of the molded embellies that I created last week--it's addictive...I just kept melting and filling the molds!

I created the tag with layers of embossed backgrounds, air brushed and water stamped backgrounds. A final layer of Gilded Rose along the edges of the distressed tag and some Mermaid Tears applied Frantage Style finished the base of the tag.

Next I stamped with die ink the inspired stamp and sprinkled Micro Black on to the surface of the mica. I heat set the words and waited for my piece of mica to cool. I attached it to the tag with some copper brads. I finished the tag with some of my molded embellies and some fancy fiber string.

I hope you enjoyed my project! Thank you for stopping by today!

Twitter at @leslierahye | Facebook at leslierahye.| YouTube at leslierahye | Pinterest at leslierahye

Thursday, August 14, 2014

Weekly Challenge | 1, 2, Punch!

It's time for a new challenge with Digital Delights by Louby Loo! This week at Delightful Challenges our challenge is 1, 2, Punch! This gave me the opportunity to dust off one of my favorite punches and add a little border to the bottom of my musical mat! We've been living marching band this month so it was only natural for me to outfit Tommy in a blue and gold uniform! Fun! ~I hope you enjoy my card! Thank you for stopping by!

Card stock : Neenah, Bazzill
Accessories : Art Glitter Glue, CLD dies & 
Markers : Spectrum Noir

*****
Our Theme for this week is:

1, 2, Punch
(create an element to add using a paper punch)

Be sure to read the challenge rules below

We are being sponsored by the fabulous

Prize
$15 Store Certificate

Now it's Your Turn!
You are not required to use a Digital Delights 
Image to join in the fun 
but if you do, you can enter THAT project TWICE.
To enter twice when using a Digital Delight image,
for your 1st entry use your card link.
For your 2nd entry use your blog address
 and add "2nd entry" after your name

Otherwise, only ONE entry person
**Please be sure to follow the challenge theme and rules or it will be removed.
Twitter at @leslierahye | Facebook at leslierahye.| YouTube at leslierahye | Pinterest at leslierahye

Tuesday, August 12, 2014

Autumn Greetings


 Happy Tuesday everyone! Today on the Cheery Lynn Blog I share this autumn card using the new Joy to the World Wreath and Deer in the Forest. These woodsy dies paired with a brown card stock that has an autumn colored core make for great fun! I die cut the "leafy" images with a brown card stock with a green core. I then sanded lightly on the wreath and a bit more heavily on the leaves on the Deer's antlers to create green leaves on brown stems. With the Fishtail Banner and the negatives from the French Lattice Frame I sanded more vigorously to reveal an orange core. The browns, greens and oranges say autumn to me! I added a bit of glitter pen to the deer and his antlers to get a bit of sparkle.


Cheery Lynn Dies used

Thank you for stopping by! I hope you enjoyed my project!

*****
Remember there is still time to join the new challenge!!! Challenge #146 is Fun with Letters There is a chance to win a $20 shopping spree at Cheery Lynn Designs. Thank you for stopping by today!


Twitter at @leslierahye | Facebook at leslierahye.| YouTube at leslierahye | Pinterest at leslierahye

Monday, August 11, 2014

Emboss Powder Embellies

Happy Monday everyone! Today on the Globecraft and Piccolo Blog I share a steampunk fatbook page that I create using embellishments that I made with Piccolo Emboss Powders. I am a mold addict--there, I said it. I think molds are awesome...from molded food and resin projects to jewelry projects and more...molds are, simply put, FUN!


Today I used silicone molds which come a variety of ways. There are companies that make them special for embellishments and then there are food companies that make them for decorated cakes and there are also companies that sell the materials to make your own mold! I chose to use molds for crafting embellishments.I found that heating up the mold a bit before adding a sprinkling of emboss enamel helped the enamel to melt faster and stay in the mold rather than flying out! I added enamel in metal colors to the gear molds and built up my molten pile until it was near the edge of the mold. Once I was happy with the fill, I set my mold to the side to cool completely. Before popping out the embellishments, I zapped the edges of the mold one more time to melt the thin "flash". Once removed from the mold you can add more paint or colorants, sand or whatever. I like the shiny metal look of the gears but on some I zapped the top of the gear to give a textured metal look! I think these were perfect for my steampunk fatbook page~!
I hope you enjoyed my project! Thank you for stopping by today!

Twitter at @leslierahye | Facebook at leslierahye.| YouTube at leslierahye | Pinterest at leslierahye